To create a request, you must provide details about the desired items and other necessary information, which can then be submitted.
There are two main ways to provide this information:
In the Web Portal - Payhawk will extract available information from any attached images and URLs to populate the request details.
If multiple expense documents are uploaded, Payhawk uses only the first uploaded document for automatic data extraction. Subsequent documents will not trigger data recognition or field updates.
Via the Procurement AI Agent - the Agent will automatically fill in the required information for creating your request by extracting data from images, URLs, or shared conversations.
The minimum information you need to provide when creating a request in Payhawk may vary depending on the settings defined by a Payhawk Administrator at your company for the specific request type (for example, the custom categorization request fields), and on whether the request type needs to be reviewed (typically, if the request requires a review, the details you'll need to provide will be fewer).
If Payhawk’s Procurement AI Agent is enabled for your company, you can easily create and submit requests using its powerful capabilities and conversational experience, all within your company’s conversational channel. To confirm availability, check with your company’s Payhawk Administrators.
Specifics
If a request type is set to require a review, a request of that type will transition to the Review tab once you've submitted it. If no review is needed, it will proceed directly to the Approve tab. For more information, see the phases in a request lifecycle.
You can add discounts, trade-ins, returns, and similar by including items with negative unit prices in your request.

The only mandatory field to create a request is the Description field.
The name of the request will be automatically generated based on the information provided in that request. The Payhawk AI will extract all relevant information from the description to fill in as many request fields as possible.
While you don't need to include a supplier for your request to be reviewed or approved, you must add the supplier data to allow Payhawk to link the request to the related expenses based on the uploaded invoices later on.
Request fields marked with asterisk (*) in the system are required. Required fields may vary depending on the request type and request settings defined by a Payhawk Administrator at your company.
Creating one-time requests
To create a one-time request:
In the Payhawk web portal, go to Requests.
Click on the + New button.
In the dialog that opens:
Select the type of request.
(Mandatory) Fill in the Description field providing information you consider important for approvers and reviewers to know.
Attach a document for your one-time request, for example, a supplier quote. Payhawk's automation tool will automatically extract the request data and fill in the information in the respective fields upon creating the request.
Click on Continue. As a result, the request will be created.

Fill in the information included in the Request details section.
In the Supplier field, choose the company from which you want to request the goods or services. If you have added a supplier, you’ll be able to edit it before the request is approved. If the Supplier field is left empty, you can add it even after the request has been approved.
In Payment method, select among the available payment methods for the request:
Card indicates the request will be paid with a card and that it can be later on linked with a card expense only. Here you can either select to pay the requested items with a card already assigned to you or you can choose the Single-use card option. To pay with a card assigned to you, that cardholder must have an active card. If they don't, choose the Single-use card option, or ask an Administrator to issue a card first.
If you choose to pay with a card assigned to you, the card will be topped up with the requested gross amount when the request is approved.
If you select to pay with a single-use card, it will be issued in your name automatically when the request is approved.
Bill indicates it will be paid via bank transfer and that it can be later on linked with a bill expense only.
No payment needed indicates the request doesn't need to be paid for, as the requested goods are in store, for example.
If Payment method is not a required field, the settings defined by a Payhawk Administrator at your company allow it, and you haven’t defined a value for it (None), you will be able to link expenses of any expense type to that request.
To edit the payment method, click on Edit, update the information, and click on Save.
The Special instructions field will be visible only if you are requesting a purchase order. Enter any special instructions you want the approvers or reviewers of the purchase order to see.

Fill in the information included in the Additional information section. It will contain fields that were set as required for the request type by a Payhawk Administrator at your company.
Fill in the information included in the Amount section.
To add new items, click on the Add new item button.
If you are not interested in the item details but rather in the amount only, click on Remove item details. As a result, a filed showing only the aggregated amount of the requested goods will be displayed.
From the screen with the amount only, you can add the details for each item by clicking on the Split to lines option. In the dialog that opens, choose whether you want to add the items manually or from the attached document (if any).

Manual split will result in opening an empty item row where you can add the item details.
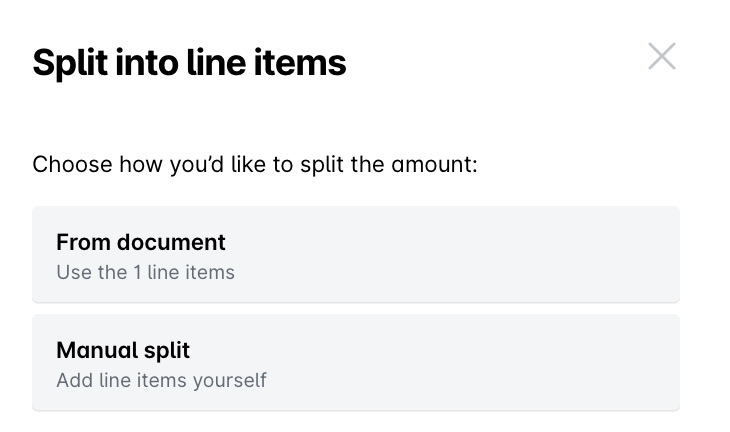
From document will show the lines detected form the attached document. To confirm you want the system to fetch and replicate them in the request, confirm by clicking on Fetch [number] line items.

If you have uploaded a request document (for example, an invoice), you can also use the Split by document lines option. As a result, Payhawk AI will replicate the rows of the invoice, extract the data from the document, and automatically fill in the available information related to each requested items.
If the request type has been associated with categorisation fields, scroll the Amount table to the left and enter the information where needed.
To submit the request, click on Submit.

Changing the card on a submitted or approved request
If a request or purchase order was submitted with the wrong card, or the card on it was closed, change the card before linking the expense:
Return the request so it becomes editable.
Under Payment method, select the correct card. If the cardholder has no active card, choose Single-use card or have an Administrator issue one.
Submit the request for approval again.
Once approved, the request becomes Open. Only then can that card be selected on the matching expense.
When the request is approved, the card limit is increased by the requested amount. Once the expense is matched, the available funds are reduced by the expense amount. If a request has several line items, you can link one expense per line item using the same card.
An expense is matched to its request automatically when the amount and card match. If the request type's workflow has auto-close enabled, the request closes automatically once matched.
Automatic extraction of request data
Based on the request field settings configured by your company's Payhawk Administrators, Payhawk's automation tool will automatically extract key request data, such as the supplier details, and will use invoice data to fill in the request summary.
However, extracted line items from documents are not automatically applied. You can choose to manually split the request or let the system extract the lines for you. Documents can include price quotes, shopping cart screenshots, or similar materials. An exception applies when the Always use items mode toggle is enabled. For request types that require item-level breakdowns, the system will automatically apply item details either from the description or from document extraction.
The item fields will be automatically populated based on the applied field suggestion strategy, if enabled.
Successfully extracted data will be marked with a star.