To implement a more granular segregation of duties in Payhawk, you can create custom roles by starting with any built-in Payhawk role and tailoring its permissions to meet your specific requirements. For example, you might create an HR Administrator role by selecting the built-in Payhawk Administrator role and deselecting any permissions that are not relevant to the HR function.
Custom roles allow you to define highly specific user access by limiting or extending certain permissions for individual employees. For example, you can duplicate the Payhawk Accountant role but disable permissions related to viewing company spend policies.
Unlike built-in roles, custom roles offer greater flexibility. You can rename them, modify their permissions, or deactivate roles that are no longer needed.
Notes on custom roles
Custom roles are created and managed at the group level. Once created, they are automatically available across all entities within the group account, and any changes made to the role are instantly applied to all entities.
When configuring custom roles, keep in mind that some permissions are interdependent. Enabling a higher-level permission will automatically activate any required lower-level permissions. For example, granting an employee the ability to review others' expenses will also allow them to view those expenses.
Applying custom roles across the platform
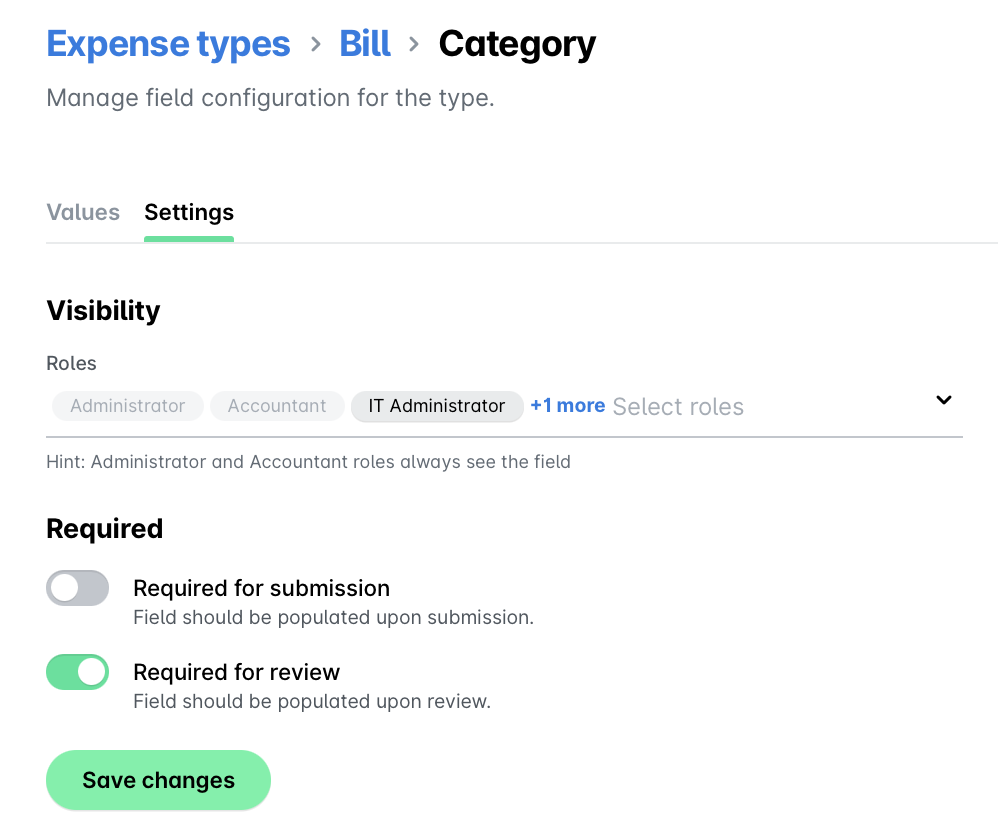
Once you create a custom role, it becomes available across the platform. However, it will be available for you to add to the field settings, but it won't be pre-selected. To make the custom role operational, you need to select it manually from the drop-down role selector for the desired field settings.
The custom role becomes available as an option in the role selectors used in the respective expense types and request types.
The custom role becomes available in the approval workflows, enabling you to include the custom role in any workflows you define. This allows for more precise routing of approvals based on your organization’s structure and responsibilities.

The custom role also becomes available to be assigned to employees, allowing you to grant tailored access and permissions that align with each individual's role within your organization.

When creating a custom role, you can choose to switch on the Copy configurations toggle. This allows you to copy workflows, type and field visibility, from the role you are using as the basis for your new custom role. This way, you can avoid having to manually configure these settings throughout the entire product.
Creating custom roles
To create a custom role in the Payhawkk web portal:
From the Group Dashboard, go to Settings > Roles and permissions.
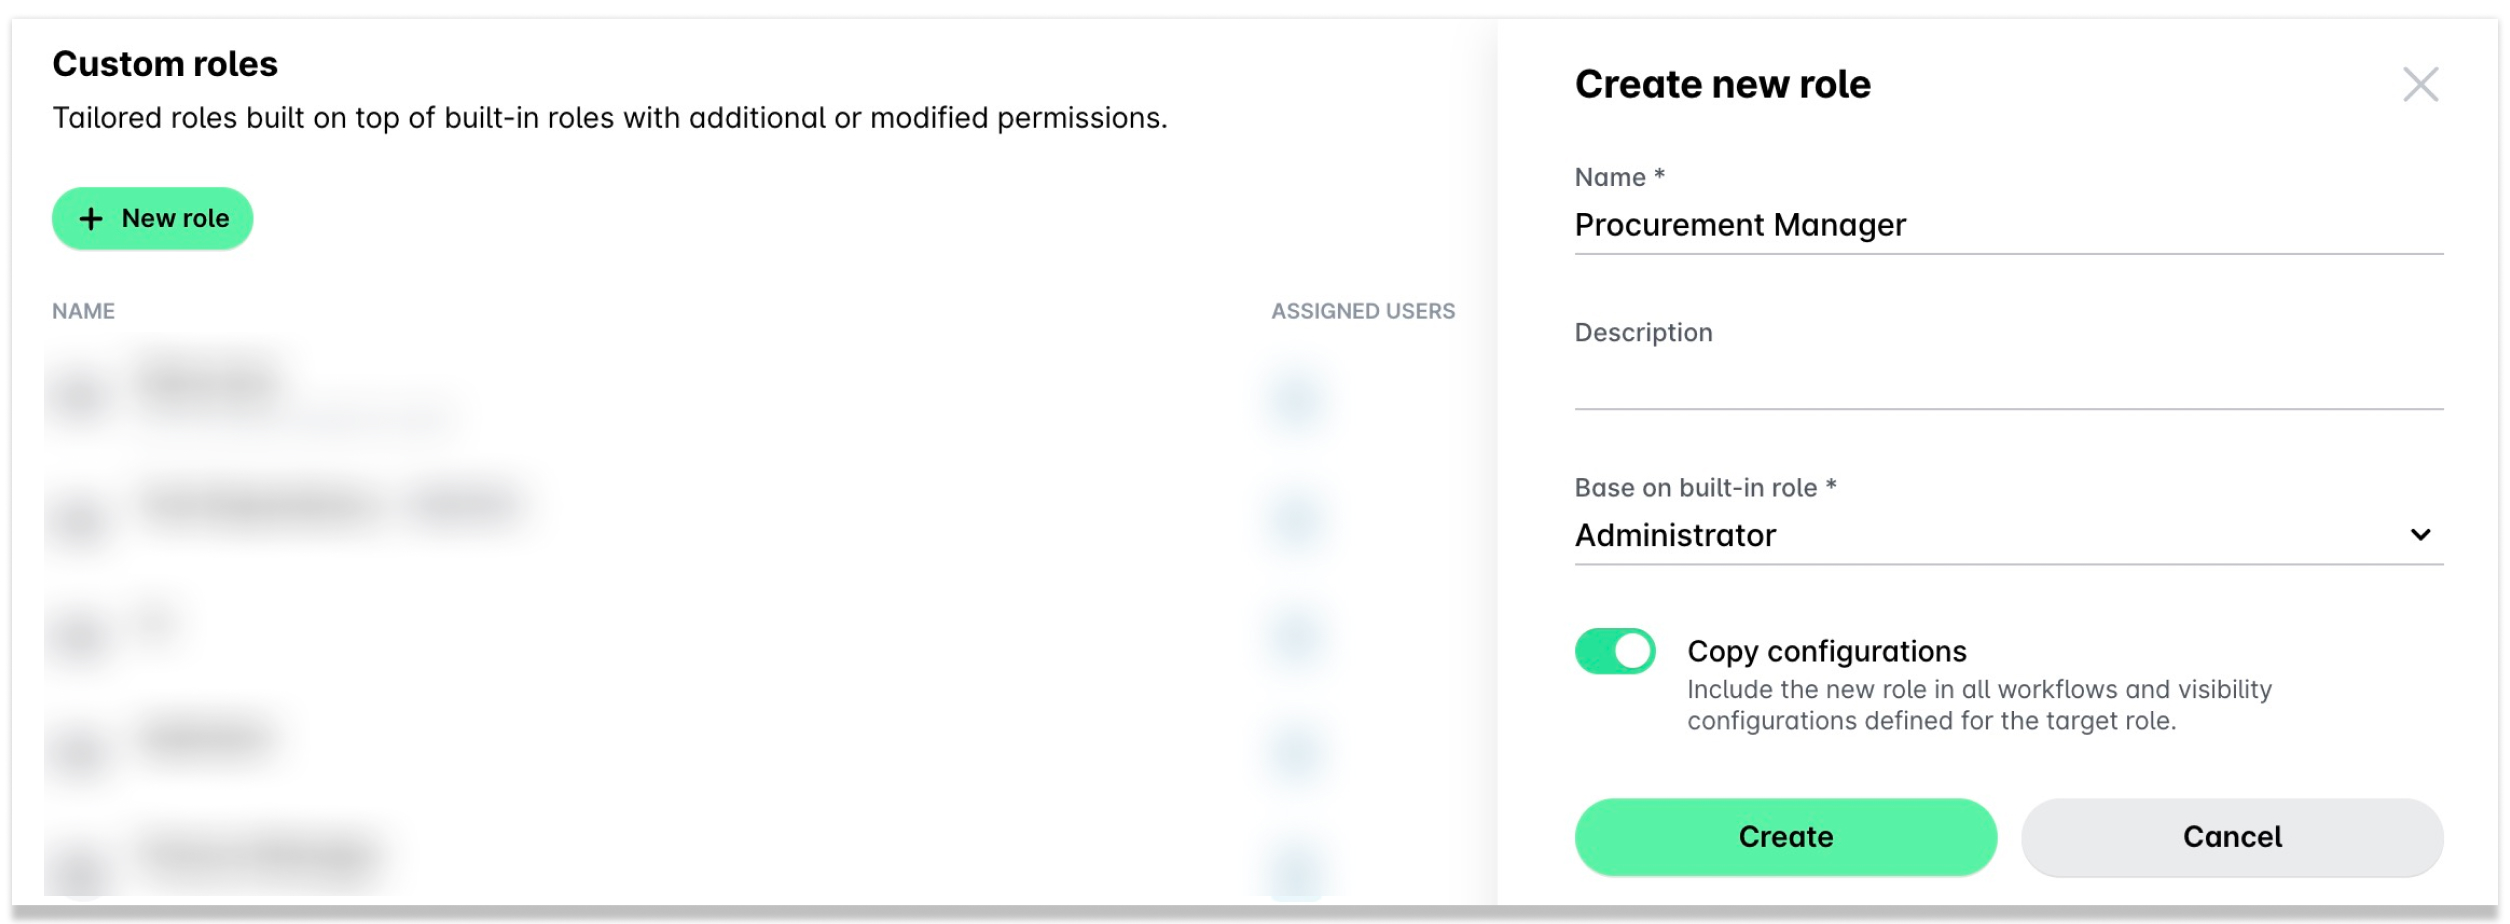
Under Custom roles, click on New role.
In the dialog that opens:
In the Name field, provide a name for the role you want to create.
In the Description field, provide additional information about the customr ole if necessary.
In the Base on built-in role field, select the built-in role whose permissions you want to copy. Choose the one that is closest in permissions to the custom role you want to create.
Switch on the Copy configurations toggle to copy workflows, and type and field visibility from the role you are using as the basis for your new custom role.
Click on Create.
To adjust the permissions of the built-in role you've selected as the basis of your custom role, go to Roles and permissions > Custom roles and select the newly created custom role.
Under Permissions, toggle on the permissions you want to include and toggle off the ones you want to exclude from the custom role.
Click on Save changes.

Renaming custom roles
To rename a custom role in the Payhawk web portal:
From the Group Dashboard, go to Settings > Roles and permissions.
Select the desired role and go to its Settings tab.
Under Name, update its name.
Click on Save changes.

Activating and deactivating custom roles
Before you can deactivate a custom role, you must unassign all employees from it and assign them to a different role. Once this is done, proceed with the following steps:
From the Group Dashboard, go to Settings > Roles and permissions.
Select the desired role.
Click on its three-dot menu and select Deactivate role.
In the dialog that opens, confirm your choice by clicking on Deactivate.

Alternatively, to activate a role, follow the same steps and click on Activate role.
Updating custom role permissions
To modify the permissions included for a custom role:
From the Group Dashboard, go to Settings > Roles and permissions.
Select the desired role.
Under Permissions, toggle on the permissions you want to include and toggle off the ones you want to exclude from the custom role.
Click on Save changes.