Payhawk exposes its Developer API, thus enabling users to further tailor their Payhawk experience to the specifics of their business.
Authenticating to the Payhawk Developer API
Requests to the API require authentication. You can authenticate by using either the Authorization: Bearer [API_KEY] or X-Payhawk-ApiKey: [API_KEY] request header.
You can manage your account-specific API keys by navigating to Settings > Integrations. If you need a new API key, follow the steps:
In the Payhawk Web Portal, go to the Settings > Integrations > Available integrations section.
Navigate to the API connection and click on Connect.

From the drop-down list, choose a scope when creating an API key, by selecting either Full access or Read-only access:
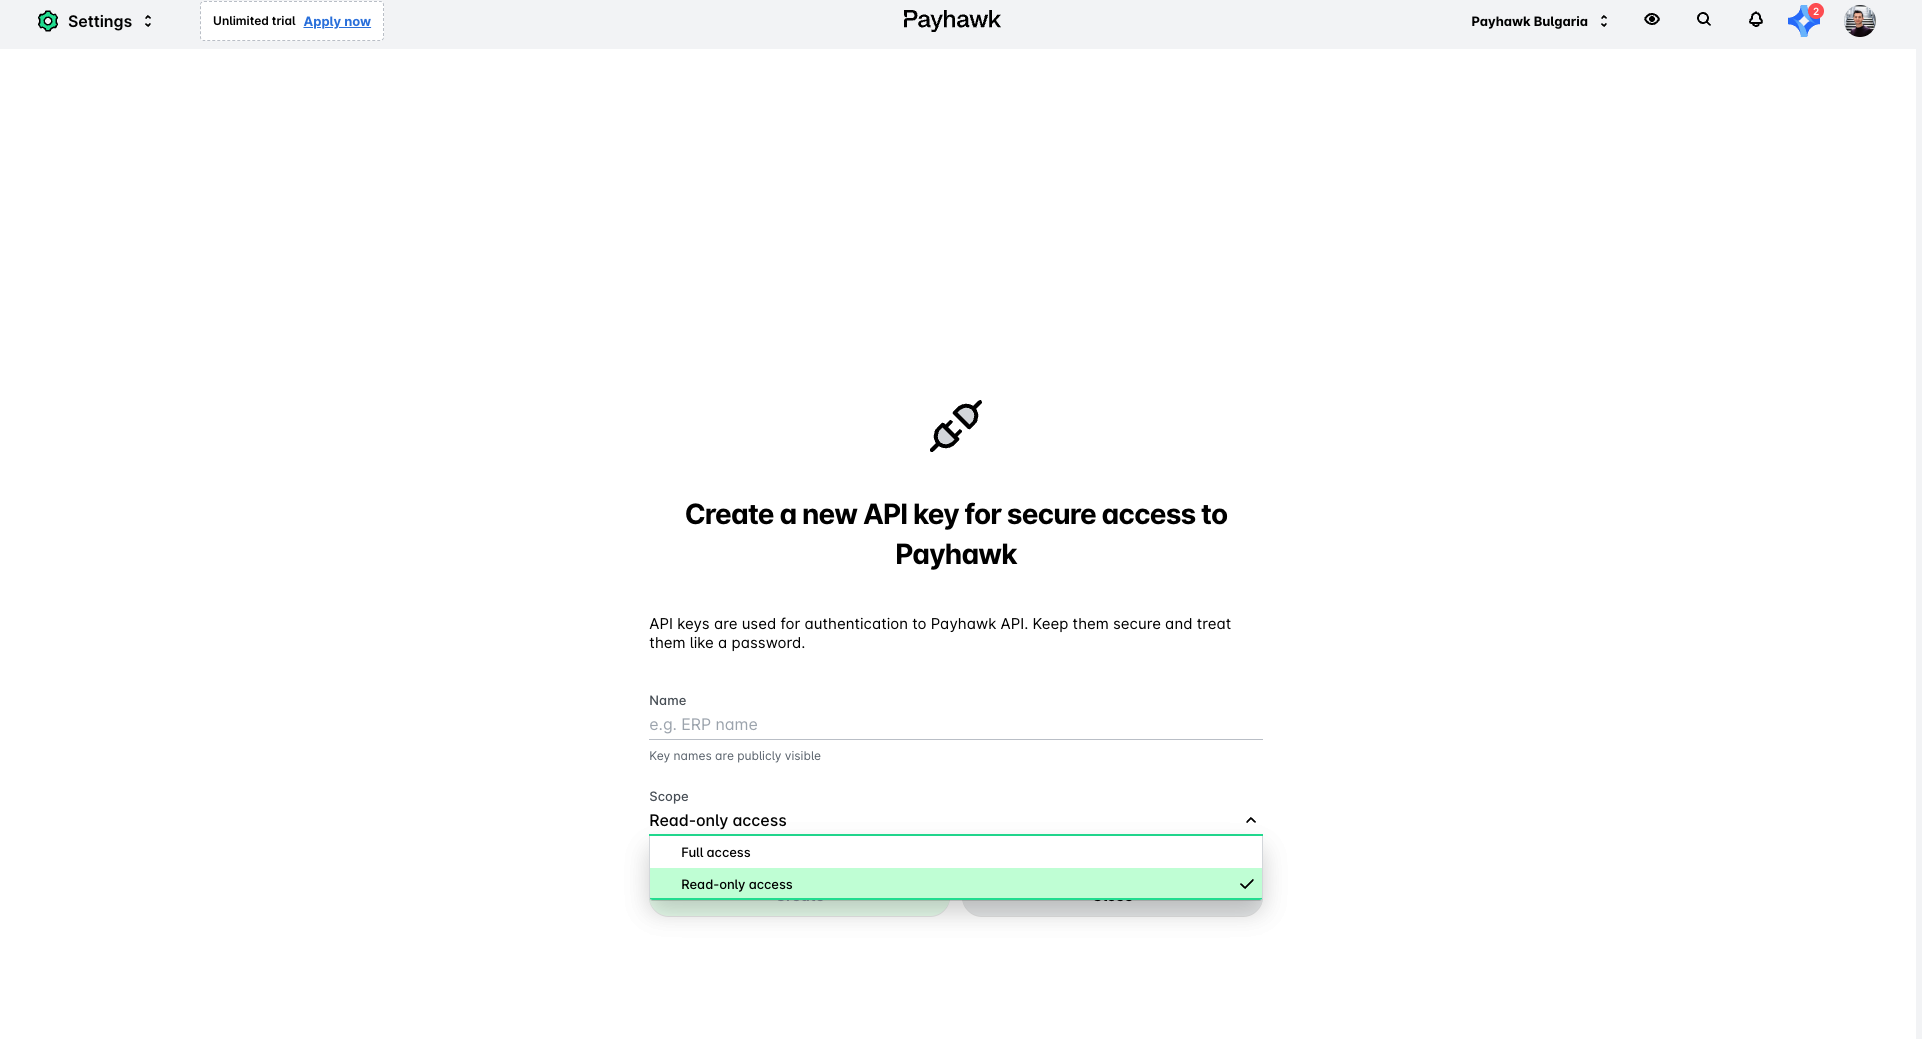
Provide the required details and click on Create. Once the API key has been generated, you can copy and regenerate it.
Once you've obtained your API key, you can start making requests to Payhawk’s API by including the key in the
X-Payhawk-ApiKeyHTTP header. To verify that the newly generated API key is working correctly, visit the Payhawk API documentation and run a test request.The API Primary and API Secondary keys are system-generated during account setup to ensure essential operations, and cannot be deleted by users. For greater control over your integration setup and flexibility, you can generate your own custom API key.
To manage the API keys and webhook settings in the Payhawk Web Portal, you need to be either a Payhawk Administrator, a Payhawk IT Administrator, or have a custom role with the following permissions:
View developer API access
Manage external integrations
If you're not using the default (out-of-the-box) integrations and need the system-generated keys removed, contact Payhawk Support for assistance.
Store API keys securely.
Request throttling and limits
The Payhawk Developer API is limited to 15 requests per second which can be seen in the returned ratelimit headers of every API request.
Webhooks
Webhooks are a powerful tool that enables real-time integration. When an action happens in Payhawk, your system can be automatically notified of that action:
The Account ID can be retrieved from the
accountparameter when you access the Payhawk Web Portal:https://portal.payhawk.com/?account={{accountId}}.Make sure you have the API key enabled. Retrieve an API key granting access to the account. For more information, see Authenticating to the Payhawk Developer API.
Navigate to the Payhawk Developer Portal at https://developers.payhawk.com/#/Webhook%20Subscriptions.
Navigate to Webhook Subscriptions.
Create a webhook by using the Create Webhook Subscription endpoint:
EventType- For example, if you want to receive notifications when new expenses are created, you can use theexpense.createdevent. See the full list of event types supported by Payhawk.Callback URL- This is the URL to which the webhook will be sent.
Verify the webhook is created by using the Get webhook subscriptions endpoint.
Webhooks are used to receive events by subscribing to them. Once subscribed, events will be sent to you with a payload containing relevant data.
Webhooks are sent using POST requests. The following images display a sample request of a webhook firing after an expense is created in Payhawk.


Retries are made for 408, 409, 429, and 500+ errors. The number of retries and the retry logic depend on Payhawk's implementation. For 400 responses, retries are typically not performed as they indicate a client-side issue, while for 500 responses, retries are handled based on server-side logic to ensure successful event delivery.
To verify the signature, Payhawk uses SHA256 encrypted via RSA.
// Example using node-rsa
const signature = req.headers.get("X-Payhawk-Signature");

if (!signature || !signature.length) {
    throw new ForbiddenError();
}

const publicKey = fetch("https://api.payhawk.io/api/v2/rsa-public-key");
const rsa = new RSA(publicKey);

const url = req.path(); // including query string. eg 'some-path'
const payload = req.getBodyAsString();
const dataToSign = `${timestampString}:${url}:${payload}`;

const isValid = rsa.verify(dataToSign, signature);

if (!isValid) {
    throw new ForbiddenError();
} else {
    // Request originates from Payhawk
    // Continue processing the request
}
Supported event types
The following table lists the supported event types you can subscribe for.
Event Type | Explanation |
|---|---|
| Triggered when a new expense is created. |
| Triggered when an expense is reviewed. |
| Triggered when an expense is approved. |
| Triggered when an expense is rejected. |
| Triggered when an expense is deleted. Note that paid expenses cannot be deleted. |
| Triggered when the payment details of an expense are updated. |
| Triggered when a document is uploaded to an expense. |
| Triggered when an attachment is converted into PDF format. |
| Triggered when a payment is authorized. |
| Triggered when a payment is reverted. |
| Triggered when a payment is successfully settled. |
| Triggered when a payment fails. |
| Triggered when a deposit is received. |
| Triggered when a new supplier is created. |
| Triggered when a supplier's details are updated. |
| Triggered when the status of a purchase order changes. |
| Triggered when a one-time login request is completed. |
| Triggered when an expense report is reviewed. |
| Triggered when an expense report is deleted. |
Querying expense records
To query expense records with the Payhawk Developer API:
Copy the Account ID of your Payhawk account. The key can be retrieved from the
accountparameter of the portal URL, for example,https://portal.payhawk.com/?account=payhawk_demo_6fc0db9a.Make sure you have the API key enabled. To obtain the key, go to Settings > Integrations > API Keys.
Navigate to the Expenses section at https://developers.payhawk.com/#/Expenses/get_api_v3_accounts__accountId__expenses.
Use the
GETrequest. Click on try it out to see the full request: https://api.payhawk.io/api/v3/accounts/payhawk_demo_6fc0db9a/expenses.
Page size and request size
The page size is 1000 per request. However, the results support paging and Skip and Take parameters: https://api.payhawk.io/api/v3/accounts/payhawk_demo_6fc0db9a/expenses?%24skip=1000&%24take=1000%27.
Filters
Filters can be constructed by using the examples. To combine them, use the following approach:
    {
      "status": {
        "$equal": "draft"
      }
    },
    {
      "supplier.name": {
        "$contains": "Payhawk"
      }
    },
The full list of filter properties is available in the IExpenseFilter type.
The filters are then attached as a Query Parameter encoded and attached to the URL, so the above filter translates to:
https://api.payhawk.io/api/v3/accounts/payhawk_demo_6fc0db9a/expenses?%24filter=%7B%0A%20%20%22%24and%22%3A%20%5B%0A%20%20%20%20%7B%0A%20%20%20%20%20%20%22status%22%3A%20%7B%0A%20%20%20%20%20%20%20%20%22%24equal%22%3A%20%22draft%22%0A%20%20%20%20%20%20%7D%0A%20%20%20%20%7D%2C%0A%20%20%20%20%7B%0A%20%20%20%20%20%20%22supplier.name%22%3A%20%7B%0A%20%20%20%20%20%20%20%20%22%24contains%22%3A%20%22Payhawk%22%0A%20%20%20%20%20%20%7D%0A%20%20%20%20%7D%0A%20%20%5D%0A%7D&%24
Sorting and ordering
OrderBy follows the same convention in the query string:
{
  "createdAt": "asc"
}
translates to orderBy=%5B%7B%22createdAt%22%3A%22asc%22%7D%5D&%24.
The full list of sortable options is available in the IExpenseOrderBy property.
Managing custom fields
The custom fields in Payhawk can be manipulated from the Payhawk Web Portal. However, there are use cases when an external system has to update or manage those fields. A common use case is to maintain Project numbers from an external ERP or time-tracking software.
Copy the Account ID of your Payhawk account. The key can be seen from the portal URL, for example,
https://portal.payhawk.com/?account=payhawk_demo_6fc0db9a.Make sure you have the API key enabled. To obtain the key, go to Settings > Integrations > API Keys.
Navigate to the custom fields section in the developer portal at https://developers.payhawk.com/#/Custom%20Fields/get_api_v3_accounts__accountId__custom_fields.
You can perform the following actions with the custom fields:
Create, update, or delete a custom field.
Create, update, or delete a custom field value.
Create, update, or delete a custom field manager.
When creating a custom field, the ID of the field is auto-generated. To see it:
Go to Settings > Expense fields.
Scroll down to the desired custom field and click on a created custom field or from the
GETcustom field request.
If a custom field is deleted, the existing expenses that have that custom field attached are not updated.
When a Payhawk account is part of a Payhawk group, custom fields are managed on a group level using the Group Custom Fields endpoints and an API key granting access to the group. Once created on a group level, the custom fields can be made available to one or more entities belonging to this group.
Retrieving the invoice for an expense
The file can be found under Expense > Document and files array.
Copy the Account ID of your Payhawk account. The key can be seen from the portal URL, for example,
https://portal.payhawk.com/?account=payhawk_demo_6fc0db9a.Make sure you have the API key enabled. To obtain the key, go to Settings > Integrations > API Keys.
Open the Developer Portal and check the Expenses section at https://developers.payhawk.com/#/Expenses.
Use the
GET Expenses(for many expenses) orGET Expense(for a single expense) endpoints and find thefilesarray:{ "document": { "documentDate": "2024-02-15T12:53:50.809Z", "dueDate": "2024-02-15T12:53:50.809Z", "serviceDate": "2024-02-15T12:53:50.809Z", "documentNumber": "string", "documentType": "receipt", "files": [ { "id": "string", "url": "string", "contentType": "string" } ] } }The reason the returned value is an array is that Payhawk allows two or more documents to be attached to an expense.
Creating expenses
You can create bills, reimbursable or cash expenses using the Create expense endpoint. For card transactions, expenses are created automatically when the card is used.
Creating per diem or mileage expenses via the API is currently not supported
Retrieving the approver's name for an expense
The approver's name for an expense is not included in the API response of the general expense export.
To retrieve the approver's name for a specific expense, make an additional API call to the expense workflow endpoint by following the steps:
Get the list of expenses. Use the
GET /api/v3/accounts/{accountId}/expensesendpoint to retrieve the expenses.This will return a list of expenses with their corresponding
expenseId.Retrieve the workflow for a specific expense. Once you have the expense ID, request the following endpoint to get the approval workflow details:
GET /api/v3/accounts/{accountId}/expenses/{expenseId}/workflow.This will return detailed information about the approval process, including the approver's name, approval status, and steps.
Locate the approver in the response. In the response body, look for the
stepsarray. Each step includes details about the approver, for example:user.name- Indicates the name of the approver.status- Indicates the approval status (for example, approved or pending).
You can request the approver's name for individual expenses only.
Retrieving bank statements
The bank statement returns all transactions of a fund account (for example, a bank account) for a specific period.
To query a bank statement with the Payhawk Developer API:
Copy the Account ID of your Payhawk account. The key can be seen from the portal URL, for example,
https://portal.payhawk.com/?account=payhawk_demo_6fc0db9a.Make sure you have the API key enabled. To obtain the key, go to Settings > Integrations > API Keys.
Navigate to the Fund Accounts section at https://developers.payhawk.com/#/Fund%20Accounts/get_api_v3_accounts__accountId__fund_accounts__fundAccountId__bank_statement.
Identify the fund account and retrieve the ID based on currency and type (credit or debit) by using the following
GETrequest: https://api.payhawk.com/api/v3/accounts/demo/fund-accounts.Use the bank statement request to retrieve each line of the bank statement: https://api.payhawk.com/api/v3/accounts/demo/fund-accounts/1/bank-statement.
Additionally, you can apply filters for a specific date, similar to the expense records:
{
  "date": {
    "$greaterThanEqual": "2022-06-03T00:00:00.000Z"
  }
}
Each line contains the following information:
Type- Indicates “debit” or “credit”, for example, for incoming or outgoing movements.Date- Reflects the settlement date.Currency- Matches the fund account currency.PaidCurrency- Represents the transaction's currency, which depends on the transaction’s location.Description- Contains the POS description for card transactions or the reason entered by the user for bank transfers.fxRate- Applies only if the transaction currency (PaidCurrency) differs from the account currency (Currency).ExpenseIDs- References the associated expense records.Fees- FX fees, POS fees, or Bank fees.