This guide explains how to manage supplier expense categorization by assigning default categories, custom field values, and tax rates to each supplier within a specific Payhawk entity.
Before you start the import, make sure the supplier exists in the selected entity. Do not manually enter new suppliers, categories, or tax rates in the template.
Adding and updating data in the suppliers' expense categorization template
To ensure accurate data entry, refer to the information in the following table.
Column name | Description | Notes |
Supplier | The name of the supplier to which the categorization rules will be applied. |
|
Category | The default expense category that must be applied to this supplier’s transactions. |
|
Tax rate | The VAT suggestion for this category. |
|
Custom fields | Each custom field whose suggested source of default values is Suppliers will appear as an additional column. |
|
Bulk import and export of suppliers' expense categorization
As a Payhawk administrator, you can import your suppliers' expense categorization in bulk in the following way:
In the Payhawk web portal, go to Suppliers.
Click on the three-dot menu and select Import.
On the next screen, select Expense categorization.
Click on Generate template to download the template file.

Enter the required data in the template file, then return to the wizard and upload the file. Click on Upload.
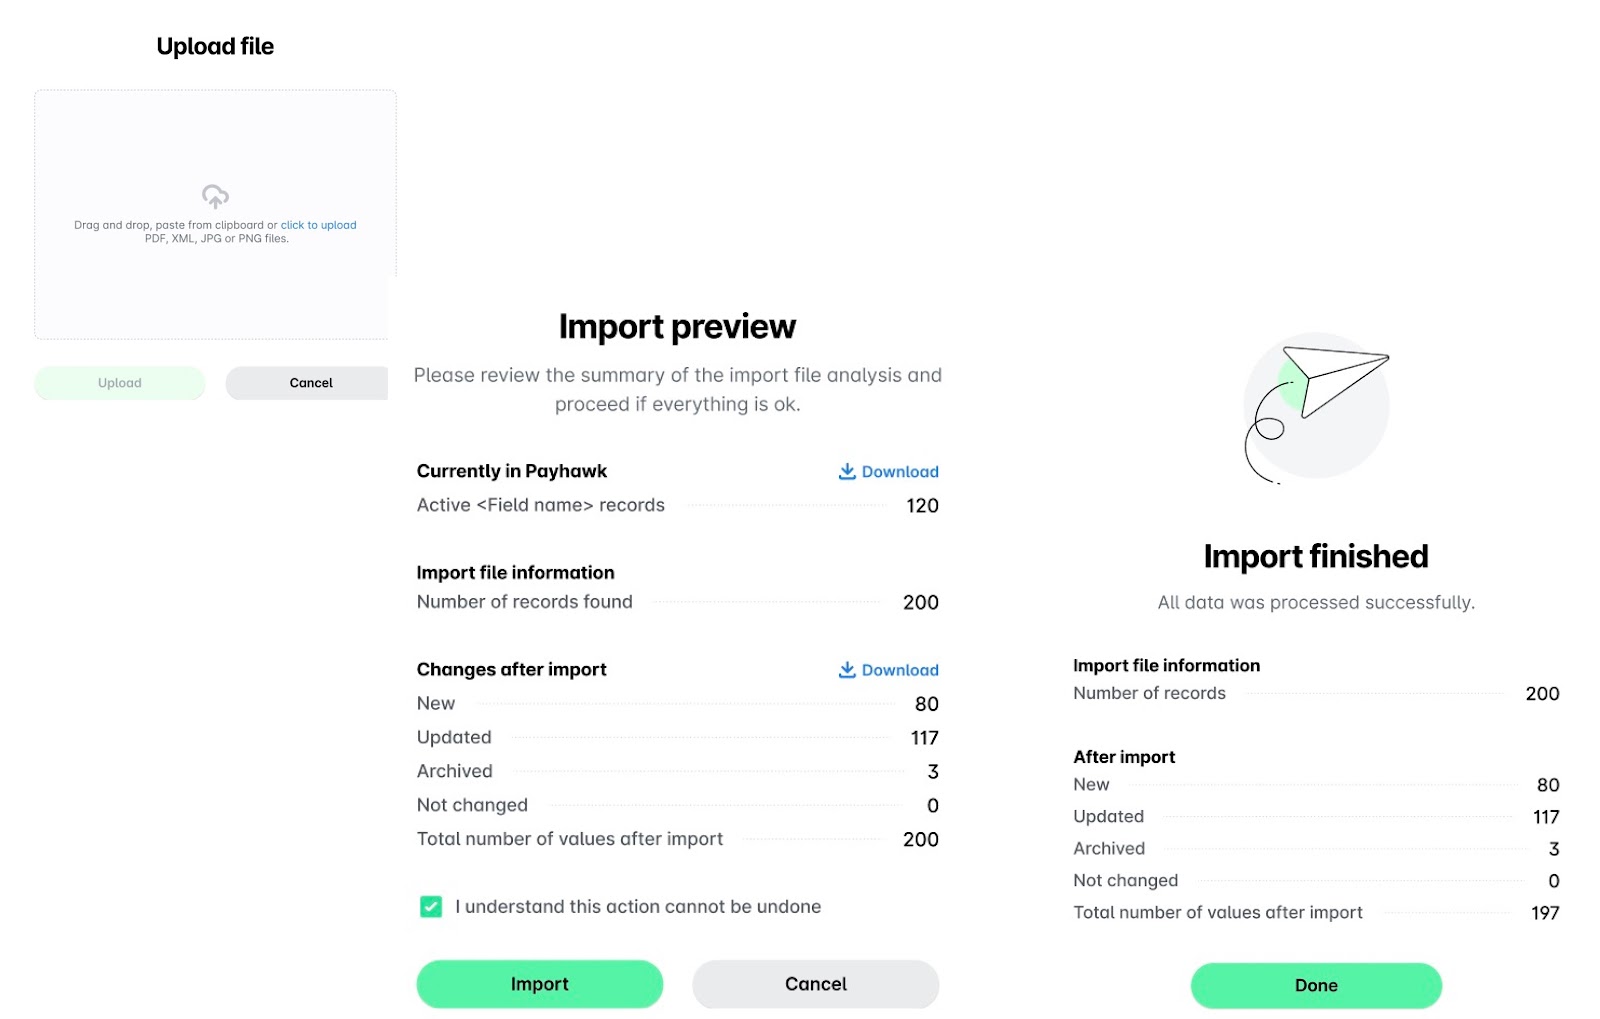
On the Preview screen:
Review the data to be added or updated.
Select the confirmation checkbox.
Click on Import.
Click on Done.
To export your suppliers' expense categorization data and download it as a ZIP folder, select the Export option from the three-dot menu.
To get started with bulk import of suppliers expense categorization, watch the following video tutorial (EN only):