After you have established a connection between Payhawk and DUO, Payhawk automatically creates the KOST1 and KOST2 custom fields.
Even if you may not want to use the KOST1 and KOST2 custom fields, do not delete them as they are required for the Payhawk-DATEV integration to work seamlessly.
Setting the KOST1 and KOST2 fields
To include all values that are related to KOST1 and KOST2:
In the Payhawk Web Portal, go to Settings > Fields library.
Select the KOST1 or KOST2 label. For the purposes of this example, select KOST1. To add KOST2 values, follow the same steps.
Click on the + Add value button.
In the dialog that opens, fill out the details, such as a user-friendly name of the category (Label), the value of the field you want to be exported to DUO (External ID), the field managers (Managers drop-down list), and who will be able to see the field (Visibility drop-down list). You can also add conditions for the field to be displayed (Conditional display).
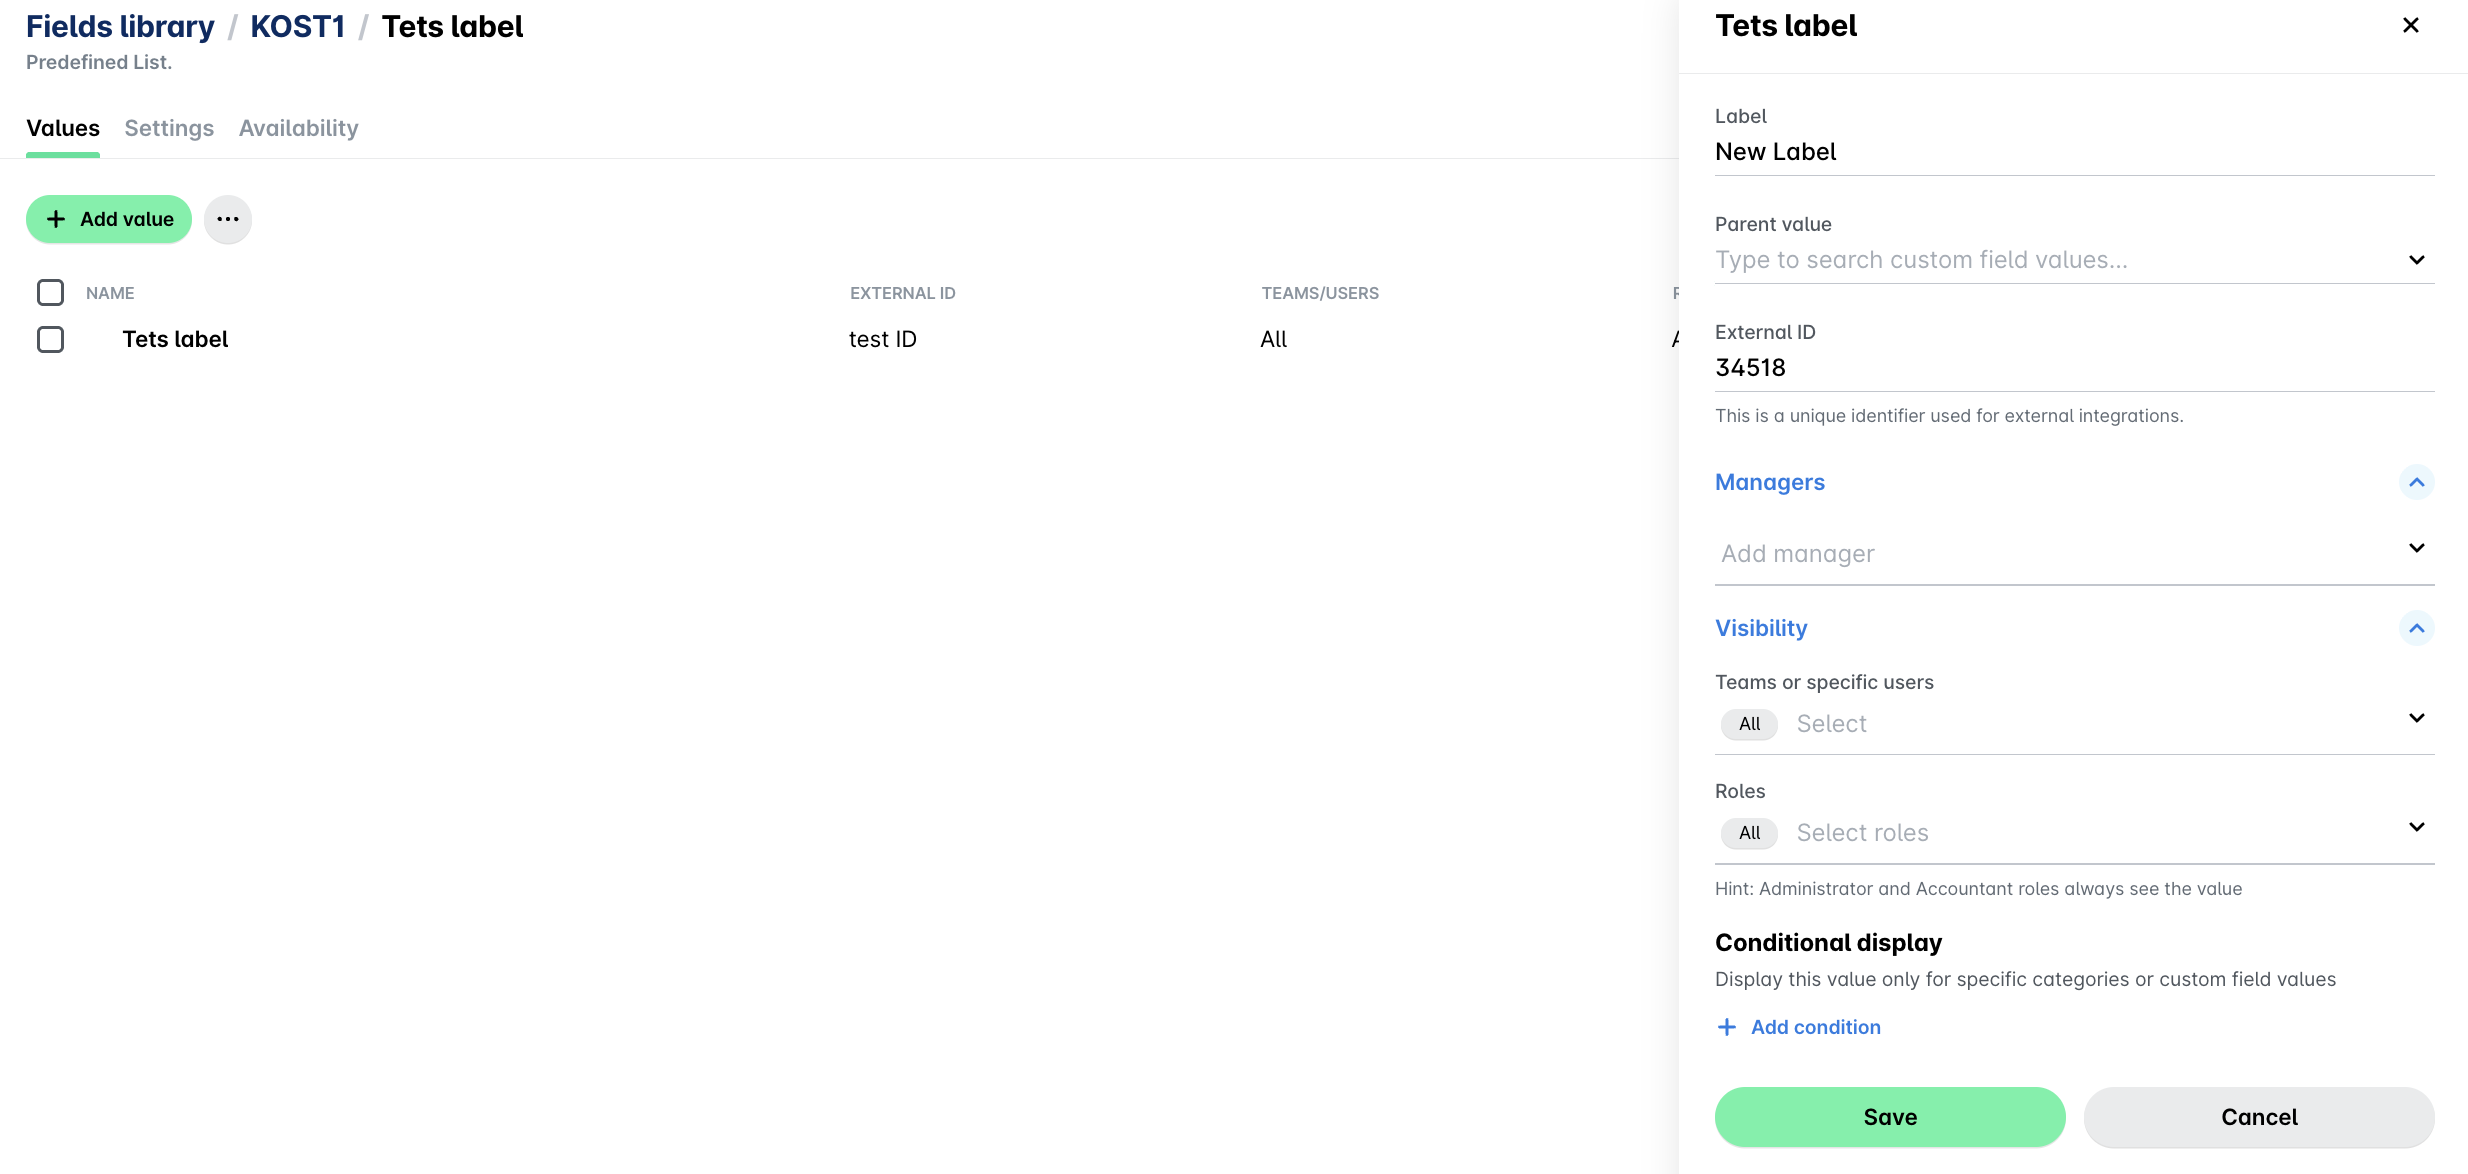
Payhawk supports nested values in the KOST 1 field and allows you to use hierarchical formats such as Location/Berlin or Location/Barcelona when selecting conditional display options.
Hiding the KOST1 and KOST2 fields
If you don't need the KOST1 and KOST2 custom fields, you can set them as not visible.
In the Payhawk Web Portal, go to Settings > Fields library > KOST1.
Under Values, go to Visibility and deselect all teams and specific users. However, there are roles that will be always able to see the filed, for example, Payhawk Administrators.
Click on Save.
As a result, the KOST1 and KOST2 custom fields won't appear when you upload expenses to Payhawk.