Payhawk supports direct integration to QuickBooks Online, providing you with the flexibility to effortlessly export and sync your expenses between the two systems.
For more information, go to the article about exported data between Payhawk and QuickBooks Online.
Initial interaction between Payhawk and QuickBooks Online
By connecting to your QuickBooks Online subsidiary, you allow Payhawk to perform the following:
Sync your chart of accounts and tax rates.
Create a bank account in QuickBooks Online for each of your active currencies.
Create Payhawk General and Fees accounts.
Fetch your QuickBooks Online Classes, Locations, Customers and Projects, and Billables.
Fetch your QuickBooks suppliers.
Prerequisites
Before you connect Payhawk to QuickBooks Online, make sure you have:
Administrator rights for Payhawk.
Administrator rights for QuickBooks Online.
Connecting to QuickBooks Online
To start connecting your Payhawk account to QuickBooks Online, follow the steps:
Go to Settings > Integrations.
Under Available integrations, find QuickBooks Online and click on Connect.
On the next screen, click Continue.

After you've granted Payhawk access to QuickBooks Online, the Data mapping dialog opens and you need to select a QuickBooks Online bank account for each Payhawk account.
In the Expense categorization section:
Select whether you want to map Payhawk accounting categories to QuickBooks Online chart of accounts only, service or non-inventory items only, or both.
Define the General account (Payhawk General), which reflects deposits and unmapped exports.
Define the Fees account, which reflects journal entries for FX and POS fees.

Click on Continue to start synching the information. As a result, Payhawk automatically fetches the master data from QuickBooks Online.
Click on Done.

Notes on configuration
The integration setup from the last time Payhawk and your accounting system were connected will be automatically re-applied the next time you connect.
You can edit the current integration setup without disconnecting from your accounting system. In Payhawk, go to Settings > Integrations, click on the three dots menu of the desired ERP system, and select Edit configuration.
Mapping linked card transactions to individual accounts
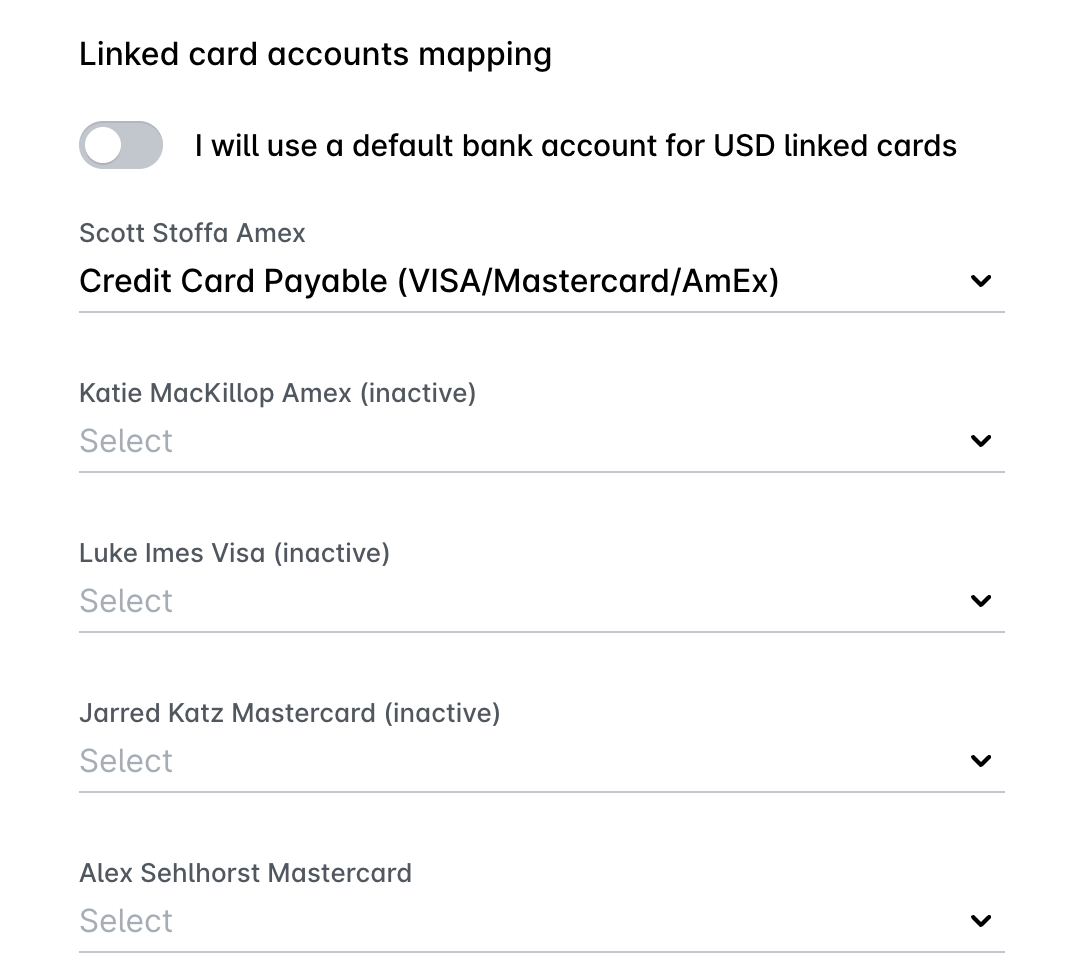
By default, the transactions of your linked cards, for example, assigned American Express Additional Card Members' Cards, are exported to QuickBooks Online under the account of the main card.
To export the transactions of each linked card under its own account instead:
In the Payhawk Web Portal, go to Settings > Integrations, click on the three-dot menu of the QuickBooks Online integration, and select Edit configuration.
In the linked card mapping settings, turn off the default card option.
Map each linked card to its own General Ledger account.
As a result, the transactions of each linked card will be exported to QuickBooks Online under the General Ledger account you have mapped to that card.
Next steps