As a Payhawk Administrator, you can use the Fields library to manage fields from one centralized place at both the group and entity level.
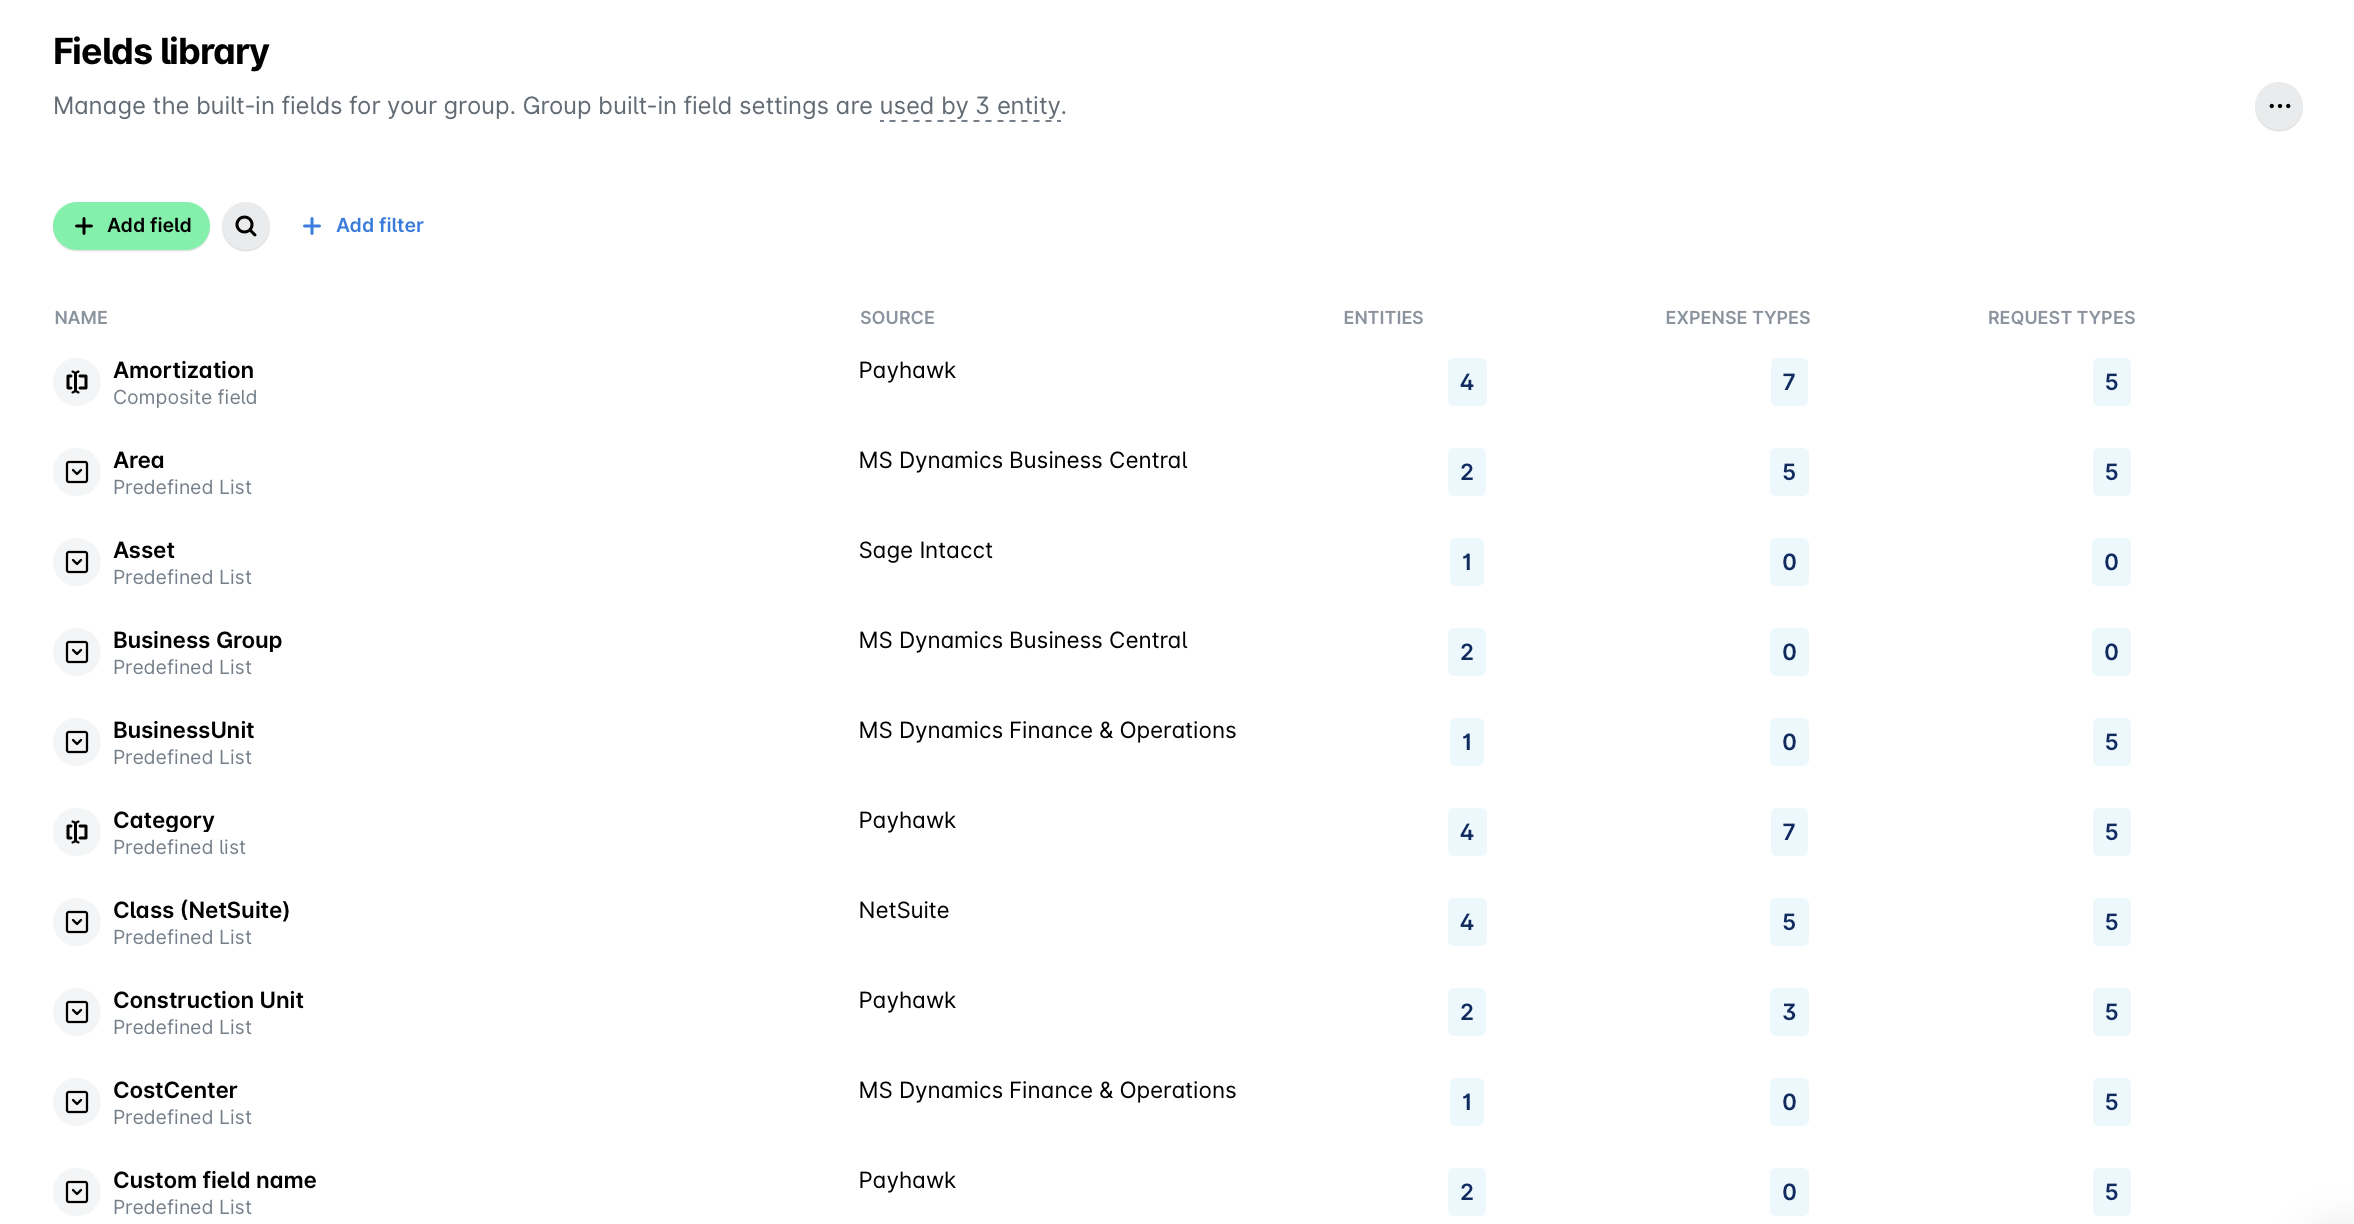
In the Fields library, you can create new fields, view where they are available among expenses and requests, select to which entities they are visible and add conditional visibility between fields.
You can also see the values of each predefined or dynamic list field, create new values, deactivate existing ones, and apply different visibility settings of the values.
Understanding fields
Payhawk uses various field types to capture diverse information.
Common fields examples include: Category, Note, Document, Document Date, Due Date, Document Type, Document Number, Service Period, Supplier, Tax Rate, Discount, Amortization, Team.
Each new field can be of one of the following types:
Predefined list – Users select from a pre-set list of options.
Dynamic list – Users select from predefined options or provide a new one.
Date – Users choose a date from a calendar.
Text – Users enter a brief response.
Viewing fields
You can view where each field is available. For example, you can see if a field is available in 3 expense types and 1 request type (with the ability to view the specific types on hover).
You can also identify the origin of each field, whether it's a field with data source from Payhawk, such as a custom field, or if it synced from external systems such as Oracle NetSuite.
Creating and managing fields
In the Fields library, you can create new fields and their associated values to meet your company’s specific data collection needs.
When creating a new field, you can select to which expense or request types you want to make it available, and select the entities in which the field will be used. If you need to edit that availability later, you must add or remove the field from the fields list from the selected expense or request type.
When you click on a field, such as Cost centers, you can view existing values and add new ones as required.
Customizing field behavior and visibility
Accessing the Fields library on a group level, allows you to control which entities can view and use specific fields, and ensures data relevance and security.
You can set up rules to display the fields only when particular values in another field are selected, and define a consistent behavior for a field that applies across all expense and request types.
You can view in which transaction types, such as card payments or hardware purchases, each field is available. If you need to add or remove a field from a specific transaction type or make it required or not, you must edit the field from the specific transaction type.
For example, you can create a Cost center field from the Fields library, make that field available in all expense types, but then decide to remove the field or some of the value of the field for mileage expenses. To do so, you must navigate to the mileage expense type fields and from there, remove the field or the set of values only for mileage expenses.
To ensure employees provide all necessary information before submitting expenses or requests, mark fields as mandatory for submission and review in the expense or request types’ settings.
Creating and managing values
In the Fields library, you can create new values of the fields and deactivate existing ones. Once added, these values will appear in the expenses or requests where that field is used.
You can also define to which entities these values will be visible. Additionally, you can define for each single value which roles, teams, or specific users will be able to see the values in the drop-down menu of each expense, where the field is available. For example, you can create the field Cost center where values are only visible to team members within the Marketing and Production teams.
Furthermore, in the Fields library, you can define when each value can appear, depending on the selected value in another field, for example, show specific values in the Project tasks fields, depending on the selected value in field Project.
You can also define which field values appear for specific expense types by accessing the relevant settings from the expense type fields. For example, display only 4 out of 20 cost centers for reimbursable expenses. From the same field view, you can assign custom field managers or category managers.