If a Payhawk Administrator at your company has set the request category to require a receipt note, you’ll need to upload one when the requested goods or services are fully or partially delivered. You and any authorized employees and roles at your company can upload a receipt note (GRN) to the system.
Viewing and downloading receipt notes
To view a receipt note for a request or a purchase order (if enabled for your company) in the Payhawk Web Portal:
Go to Requests and select the desired request or purchase order.
Click on the Receipt note tab and select the document you want to view.
In the dialog that opens, you can view the document details. To download a receipt note, click on it. As a result, it will be downloaded to your local Downloads folder.

Viewing received quantity on open requests
To view the received quantity on an open request or purchase order in the Payhawk Web Portal:
Go to Requests.
Select the desired request or purchase order by clicking on it.
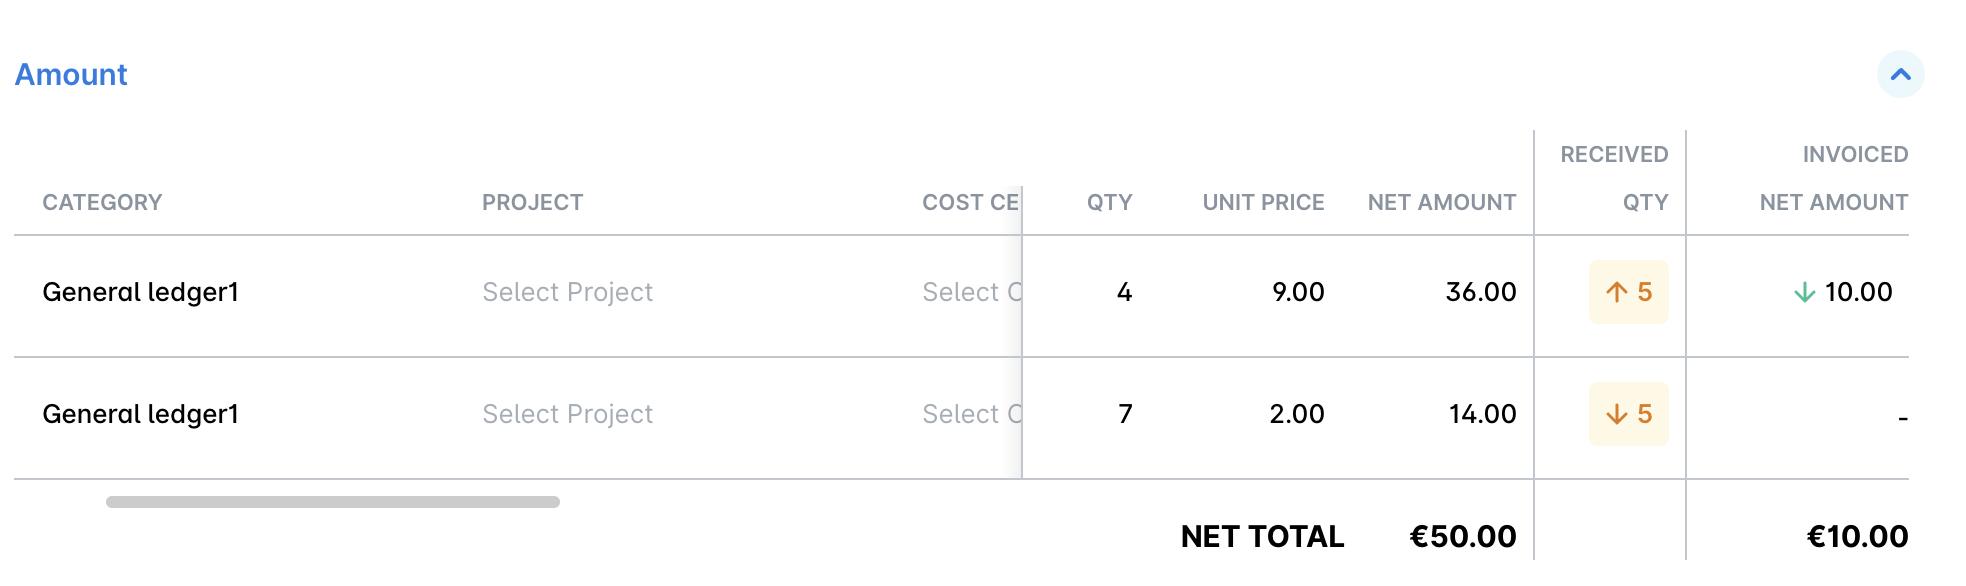
Navigate to its Amount section.
View the received quantity in the Received quantity column.
Alternatively, to view the status of a receipt note in relation to an expense in the Payhawk Web Portal:
Go to Expenses.
Select the desired expense by clicking on it.
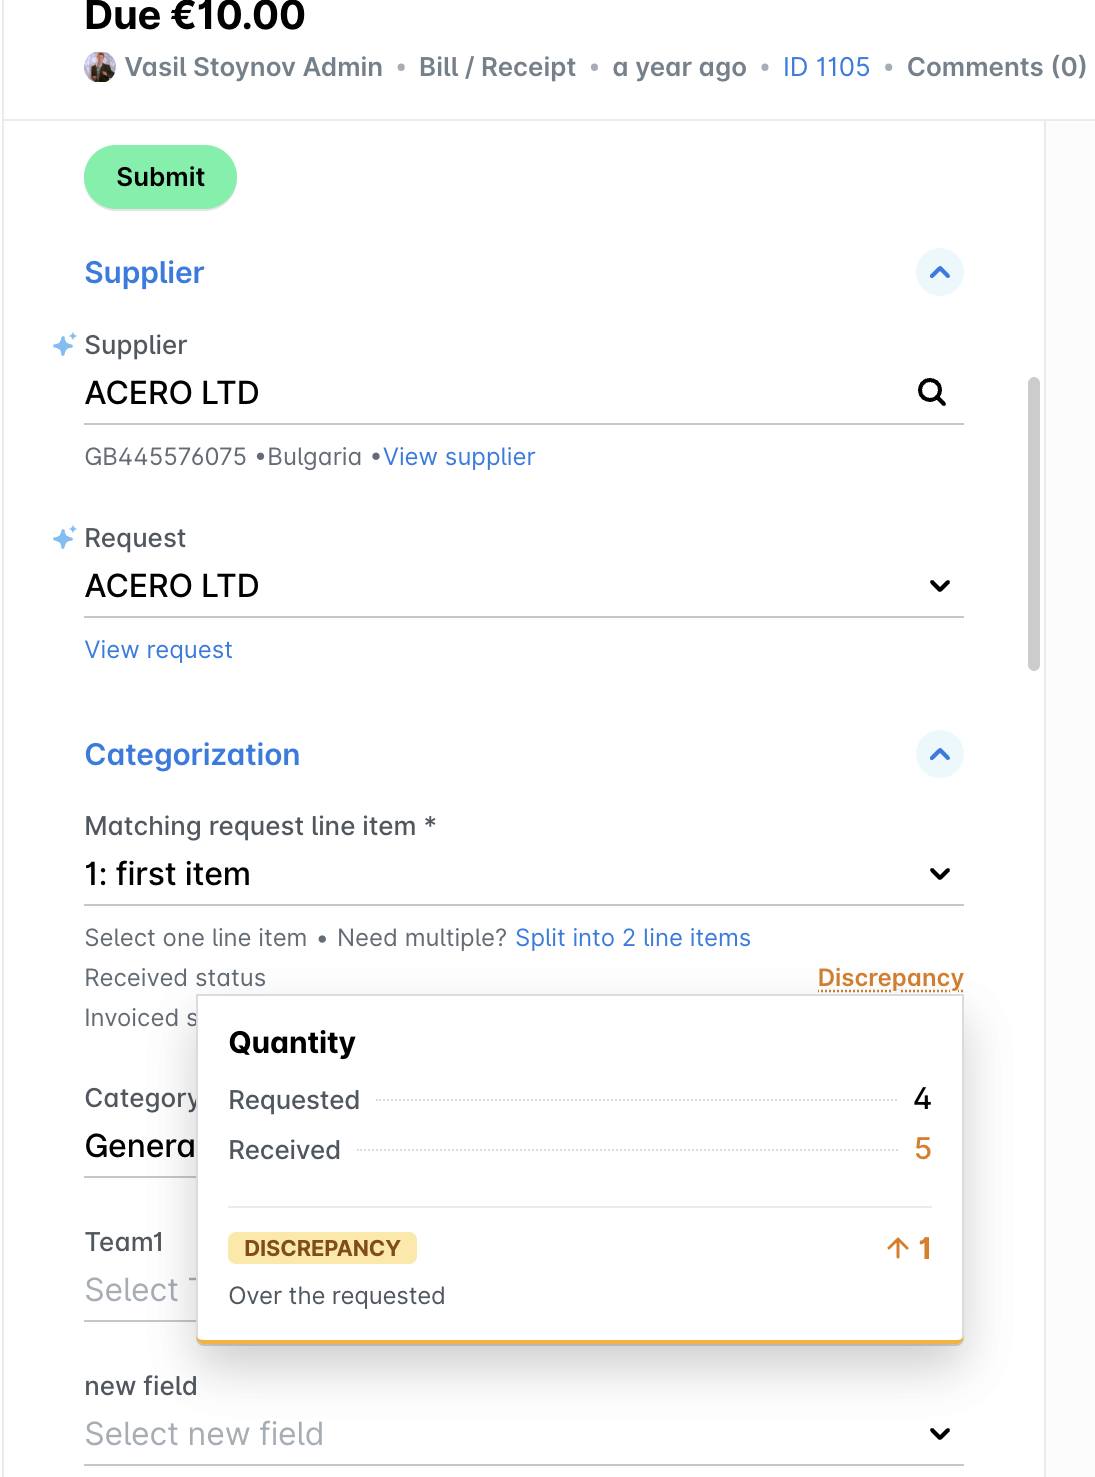
Navigate to Categorization > Received status.
Hover over the received status to view the status of the receipt note.
For example, if the received status is Discrepancy, you’ll be able to see both the requested and received quantity for the request or purchase order.
Uploading receipt notes in the portal
To upload a receipt note for your request or purchase order in the Payhawk Web Portal:
Go to Requests and select the desired request or purchase order.
Click on the Add receipt note button.

Alternatively, go to the Receipt note tab and click on the Add new receipt note button.

In the dialog that opens, fill in the details, add the receipt note, and click on Add. As a result, the receipt note will be visible under the Receipt note tab of the request.
