This article lists the minimum NetSuite permissions required for a custom role to use the Payhawk SuiteApp RESTlets. The SuiteApp no longer requires the Administrator role — any role with Token-Based Authentication (TBA) access and the permissions listed below can be used.
Reference documentation
Permissions Documentation — overview + downloadable NetSuitePermissionsUsage.xls
Permission Names and IDs — complete ID table for SuiteScript
Roles and Permission Considerations for APIs — API-specific requirements
Access Levels for Permissions — None / View / Create / Edit / Full definitions
Customizing or Creating NetSuite Roles — step-by-step guide
Creating a custom role
To create a dedicated role for the Payhawk integration, follow the steps:
In Oracle NetSuite, go to
Setup -> Users/Roles -> Manage Roles -> New.Name the role, for example, Payhawk Integration.
On the role record, check Web Services Only Role (recommended - prevents UI login with this role).
Add the permissions listed below under the Permissions subtabs (Setup, Transactions, Lists).
Save the role.
Assign the role to the user:
Lists -> Employees -> [User] -> Access -> Roles.
Permissions
Transactions
Role page → Permissions → Transactions subtab
Permission | Level |
|---|---|
Bills | Full |
Deposit | Create |
Enter Vendor Credits | Full |
Expense Report | Full |
Find Transaction | View |
Make Journal Entry | Full |
Pay Bills | Full |
Purchase Order | Full |
Reports
Role page → Permissions → Reports subtab
Permission | Level |
|---|---|
Cash Flow Statement | View |
Lists
Role page → Permissions → Lists subtab
Permission | Level |
|---|---|
Accounts | Full |
Amortization Schedules | View |
Classes | View |
Currency | Full |
Custom GL lines Plug-in Audit Log | View |
Customers | View |
Departments | View |
Documents and Files | Full |
Employee Record | Full |
Employees | Full |
Items | View |
Locations | View |
Projects | View |
Subsidiaries | View |
Tax Records | View |
Vendors | Full |
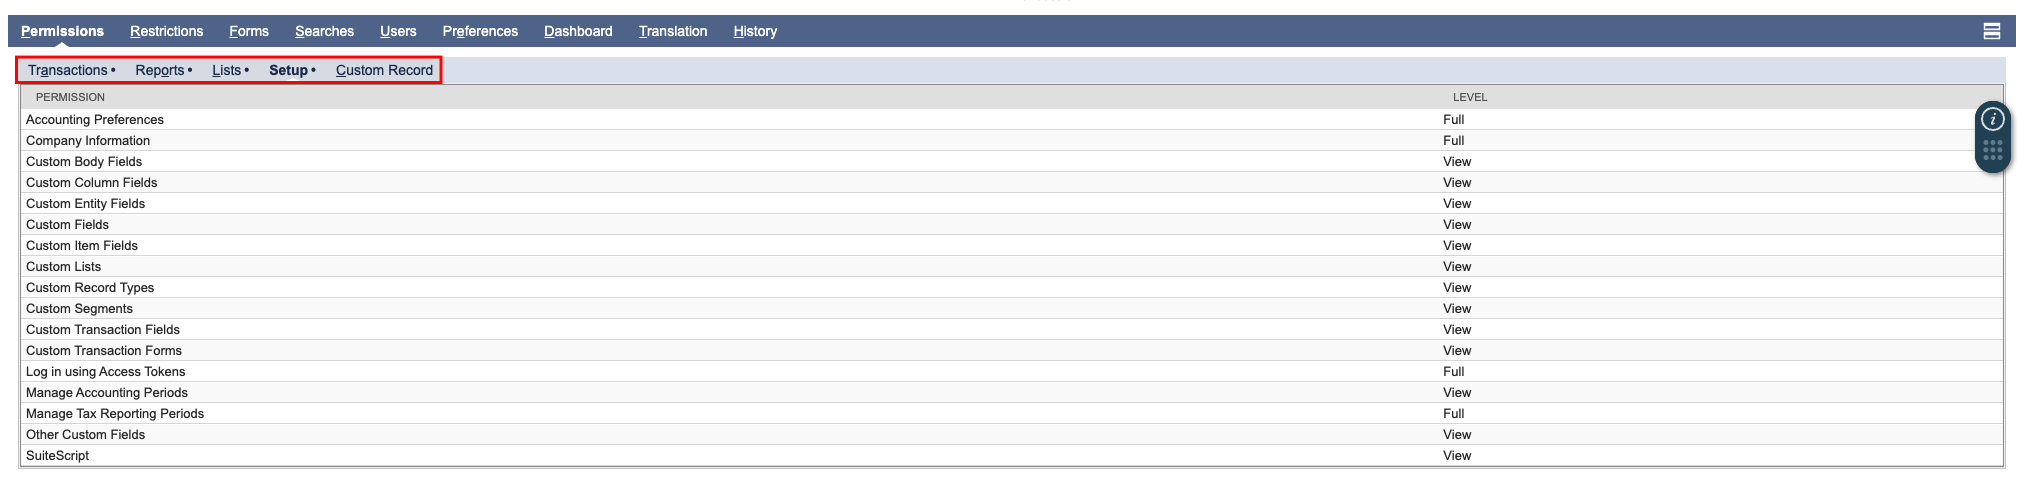
Setup
Role page → Permissions → Setup subtab
Permission | Level |
|---|---|
Accounting Preferences | Full |
Company Information | Full |
Custom Body Fields | View |
Custom Column Fields | View |
Custom Entity Fields | View |
Custom Fields | View |
Custom Item Fields | View |
Custom Lists | View |
Custom Record Types | View |
Custom Segments | View |
Custom Transaction Fields | View |
Custom Transaction Forms | View |
Log in using Access Tokens | Full |
Manage Accounting Periods | View |
Manage Tax Reporting Periods | Full |
Other Custom Fields | View |
SuiteScript | View |
User global permissions
Permission | Level |
|---|---|
Access Token Management | Full |
Entity-Subsidiary Relationship | Full |
SuiteSignOn | Full |

Notes for developers
Generic endpoints: The
records-restletandsuiteql-restletare generic endpoints that can access any record type. The role must have permissions for every record type queried through them. If a permission is missing, these endpoints will return a structured error.
Backward compatibility: The SuiteApp continues to work with the Administrator role. No changes are required for existing connections using Admin.
Full permissions reference: For a complete understanding of all NetSuite permission implications, download the official NetSuitePermissionsUsage.xls.
Troubleshooting
Diagnostic: Check the Login Audit Trail at Setup -> Users/Roles -> View Login Audit Trail. Add the Detail, Token-based Access Token Name, and Token-based Application Name columns to see detailed failure reasons.
INSUFFICIENT_PERMISSION / insufficient-permissions
This error means TBA authentication succeeded but the role lacks permissions for the specific record or operation. The records-restlet and suiteql-restlet return a structured error:
{ "errors": [{ "code": "insufficient-permissions", "message": "..." }] }Add the missing permission from the tables above. The error message typically names the record type that requires access.
Permission_denied
This TBA-level error means the role or user entity is not usable. Verify:
The role is active (not disabled).
The user has not made the role inactive on their View My Roles page.
The role has TBA permissions assigned.