If you have an active ERP integration with Payhawk, you can schedule an automatic sync for your master data objects, so that categories, tax rates, custom fields, teams, amortization, and suppliers stay aligned between the two systems without manual effort.
This article explains how the automated master data sync works, how to configure which objects are synced, how to review the sync history, and what happens if the integration is disconnected.
About the automated master data sync
The automated master data sync is a scheduled job that runs every night and pulls the latest master data objects from your connected ERP into Payhawk. It mirrors the behavior of the existing automatic supplier sync, but covers all master data objects that are exchanged between Payhawk and the ERP.
Depending on the connected ERP, the objects that can be auto-synced include:
Categories (mapped to the Chart of Accounts in your ERP)
Tax rates (mapped to VAT codes)
Custom fields (including classifications and segments such as Class, Location, and Project)
Teams (mapped to Departments)
Amortization (mapped to Amortization templates)
Suppliers (mapped to Vendors)
Each object can be toggled on or off independently, so you can choose exactly which parts of your master data should be kept in sync automatically.
Viewing the auto-sync master data settings
The information and configuration options about what master data is automatically synced between Payhawk and your ERP is located on the Settings page of the active integration in Payhawk.
To access the auto-sync configuration:
Log in to the Payhawk Web Portal.
Go to Settings > Integrations.
Under Active, locate your connected ERP and click on Manage.

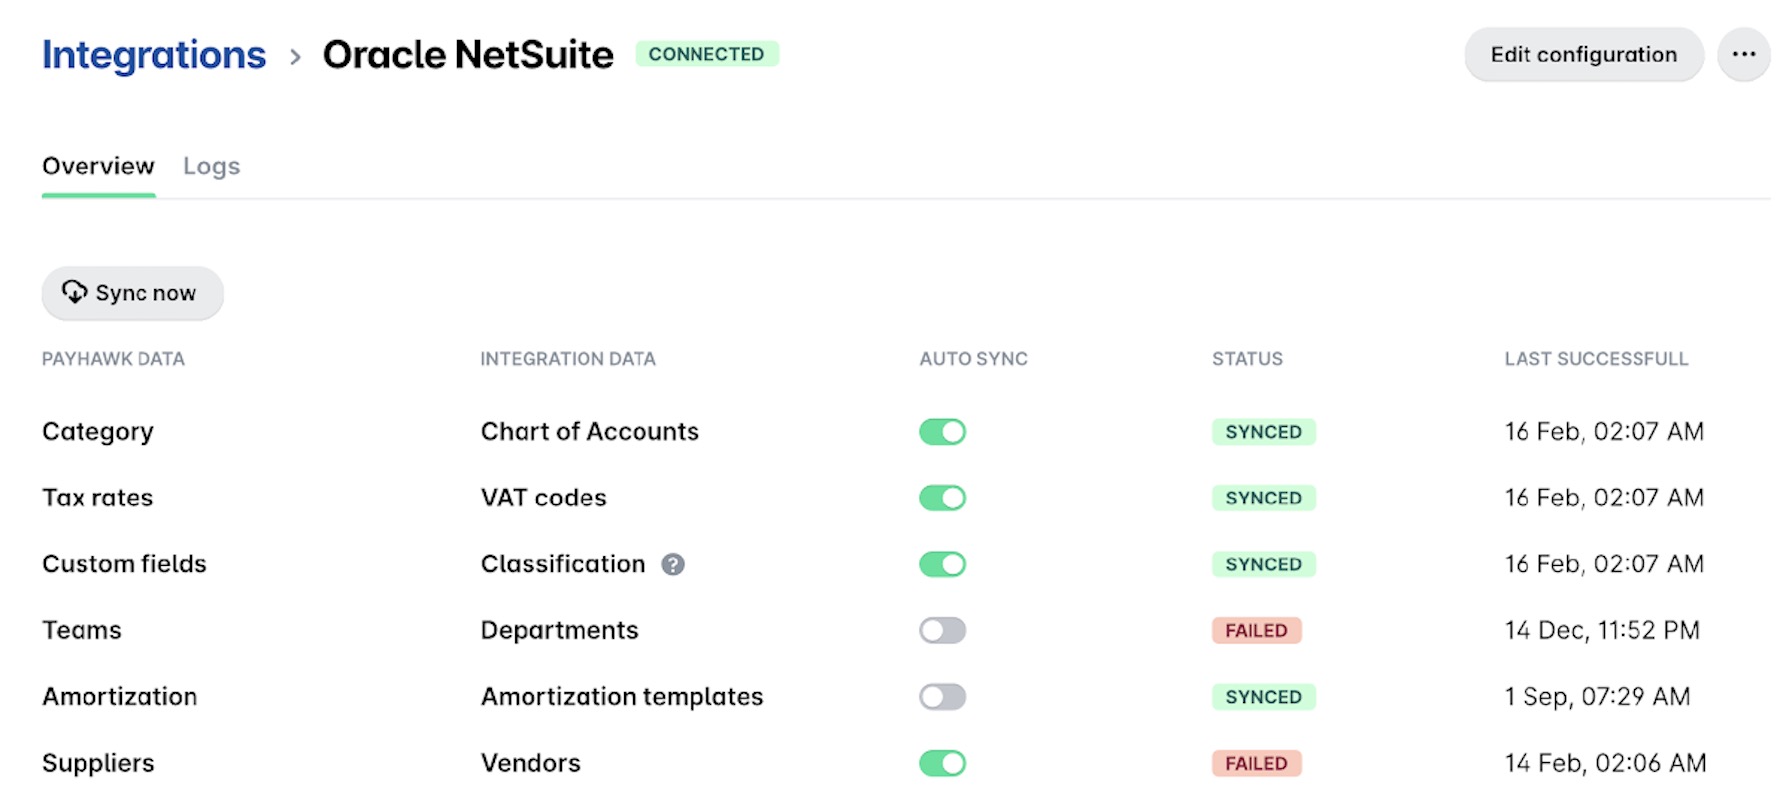
As a result, your ERP integration's configuration page with the Overview and Logs tabs is loaded. The Overview tab is where you control the auto-sync. Each row represents one master data object and maps a Payhawk data type to its counterpart in the ERP.
For each row you will see:
Payhawk data - The object as it is known inside Payhawk (for example, Category, Tax rates, Suppliers).
Integration data - The corresponding object in the ERP (for example, Chart of Accounts, VAT codes, Vendors).
Auto sync - A toggle that enables or disables the nightly sync for that object.
Status - The result of the previous sync attempt. The value is either Synced or Failed.
Last successful - The date and time of the most recent successful sync for that object.
Enabling or disabling the auto sync for an object
To start auto-syncing an object, switch on its AUTO SYNC toggle. To stop auto-syncing an object, switch off the toggle. Changes take effect from the next nightly run.
You do not need to save the screen; toggling a row is applied immediately.
Reviewing synced segments for classifications
Some objects, such as Classification, contain multiple segments (for example, Class, Location, and Project). To view the segments that are included in the sync, hover over the ? (question mark) icon next to the INTEGRATION DATA name. As a result, a tooltip displays the full list of synced segments.
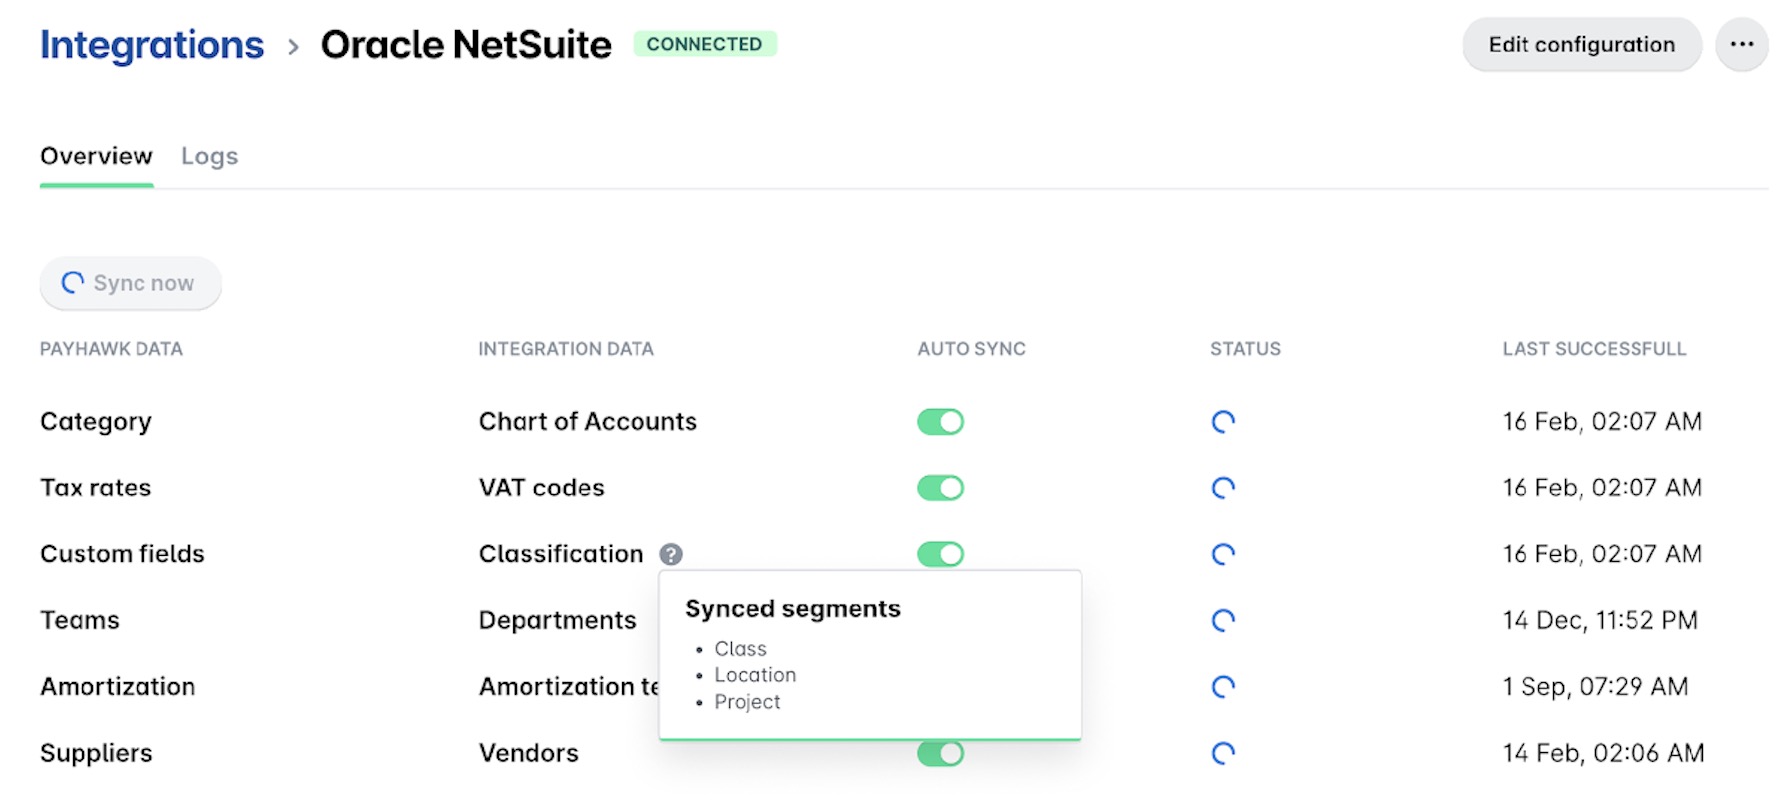
Triggering a sync outside the schedule
The automated sync runs once per night. If you need the latest data sooner, use the Sync now button to start an immediate sync for all objects. While a manual sync is running, the button becomes disabled (greyed out) and each row shows a loading indicator until the sync completes.

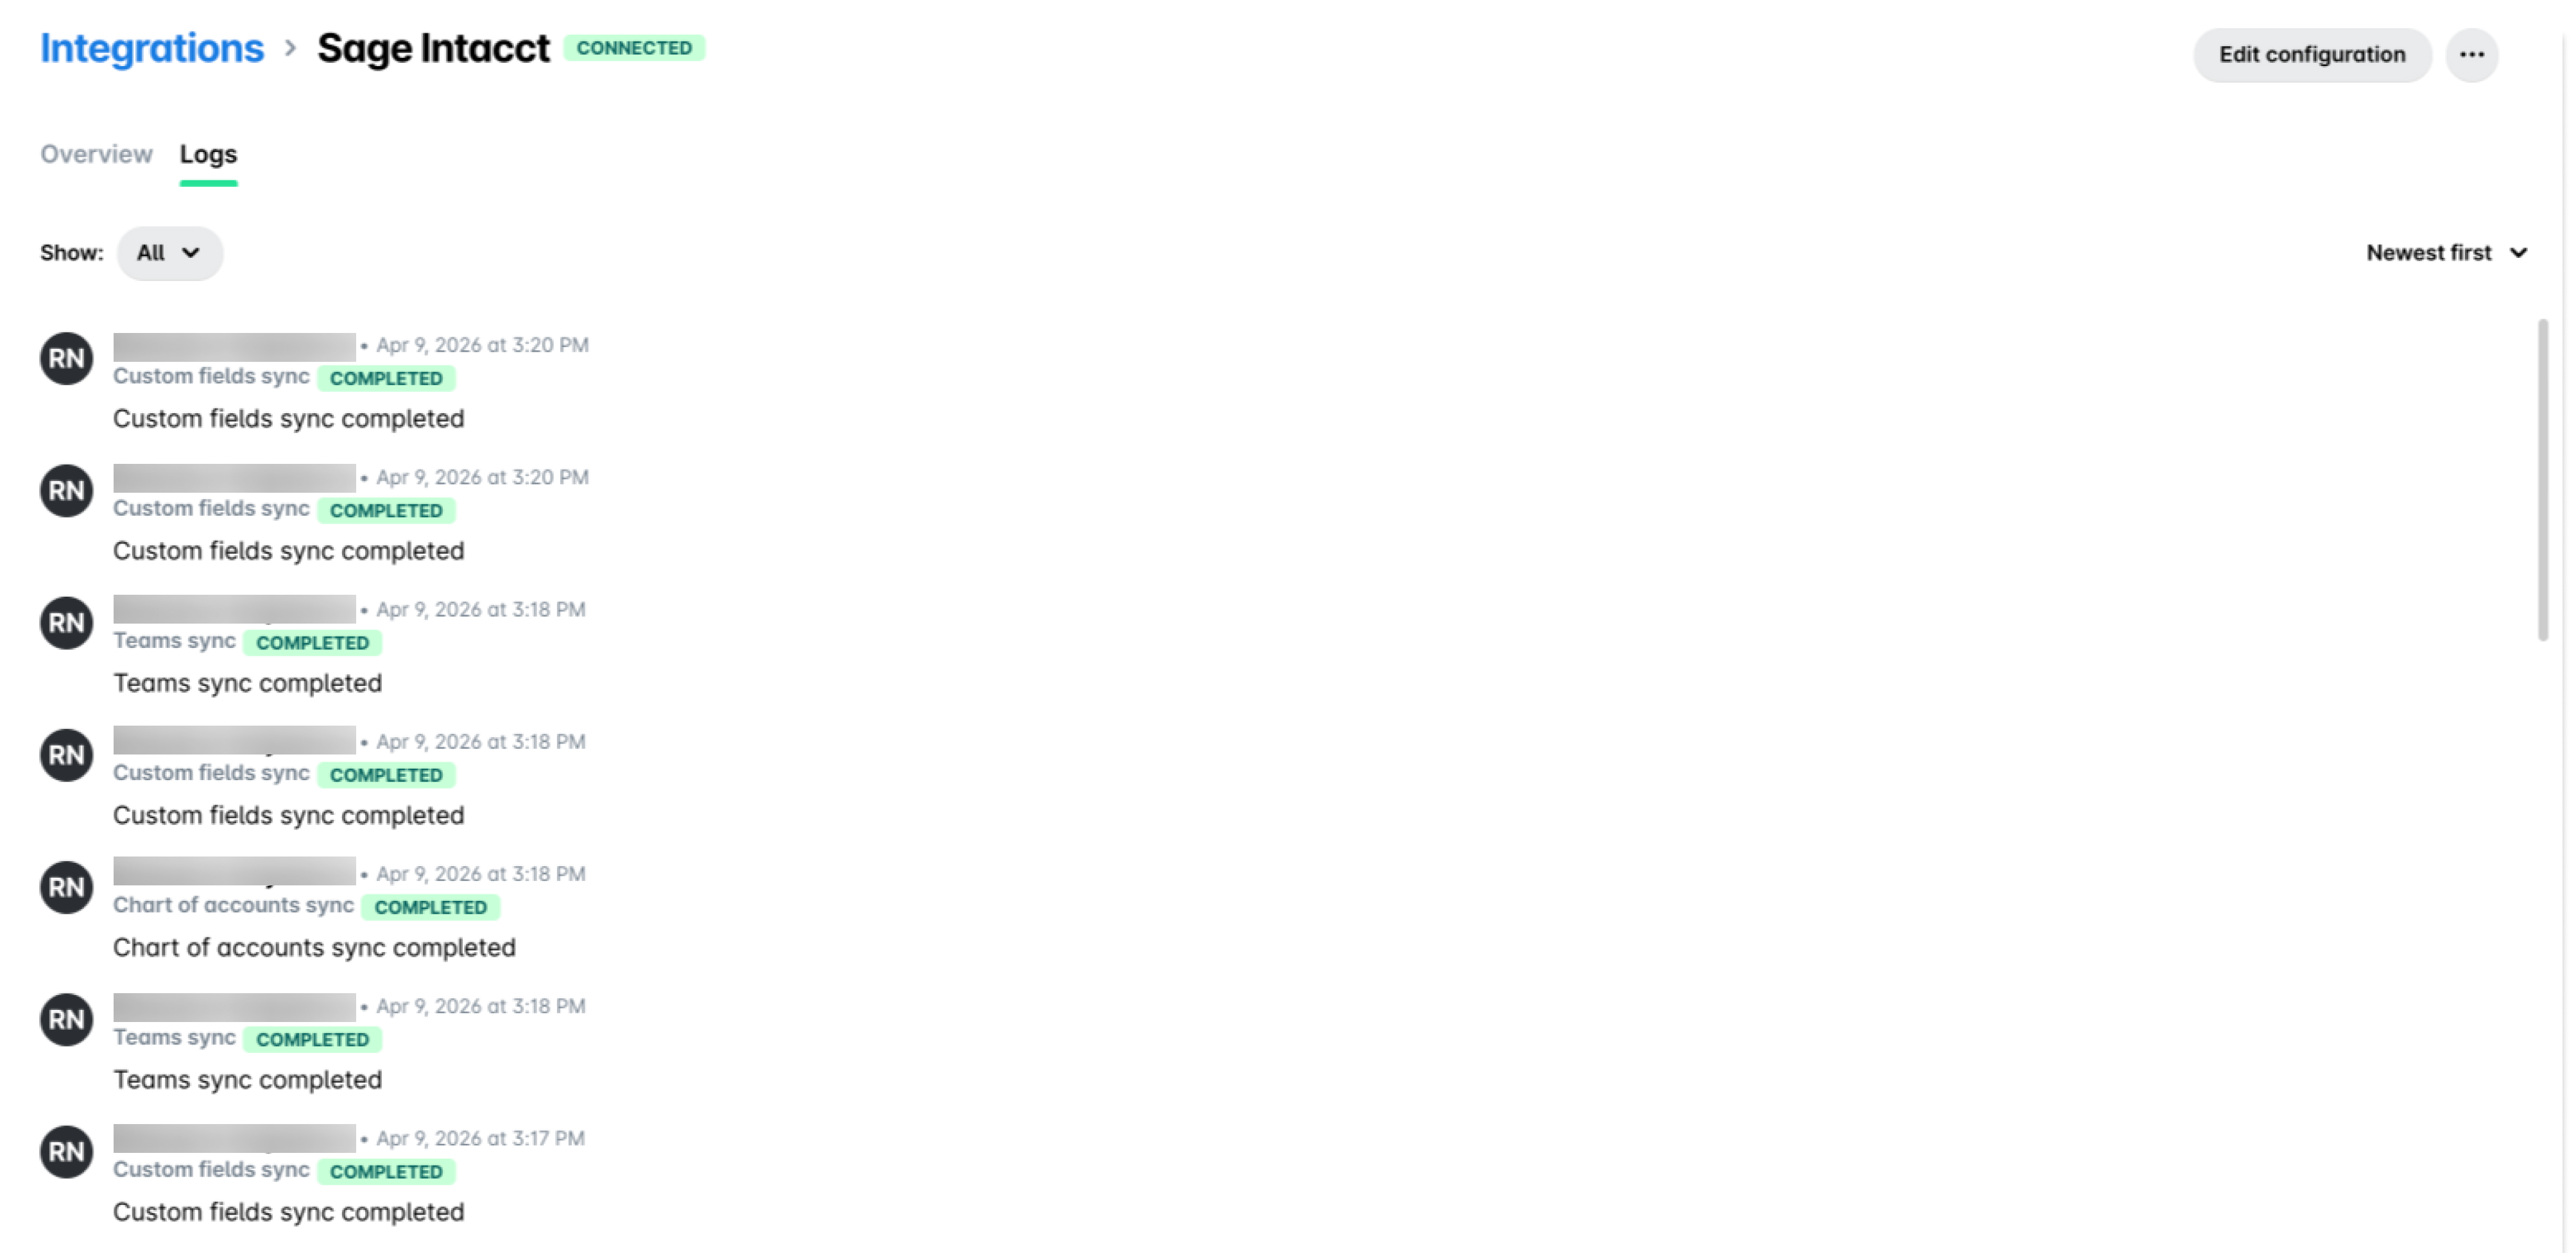
Reviewing the sync history
The Logs tab on your ERP Settings page shows a chronological history of all integration activity, including manual and automatic syncs, configuration changes, and connection or disconnection events.
Each log entry displays:
The employee who performed the action (for example, a specific user or the Payhawk system for scheduled jobs).
The type of event (for example, Manual sync or Automatic sync).
A short result summary.
The time at which the event occurred.
To filter by a specific event type, use the Show drop-down button. To change the order between newest-first and oldest-first, use the Sort selector.
The Logs tab shows whether a sync succeeded or failed but does not include detailed error diagnostics for individual objects. For detailed investigation of a failed sync, contact Payhawk Support.
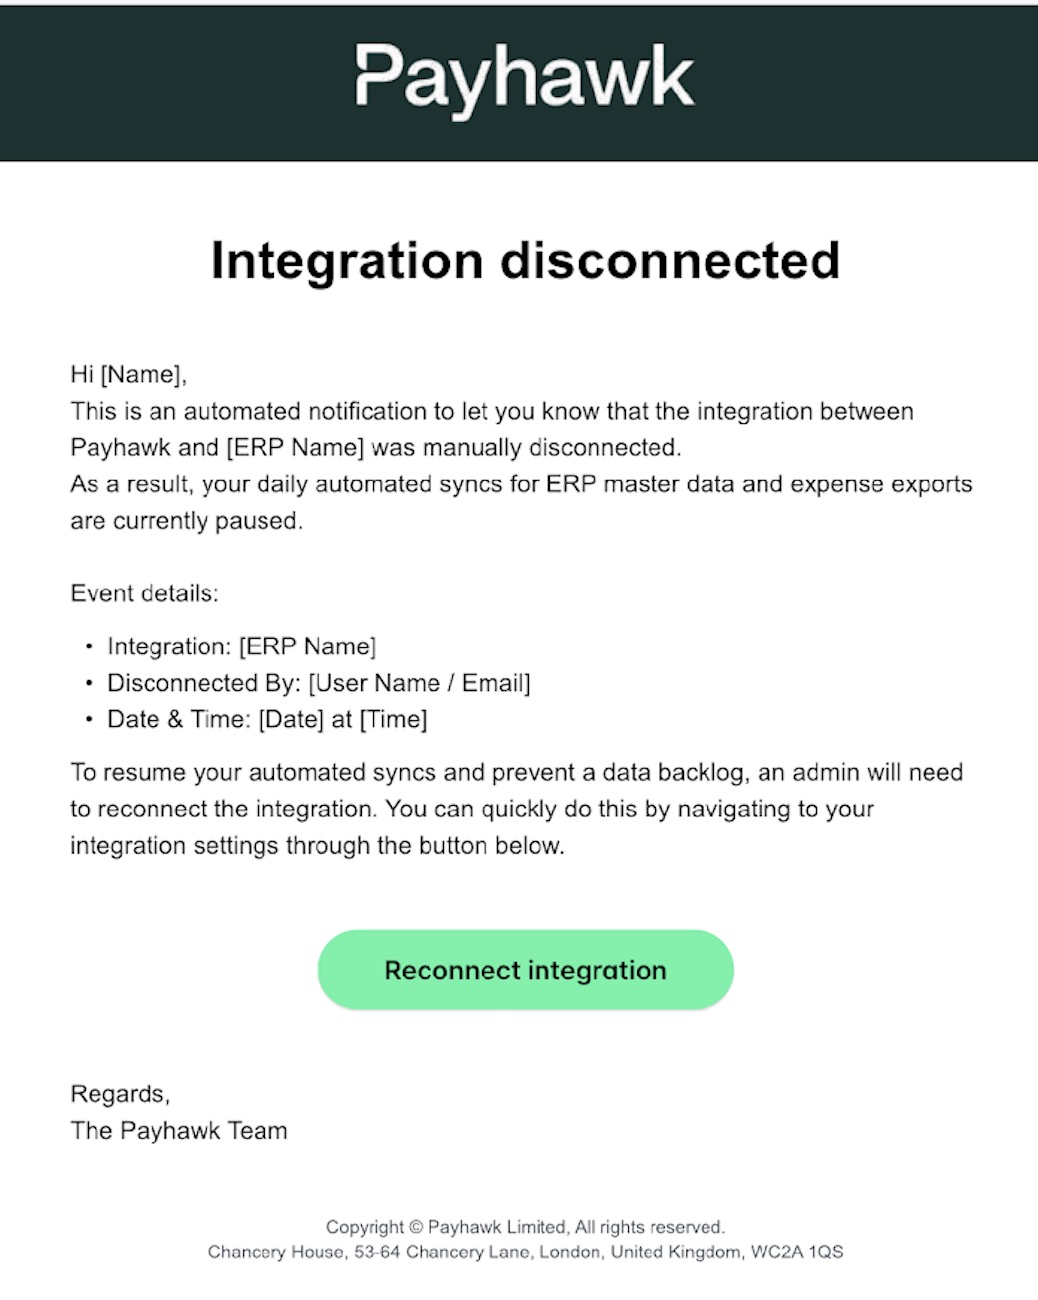
ERP disconnection
If the connection between Payhawk and your ERP is manually disconnected, automated nightly syncs for master data and expense exports are paused until the integration is reconnected.
To ensure you do not miss this event, Payhawk automatically sends a notification email to all Payhawk Administrators whenever a manual disconnection occurs.
This email includes:
The ERP that was disconnected.
The employee who performed the disconnection.
The date and time of the disconnection.
The email also contains a Reconnect integration button that takes you directly to the Integrations app in Payhawk, where a Payhawk Administrator can restore the connection and resume automated syncs.
Only manual disconnections trigger this email. If a sync fails for a different reason (for example, a temporary ERP outage or an authentication issue), the failure will appear in the Logs tab but the integration remains connected.
Best practices
Enable auto-sync for every master data object your team relies on for coding expenses to avoid outdated categories, tax rates, or supplier lists.
Review the Logs tab regularly, especially after making structural changes in the ERP, to confirm nightly syncs are succeeding.
If a specific object repeatedly shows a Failed status, temporarily turn off auto-sync for that object and resolve the underlying data issue in the ERP before re-enabling it.
When disconnecting an ERP intentionally, communicate the change to other Payhawk Administrators in advance so the automated notification email is expected.
Master data sync support by integration
Master data sync capabilities vary by ERP integration. The following table shows the available automatic master data sync features in Payhawk for each ERP.
Integration | Automatic master data sync | Audit logs |
|---|---|---|
DATEV DUO | ✗ | ✓ |
Exact Online | ✓ | ✓ |
Microsoft Dynamics 365 Finance & Operations | ✓ | ✓ |
Microsoft Dynamics 365 Business Central | ✓ | ✓ |
Oracle NetSuite | ✓ | ✓ |
QuickBooks Online | ✓ | ✓ |
Sage Intacct | ✓ | ✓ |
Xero | ✓ | ✓ |
All other integrations | ✗ | ✗ |