Employees with the necessary permissions and included in the relevant approval workflow can pay outstanding company invoices and reimburse employees directly from the Payhawk Web Portal. This way, your company can keep its payments for card transactions, cash purchases, and bank transfers in a single process.
People with the right to confirm details at your company can define whether the bank transfer needs to be executed immediately after its authorization or will be scheduled for automatic payment on a specific date, or on the expense due date.
To be able to pay an expense through Payhawk, the currency of the supplier's bank account currency must match the currency stated on the invoice.
Notes on paying single expenses
For EEA and UK accounts, Payhawk executes reimbursements and bank transfers from the Payhawk currency account (wallet).
If your EUR payment via SEPA Instant fails, you can choose to process it using SEPA Standard instead. SEPA Standard payments may take up to 1 business day.

If your EUR payment via SEPA Instant previously failed, the system will suggest the SEPA Standard option by default the next time you attempt to pay.

For US accounts, Payhawk executes reimbursements and bank transfers by doing an ACH Pull from the linked bank accounts.
If the Segregation of duties setting has been enabled for the expense payment authorization workflow, employees who confirm the payment details of expenses will not be permitted to authorize their payment, even if they have the necessary permissions. This restriction supports the four-eyes principle and helps prevent potential fraud.

Confirming payment details for single expenses
Before an expense can be scheduled for a future date or processed for immediate payment, employees with the appropriate permissions or roles must review the payment details and ensure all required information has been provided.
When making cross-border payments through Payhawk, additional details may be required depending on the currency and local regulations of the destination bank - for example, a purpose code for India.
The following image shows the required details for making an FX payment from Payhawk in United Arab Emirates Dirhams (AED).
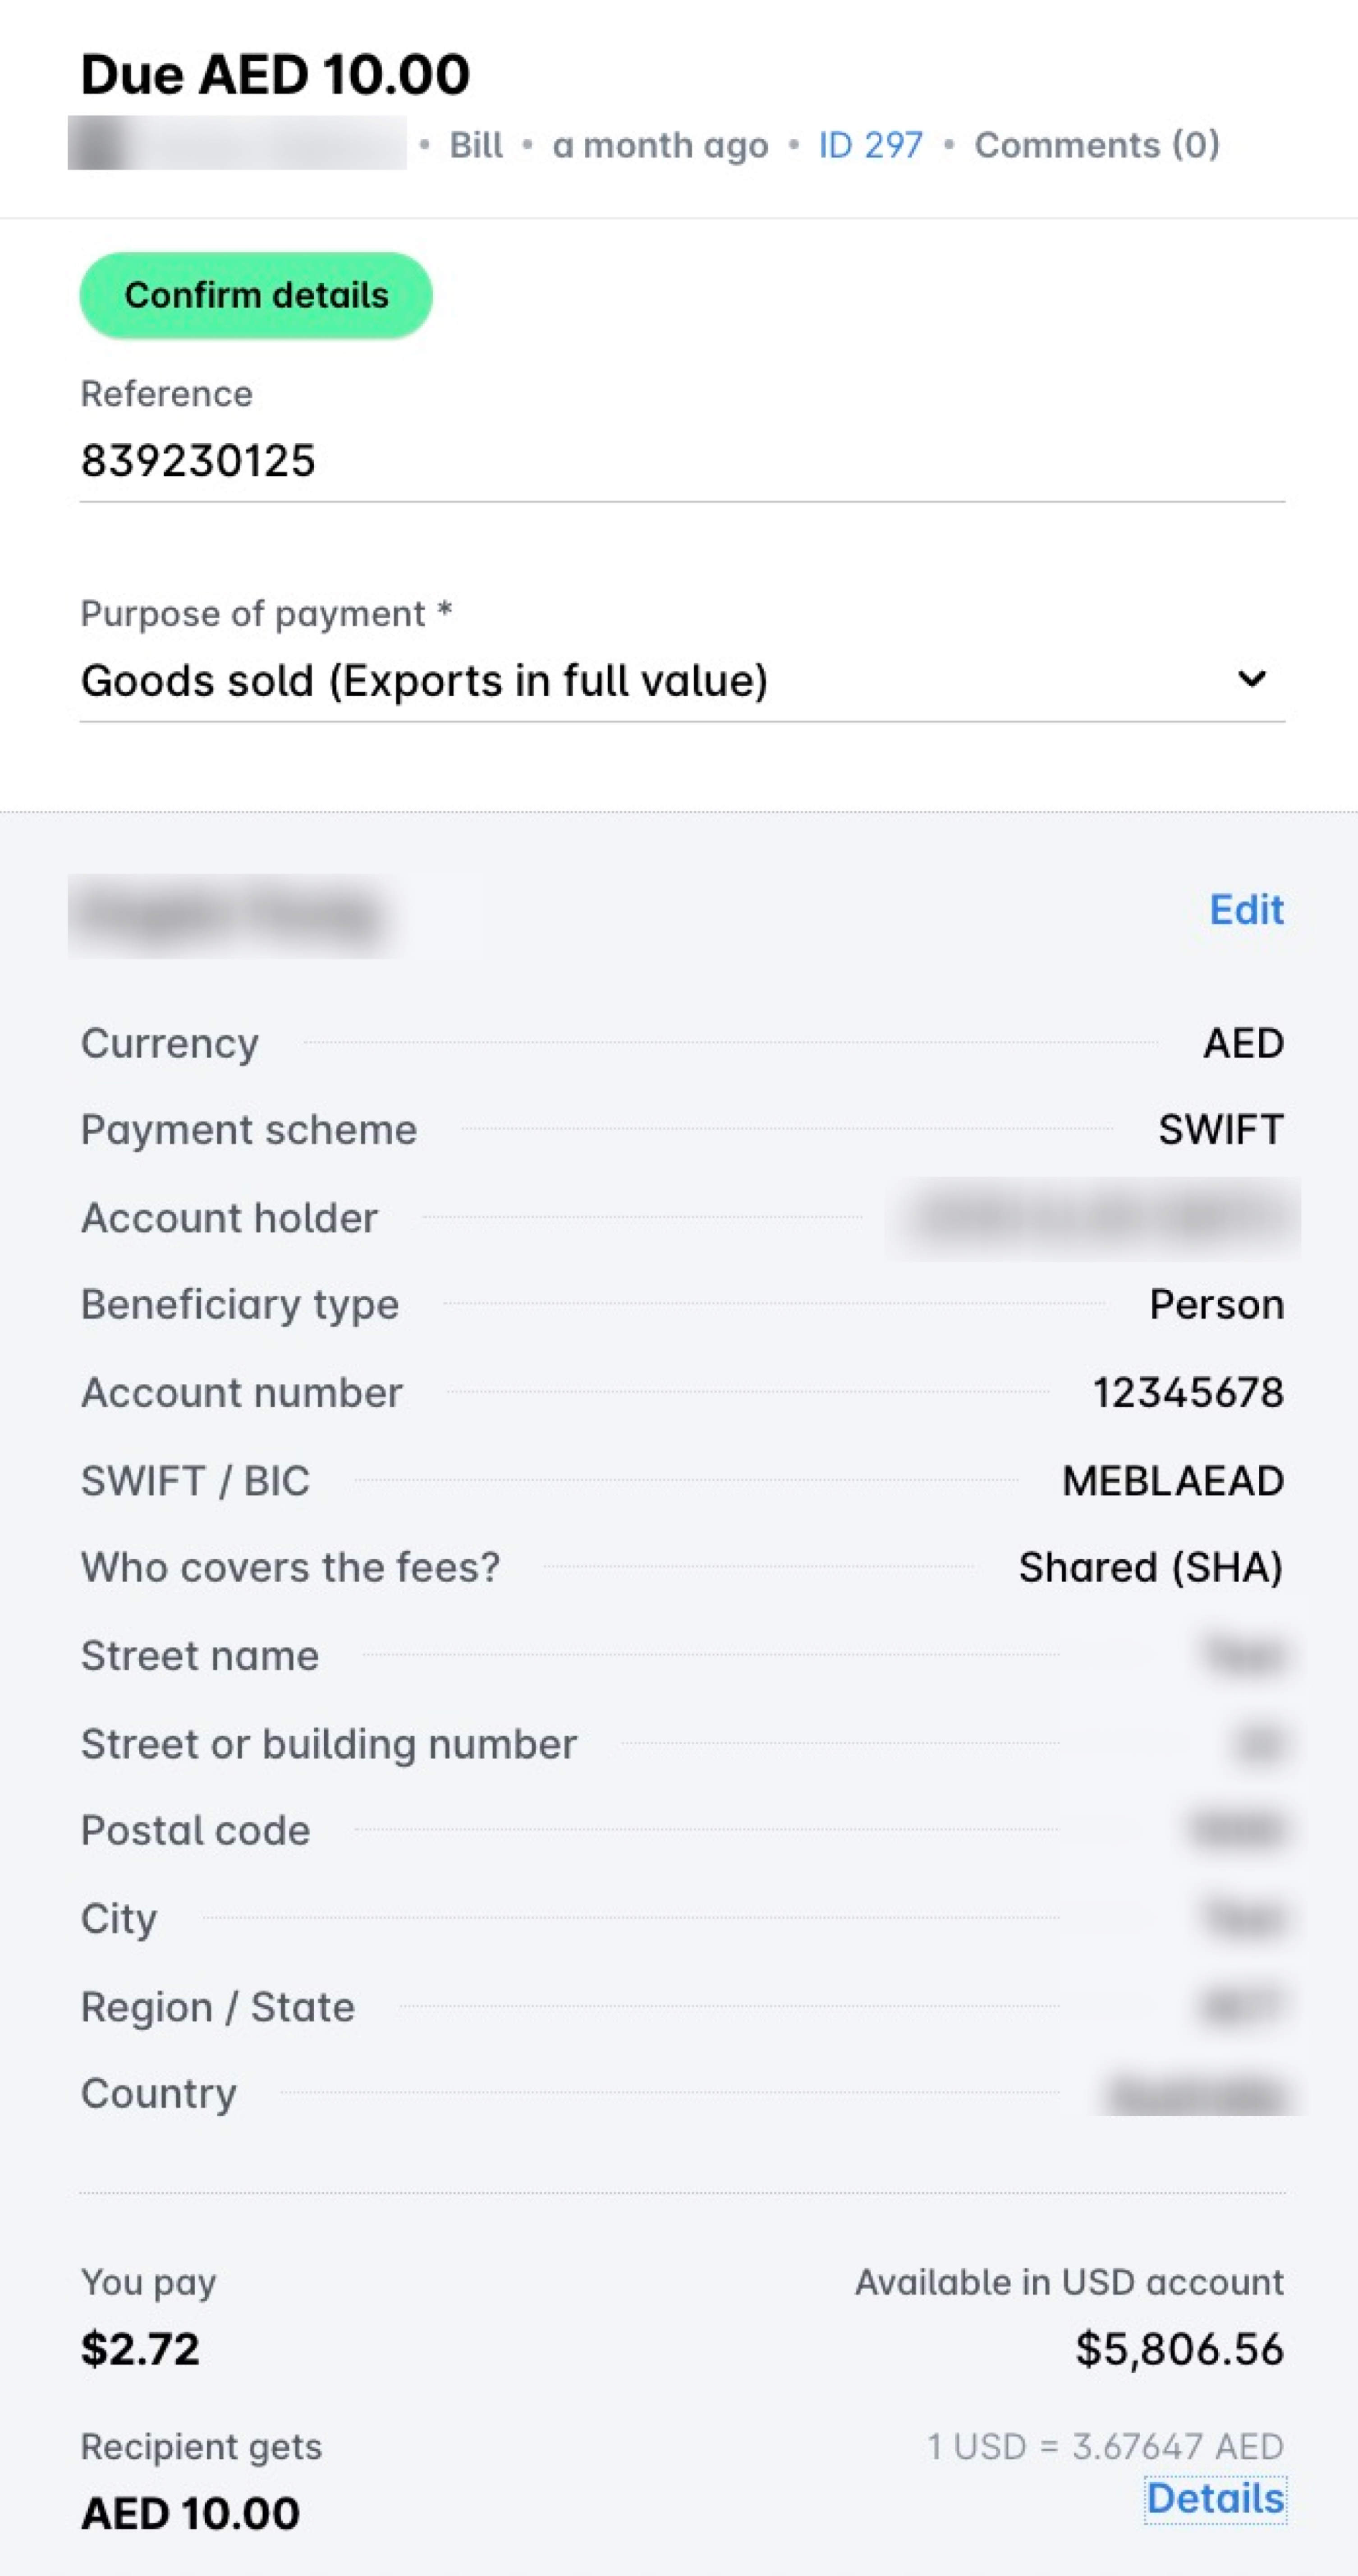
If the destination transfer requirements are not met, Payhawk will display a warning or an error message, prompting you to review and confirm the payment details before proceeding.
If the mismatch relates to Verification of Payee (VoP for EEA) or Confirmation of Payee (CoP for the UK), Payhawk allows you to override the warning and confirm the transfer. However, if payment details are confirmed despite missing or incorrect information, the receiving bank may reject or return the payment due to unmet local regulatory requirements.
The following image shows the option that will allow you to confirm the payment details regardless of a mismatch. For more information, see the articles about VoP or CoP.

To confirm the payment details for an expense:
In the Payhaw Web Portal, go to the Expenses > Pay > Confirm details tab.
Select the expense, review its payment details, and click on Confirm details.

Paying bills or reimbursables set for immediate payment
To authorize and execute a bill payment or reimburse your employees from Payhawk:
In the Payhawk Web Portal, go to the Expenses > Pay > Authorize tab.
Select the expense you want to pay by clicking on it.
If the payment execution method has been set to Pay now, click on Authorize. As a result, you'll receive a push notification from the Payhawk Mobile App for authorizing the payment.
Confirm the payment on your phone to execute.

Paying scheduled bills or reimbursables
If an expense has been authorized for a scheduled payment, it will be automatically executed by the system on the scheduled day if the funds in the respective currency account are sufficient.
Scheduled payments will be executed at 11:01 AM CET on the set day.
If the system has not been able to execute a scheduled payment due to insufficient funds, Payhawk will return the expense under the Pay > Authorize tab and display an error message.
If you need to make a bank transfer for a scheduled bill payment immediately or reschedule it, see the article on managing scheduled payments.
.jpg)
Partially paying expenses with bank transfers
Currently, it is not possible to partially pay a bill and, later on, pay the remaining amount.
A possible workaround is to create a bank expense and adjust the total amount to reflect the partial payment you want to make. You can then process the payment with a note in the Note field stating Payment part 1 for example. When you later want to pay the remaining amount, you can create another bill expense, attach the same invoice, adjust the amount to reflect the remaining balance, and, again, leave a note - for example, Payment part 2.
Another workaround is to split the expense into multiple line items and mark the already paid amount with a minus.