You can customize Payhawk features and defaults from the Overview board in the Settings app. The Overview board provides quick access to fundamental settings and configurations, such as your company's active accounting integration.
The Overview board
The features you can update and access are:
Accounting integration - Click on the displayed current ERP to go to the Integrations page in Settings, where you can manage the connection, edit the current configuration, and more.
Review assistant rules - Click on the field to go to the Review Assistant list of rules, where you can select rules and conditions for expenses that require attention.
Adjust workflows - Click on the field to go to the Workflows page in Settings, where you can modify existing workflows, add or remove approvers, and more.
Manage fields and values - Click on this field to go to the expense fields settings, where you can configure their values, visibility, whether they're required for submission and review, and more.
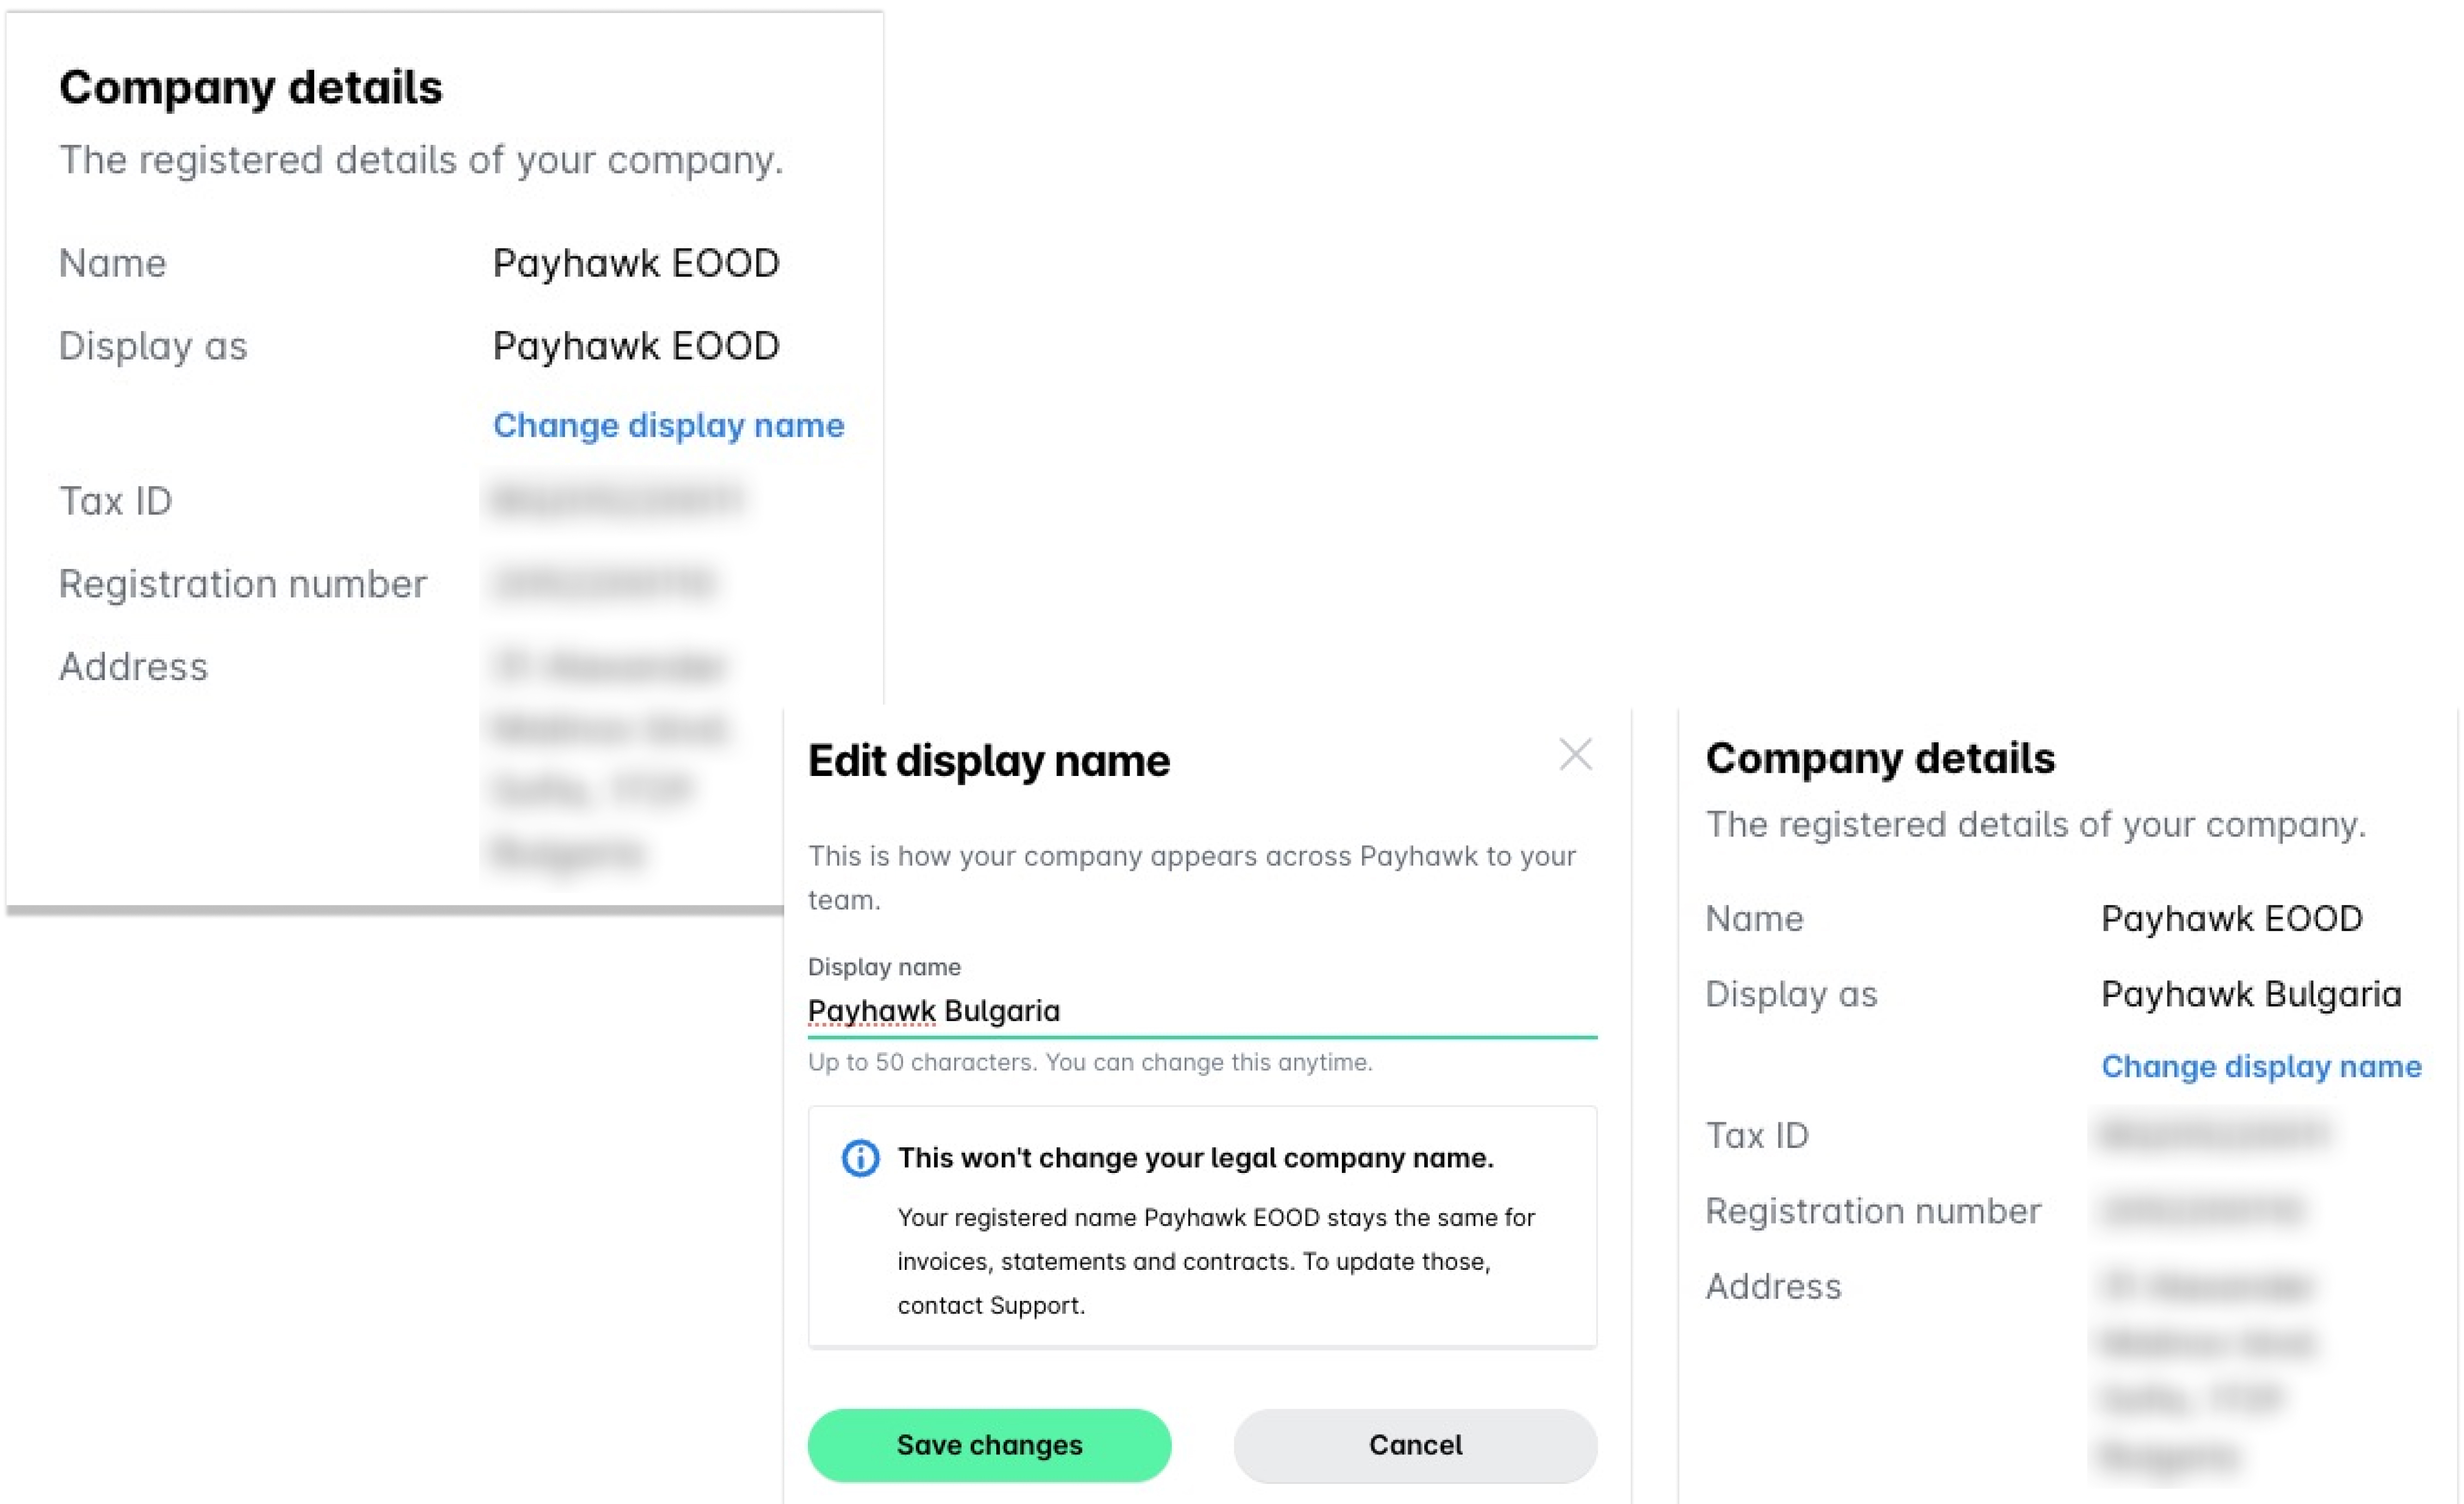
Company details - You can view the name, registration number, address, and entity name of the Payhawk account, and can also change the display name of that entity.
Card shipping address - You can view the current address to which Payhawk cards are sent and edit it if needed.
Billing details - You can view the current address where Payhawk subscription invoices are sent.
Changing the display name of your entity
You can change the name by which the entity appears on your Payhawk account. This name will be visible in the list of entities for group accounts.
Changing the display name of the entity:
Will not change your legal company name.
Does not affect official correspondence. Payhawk will continue to use your legal name in emails, invoices, and other official communications.
Is an option currently available in the Payhawk Web Portal only.
To update the name by which an entity is displayed:
Go to Settings > Overview and click on Change display name.
In the dialog that opens, enter the desired name for the entity.
Click on Save changes.