Now, the Expenses app becomes Spend. The new name is broader in meaning, so Spend can hold every type of spend, and covers everything Spend itself holds, including bills.
Spend types
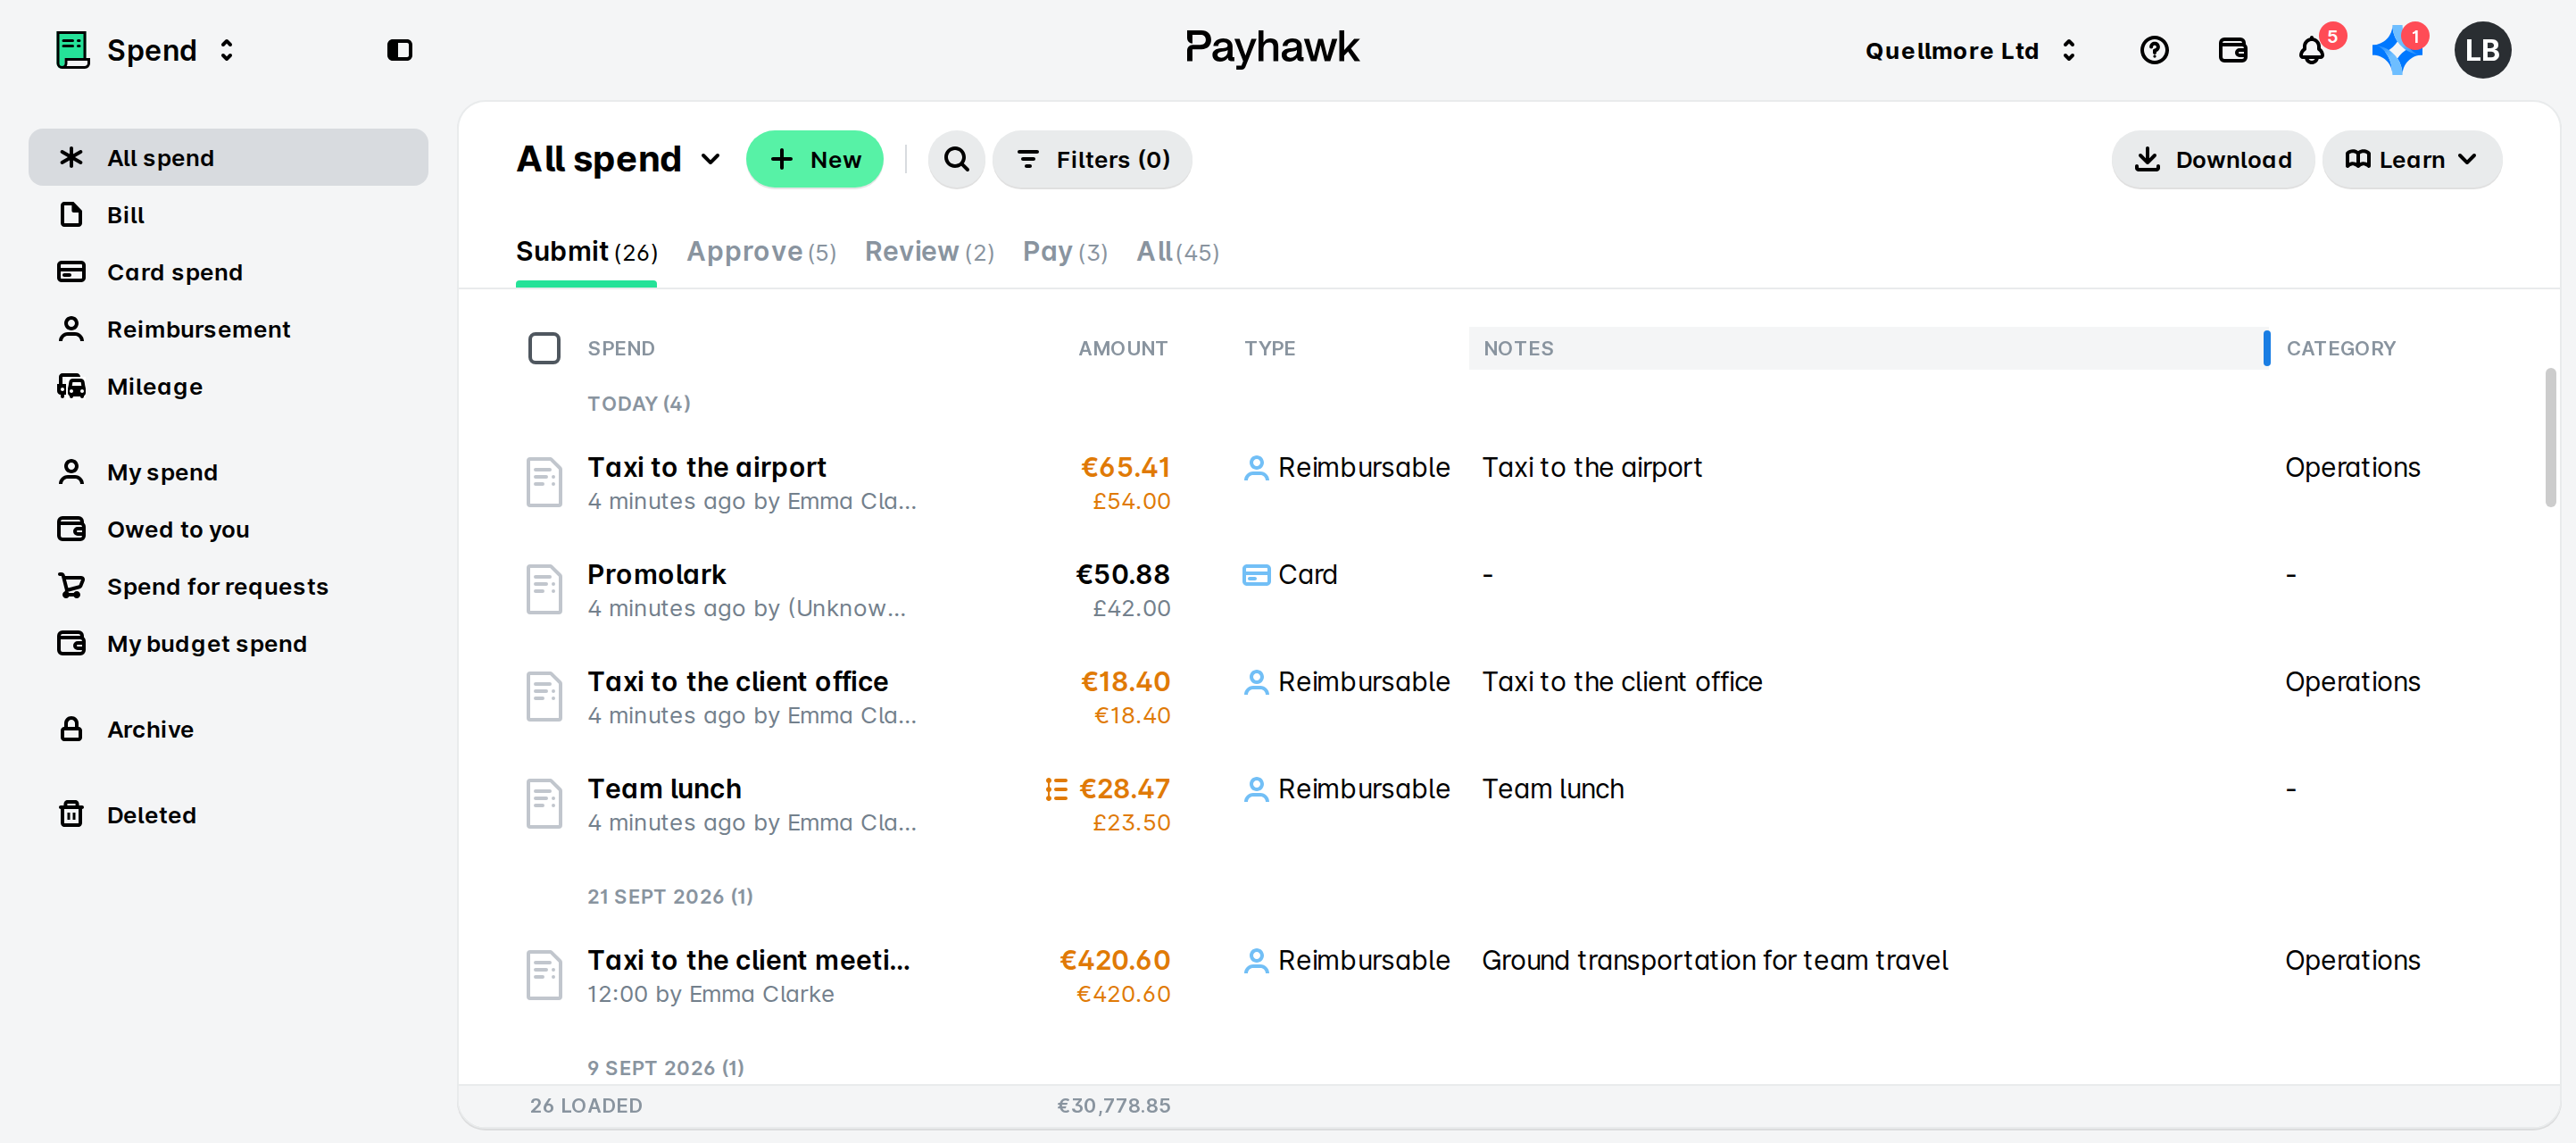
Now, the side panel lists All spend first, followed by the different spend types, such as Bill, Card spend, Reimbursement, and Expense reports.
You can now select a spend type to see only that type, for example, Card spend shows only card expenses, without filtering the expenses.
As before, you only see the spend types that your organization has enabled, for example, if your organization doesn’t use reimbursements, they won’t appear in the side panel under All spend.

Saved views
Now, saved views move into the side panel, which holds the following:
Standard views that come with Payhawk and cannot be changed such as My spend, My reports, My team spend, My team reports, and My budget spend.
Custom views that include any view you create with the + New view button.

You can reorder the views so the ones you use most sit at the top.
A view carries its own built-in filters, thus switching to a different view replaces the filters you have set.
The Spend tabs
As before, the new Spend tabs match the workflow steps enabled for the spend type you are looking at. If a step is not part of the workflow, no tab appears for it, for example, card expenses have no pay step, thus the Pay tab does not appear when you select Card spend.
All spend shows every relevant tab, so you can still work the way you do today with everything in one place.

Working with expense reports
Before, All spend showed expense reports but hid the expenses inside them.
Now, All spend includes every expense, whether or not that expense belongs to an expense report. You can search, filter, review, and approve those expenses directly.
To see how an expense connects to its expense report, open the expense and go to the Related section. For more information on that section, see the article on expense details.
Now, expense reports get their own view under the Spend side panel which lists expense reports only.
To work with an expense report:
Go to Spend > Expense reports in the side panel.
Select the desired expense report by clicking on it. The expenses in that report open in a list.
Select an expense to open its details.
You can submit a single expense from inside the report, or submit the whole report.
Archiving expenses
Now, the Archive tab moves inside Spend. You find it in the side panel, below the saved views, together with Deleted.
Useful resources