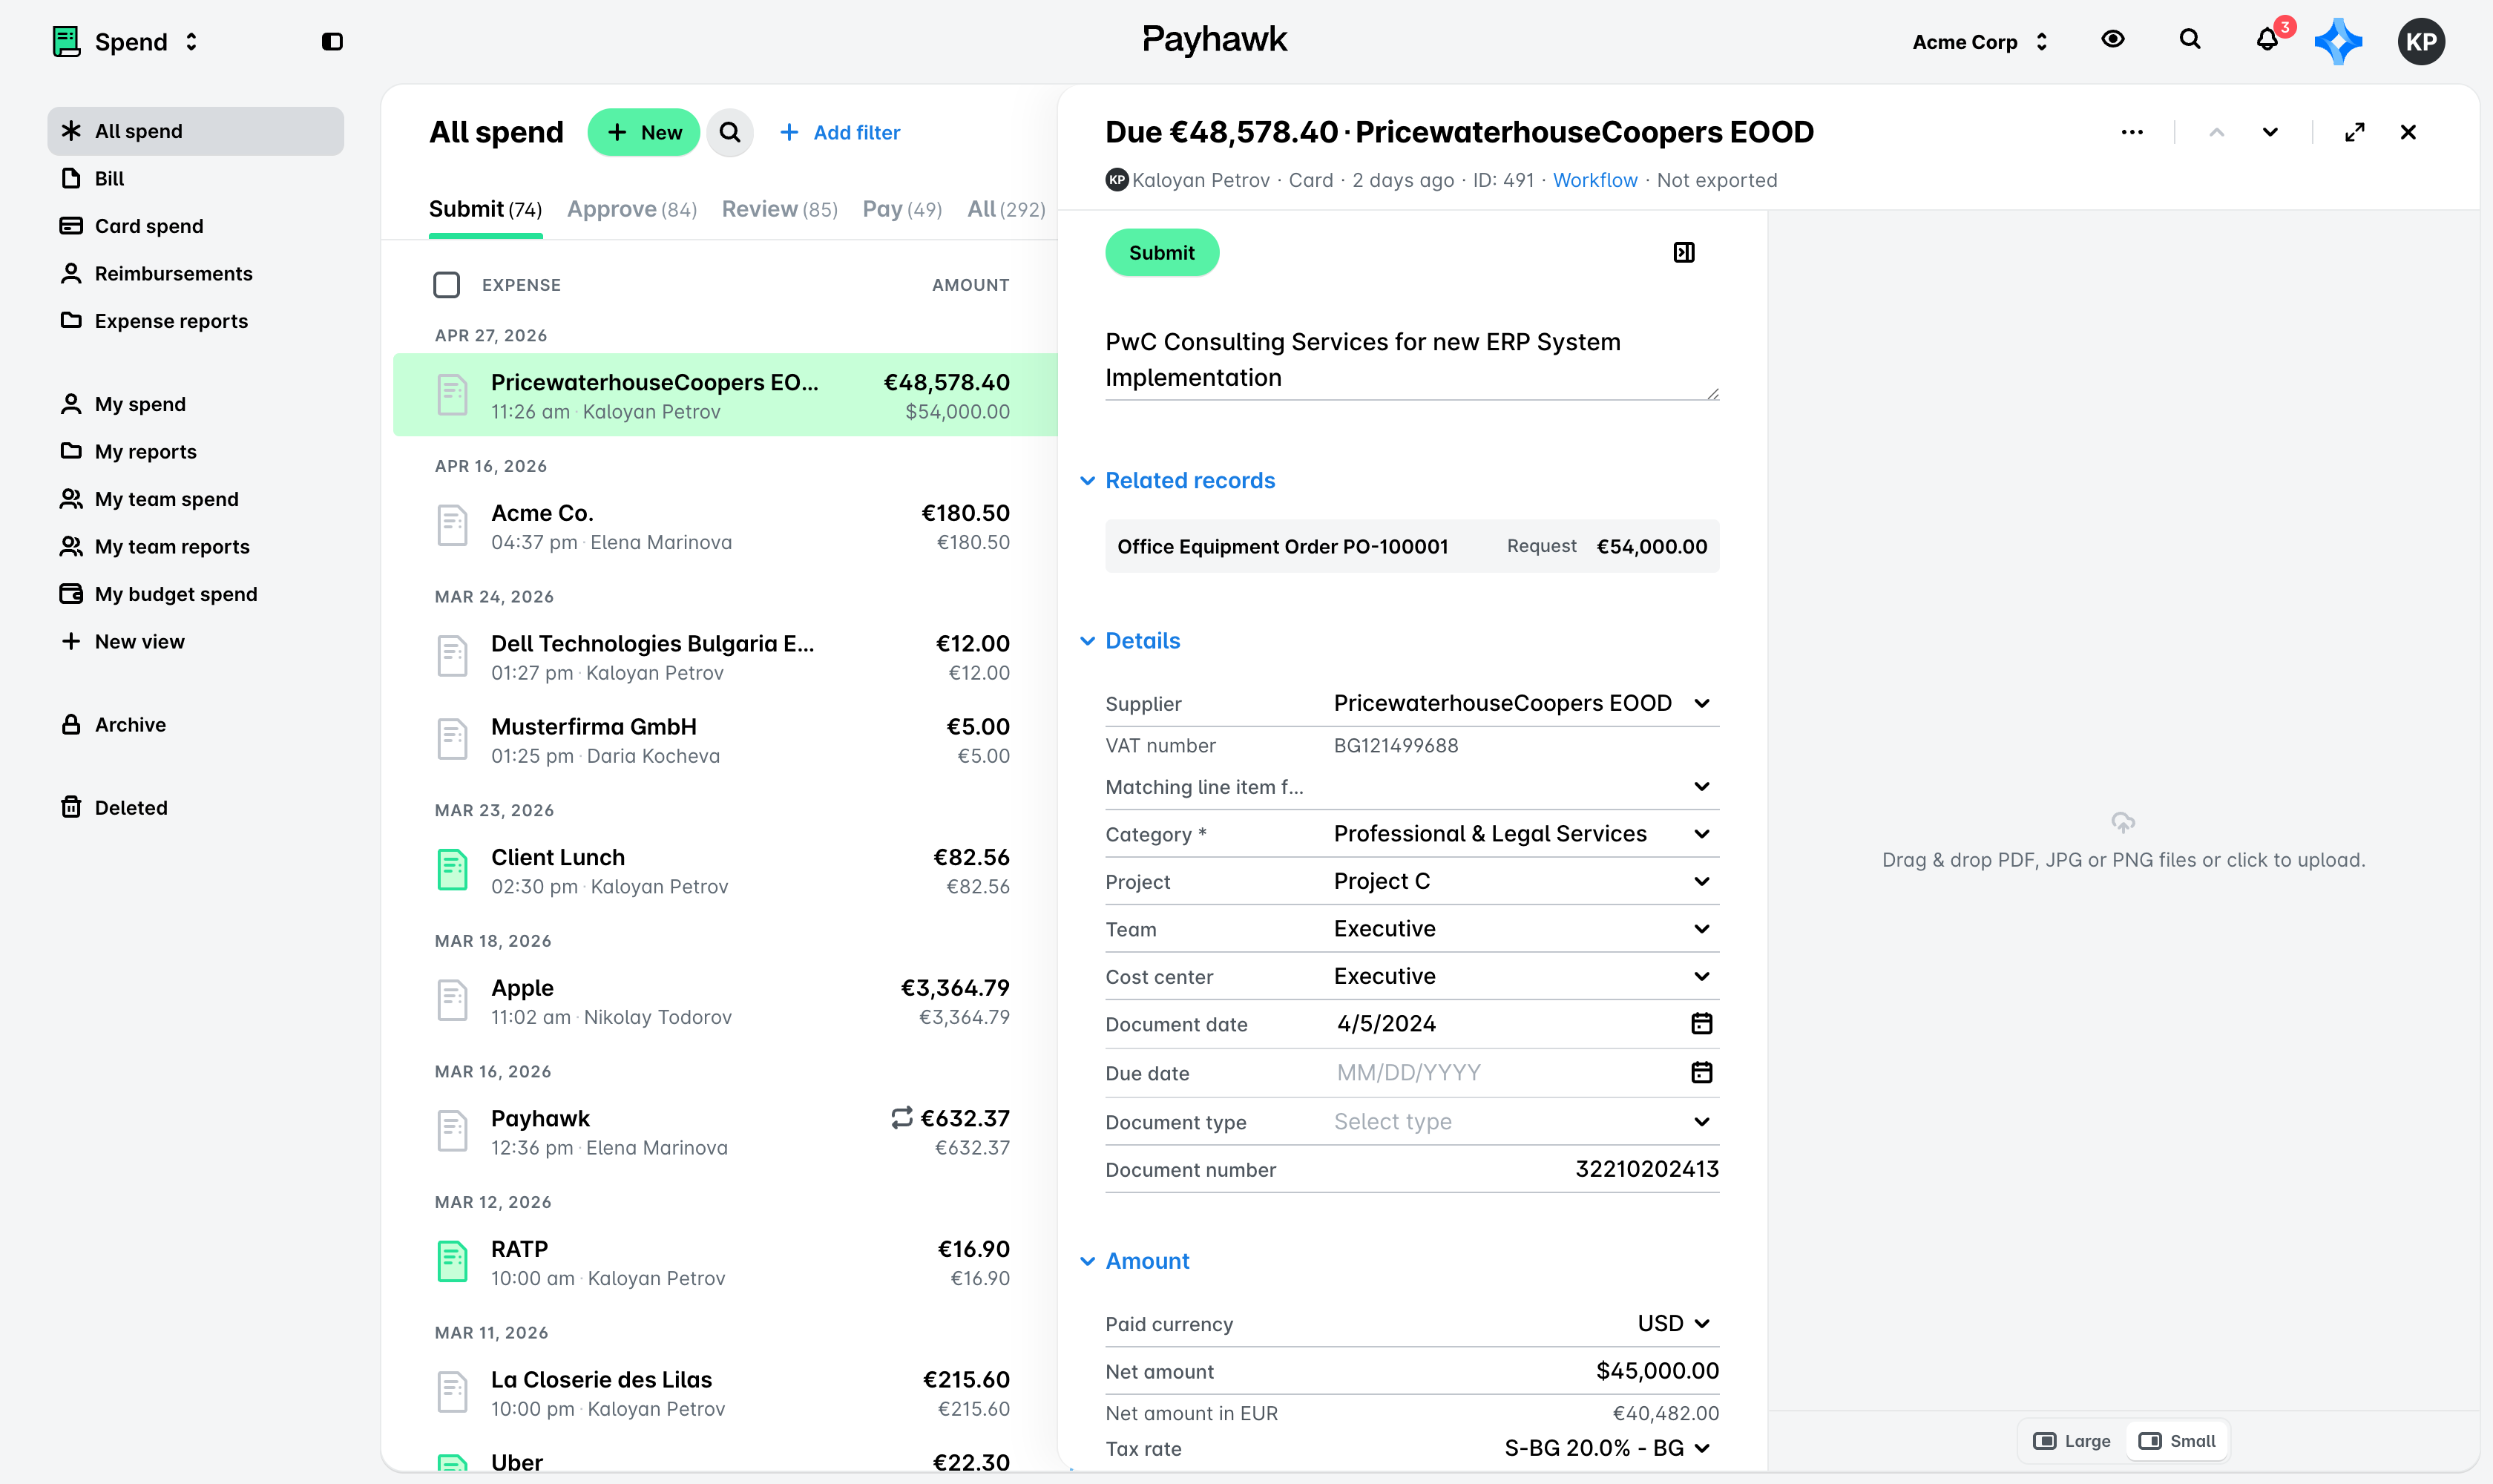
The fields showing the details of an expense remain the same, but now, the expense details themselves display more information on a single screen. The layout, the line items, and the way you move between expenses also change.
The Details section
Now, the Details section of an expense combines the Supplier, Categorization, and Document fields to make the form denser and put together the fields that you fill in.

The Amount section
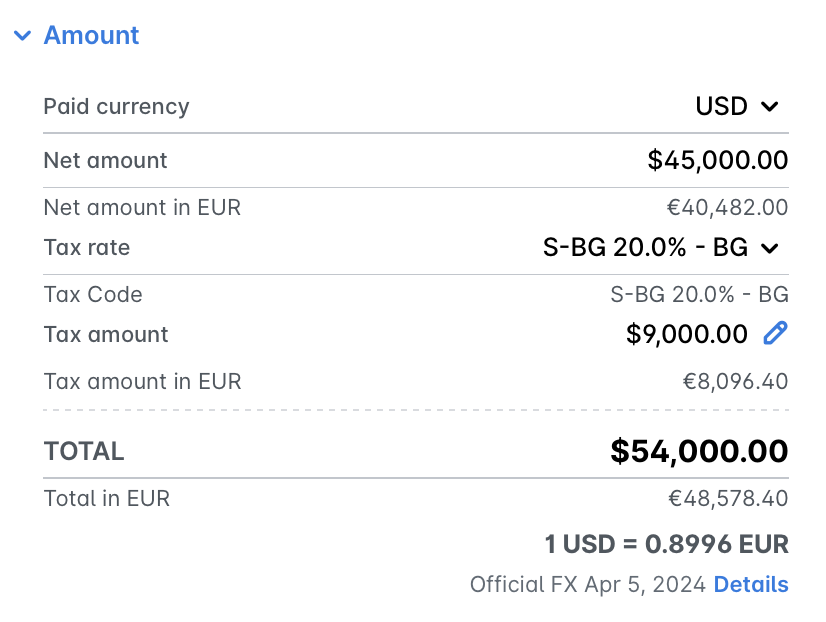
Now, the Amount section shows only one column instead of two like it used to.
As before, the Total field represents the paid amount, and if the paid amount was made in a different currency than the currency of your Payhawk account, the Total field shows the paid amount in both currencies, including the FX rate.
Viewing and editing line items
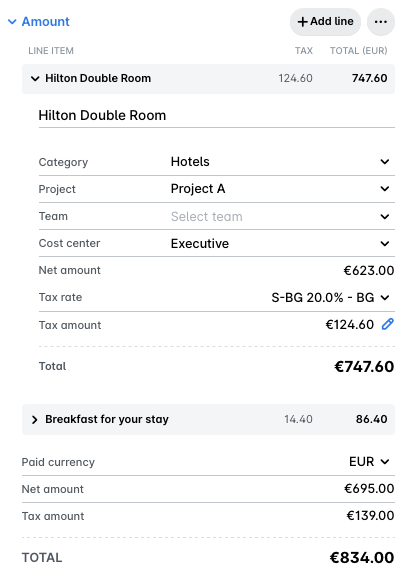
Before, line items were read-only in the Amount section, and changing them meant opening a separate edit screen.
Now, line items become editable on the expense itself. You can change the values directly in the line items rows.
The Related section
The new Related section shows every spend connected to the expense, with a link to each one. Depending on the related spend type, the Related section can include:
The request that started the spend.
A proforma invoice.
A credit note.
The expense report the expense belongs to.
The trip the expense belongs to.
The subscription the expense belongs to.
For example, if an employee requested EUR 54,000.00 and the final invoice arrives at EUR 48,578.40, the section shows both figures in one place. You can see why the amount you are approving differs from the amount that was requested.

The Activity section
Before, you had to switch between a comments view and a workflow view to piece together who approved an expense, who returned it, and what they said about it.
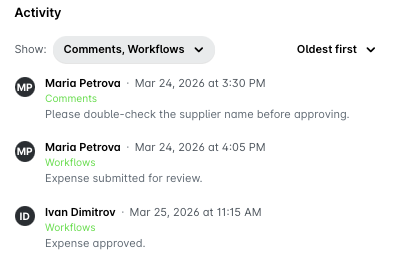
Now, the Activity section shows a combined view of Comments and Workflow by default, in one place.
Using expenses controls
In every expense, you have new controls that allow you to perform actions such as switching between expenses, resizing documents related to expenses, and using full screen mode.
Switching between expenses and using the full screen mode
Now, you can move from one expense to the next with the next and previous controls buttons in the top-right of the panel, without closing the expense you’ve already opened.
You can now also open expenses in full screen mode by selecting the full screen control in the top right of the panel.

These new controls help most when you are working through a queue. You can submit an expense, move to the next, submit that one, and keep going. They also matter in full screen, where closing and reopening each expense costs the most time.
Resizing the expense documents
Now, you can change the size of the expense document by using the Large and Small buttons in the document viewer.
On larger screens, the buttons carry text labels, while on smaller screens, the buttons appear as icons only.
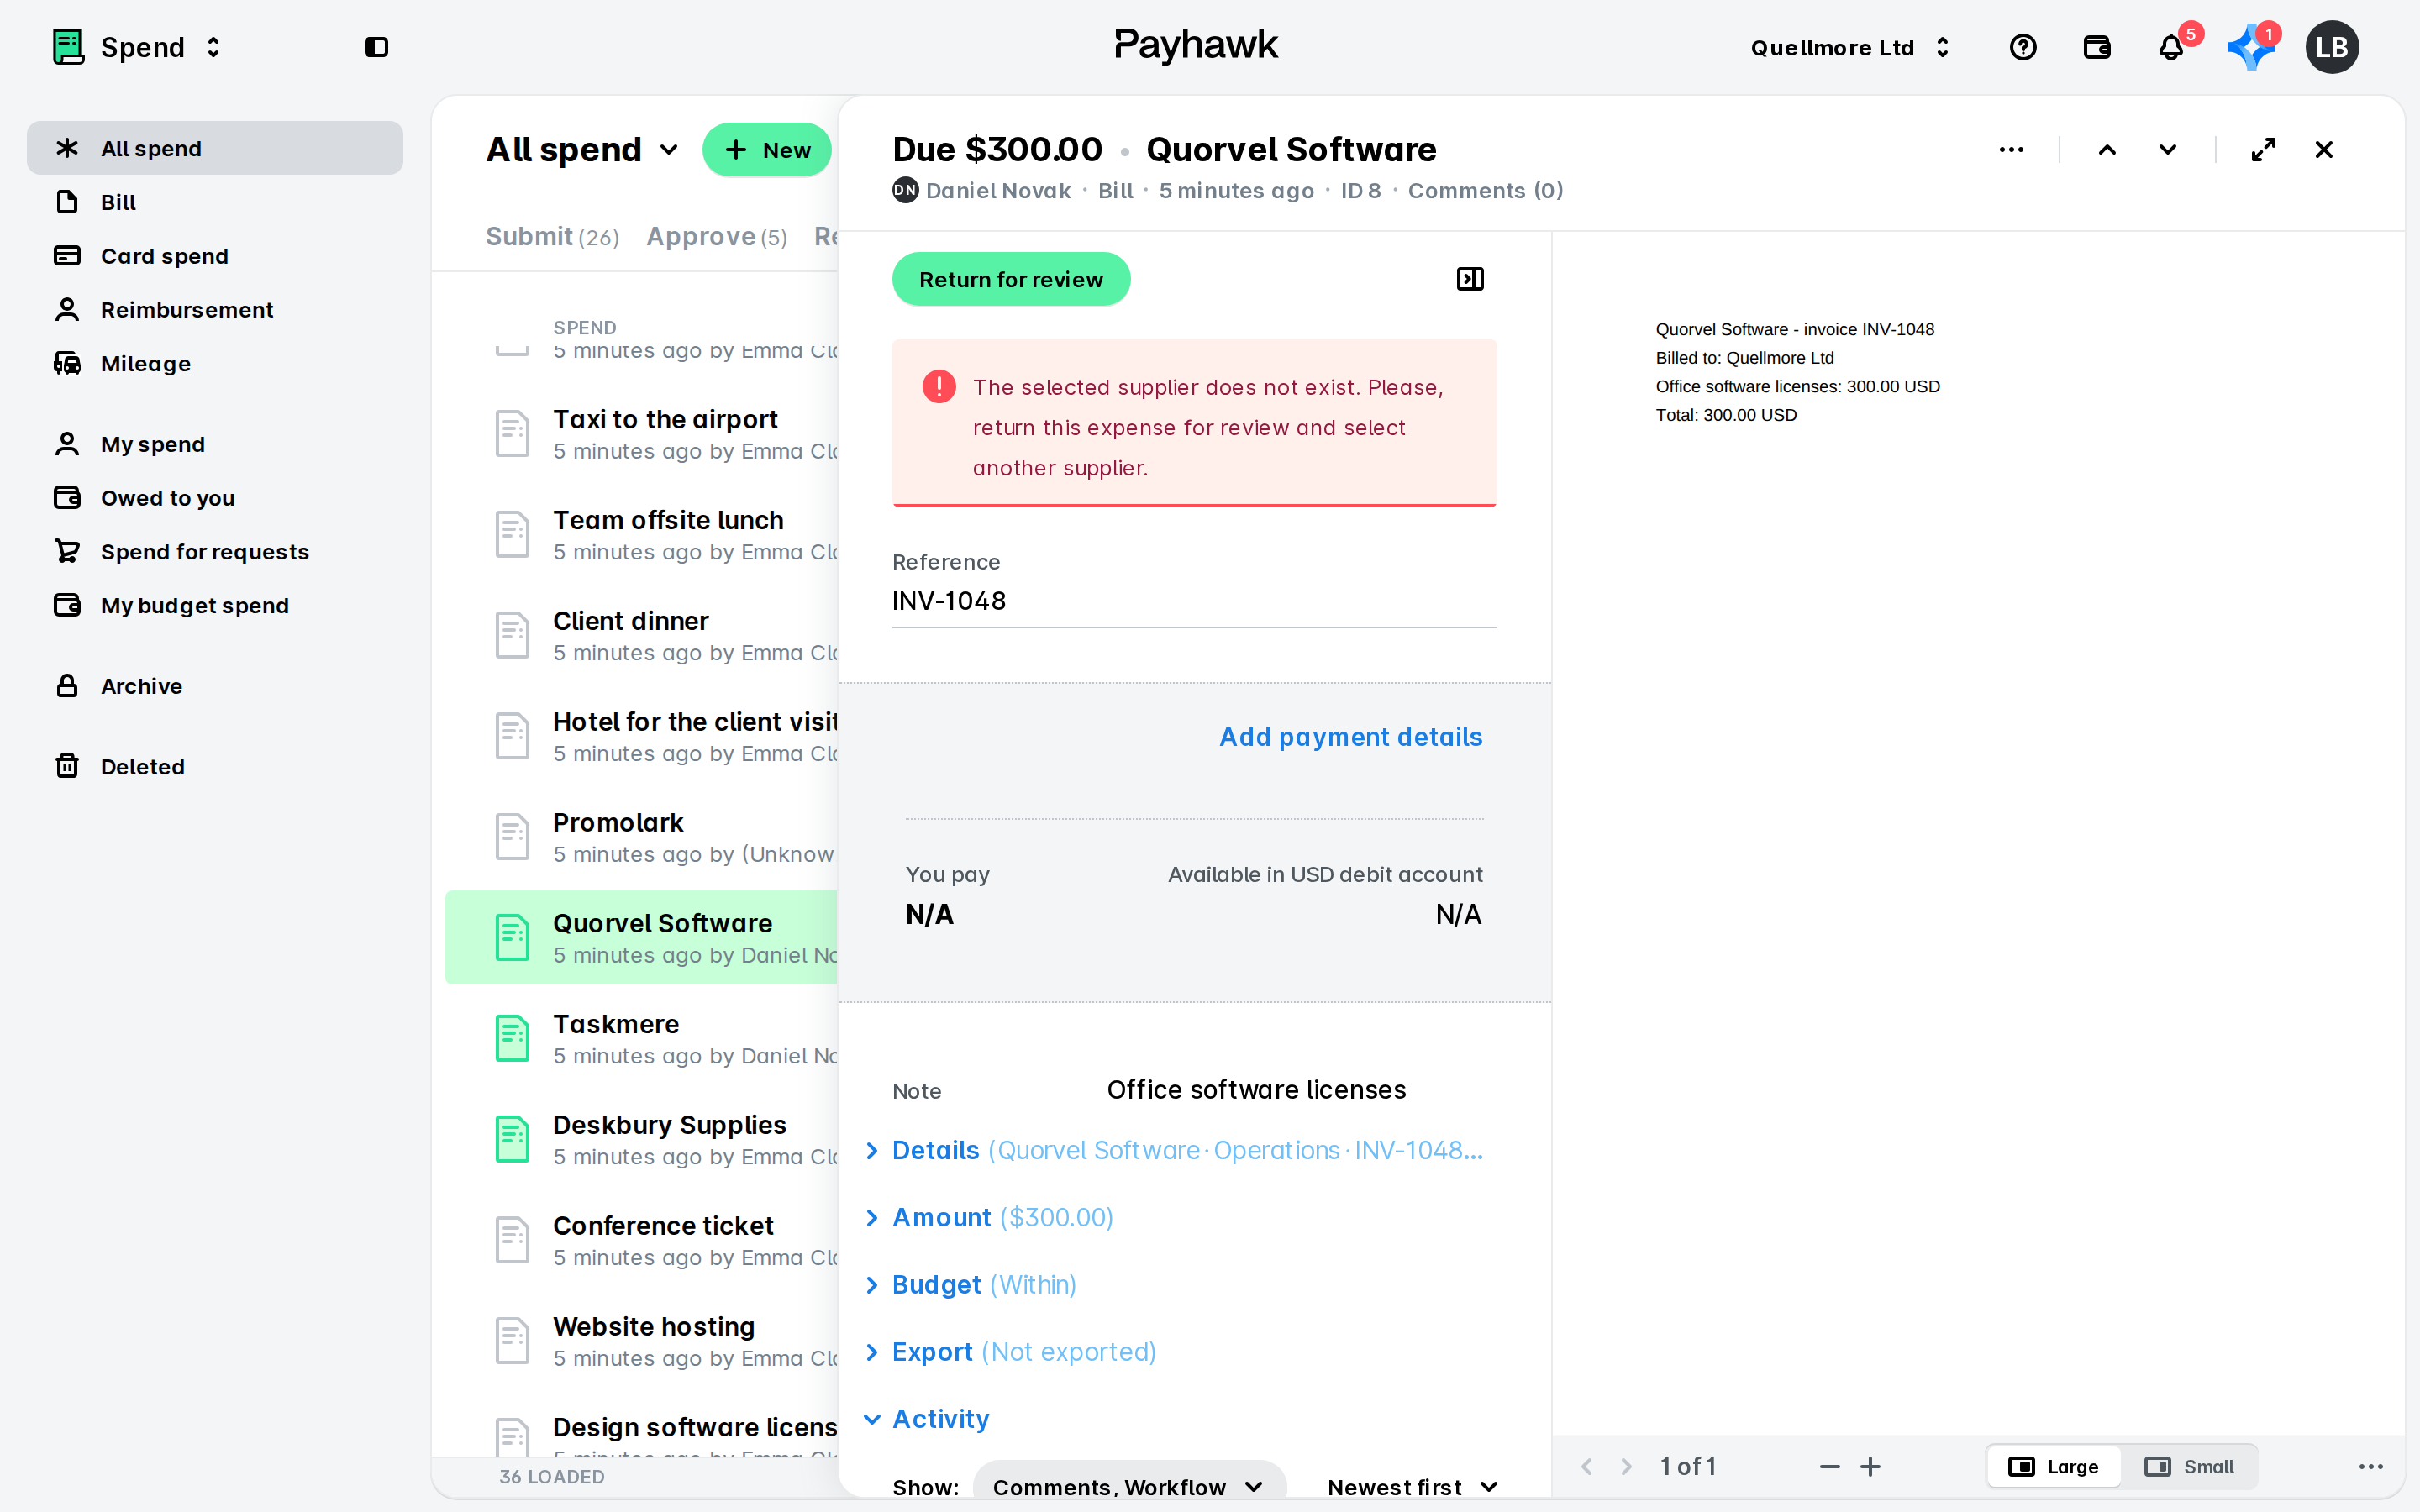
The size you set persists for the rest of your session. It carries across to the next expense you open. Logging out and back in returns the panels to their default size.
Useful resources