In Payhawk, you can configure the fields for the request types used at your company.
This functionality allows you to customize what information is collected during the request submission process and ensures that you gather all necessary data from employees.
Any field added within a request from the Fields library, brings its settings from the Fields library.
Creating fields for request types
You can add different types of fields for request types, depending on the purpose you want those fields to serve for the request.
Creating additional information fields for request types
You can add additional information fields to help you gather more context about the request and ensure it follows the correct workflow.
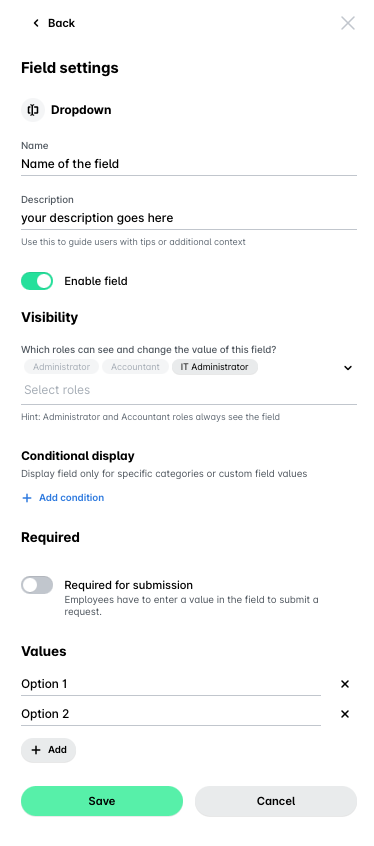
To create additional information fields:
In the Payhawk Web Portal, go to Settings > Request types.
Select the desired request type by clicking on it, for example, Hardware.
In the Fields tab, under Additional information, click on + Add.
In the dialog that opens:
Select a type for the field by clicking on one of the available options: Dropdown list, Date or Text.
Enter a name for the field.
Enter a short description for the field.
Under Visibility, select from the drop-down list the roles which will use this field.
Under Required:
Switch on the Required for submission toggle button for submitters to be obliged to provide a value for the field.
Switch on the Required for review toggle button for reviewers to be obliged to provide a value for the field.
Under Values, click on + Add to add the values for this field. You can also switch on the Enable Other option toggle button to allow employees to enter free text input.
Click on Save.
Additional fields are present within the request itself and are not shared across the fields in the Fields library.
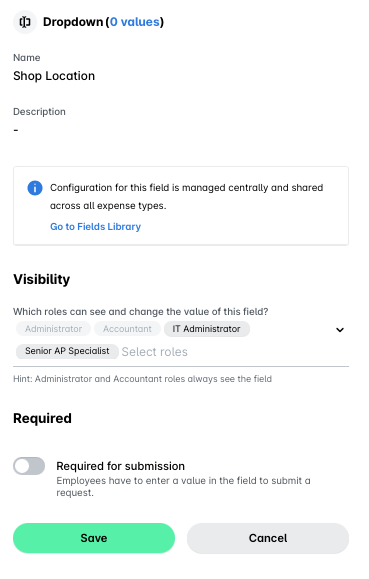
Creating categorization fields for request types
You can add categorization fields which you can use for accounting and reporting categorization.
To add categorization fields:
In the Payhawk Web Portal, go to Settings > Request types.
Select the desired request type by clicking on it, for example, Hardware.
In the Fields tab, under Categorization, click on + Add.
In the dialog that opens:
From the drop-down list, choose which field will be added, for example, Location.
Under Visibility, from the drop-down list, choose which roles will use this field, for example, IT Administrator and Senior AP Specialist.
Under Required:
Switch on the Required for submission toggle button for submitters to be obliged to provide a value for the field.
Switch on the Required for review toggle button for reviewers to be obliged to provide a value for the field.
Click on Save.
Setting workflows for request types
You can set approval workflows for request types from the Workflow tab of the respective request type. For example, to configure the workflow for the Hardware request type, navigate to Settings > Request types > Hardware > Workflow > Edit workflow.
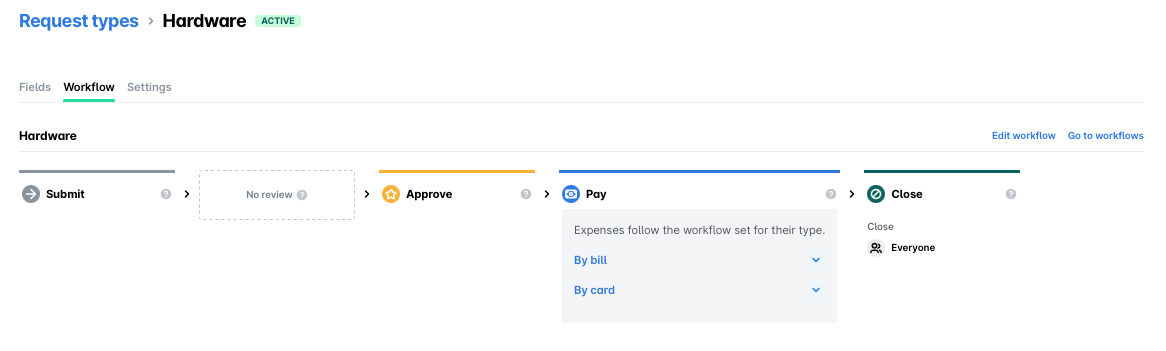
Alternatively, you can set approval workflows for request types from the Workflow tab in Settings. For example, to configure the workflow for the Hardware request type, navigate to Settings > Workflows > Requests > Hardware > Edit workflow.