Commonly, expenses that are placed in the same accounting category have the same tax rate. In Payhawk, you can associate an expense category with a default tax rate. In this way, the system will be able to apply the default tax rate to the expense category once the expense category is suggested by Payhawk's data extraction tool.
Creating tax rates
To create a default tax rate and apply it later on to an expense category in Payhawk:
Log in to the Payhawk Web Portal.
Open the app switcher in the top-left corner and go to the Settings > Fields library.
Select Tax rate by clicking on it.
Click on the + Add rate button.
Enter the tax name, code, and rate.
Click on Save.
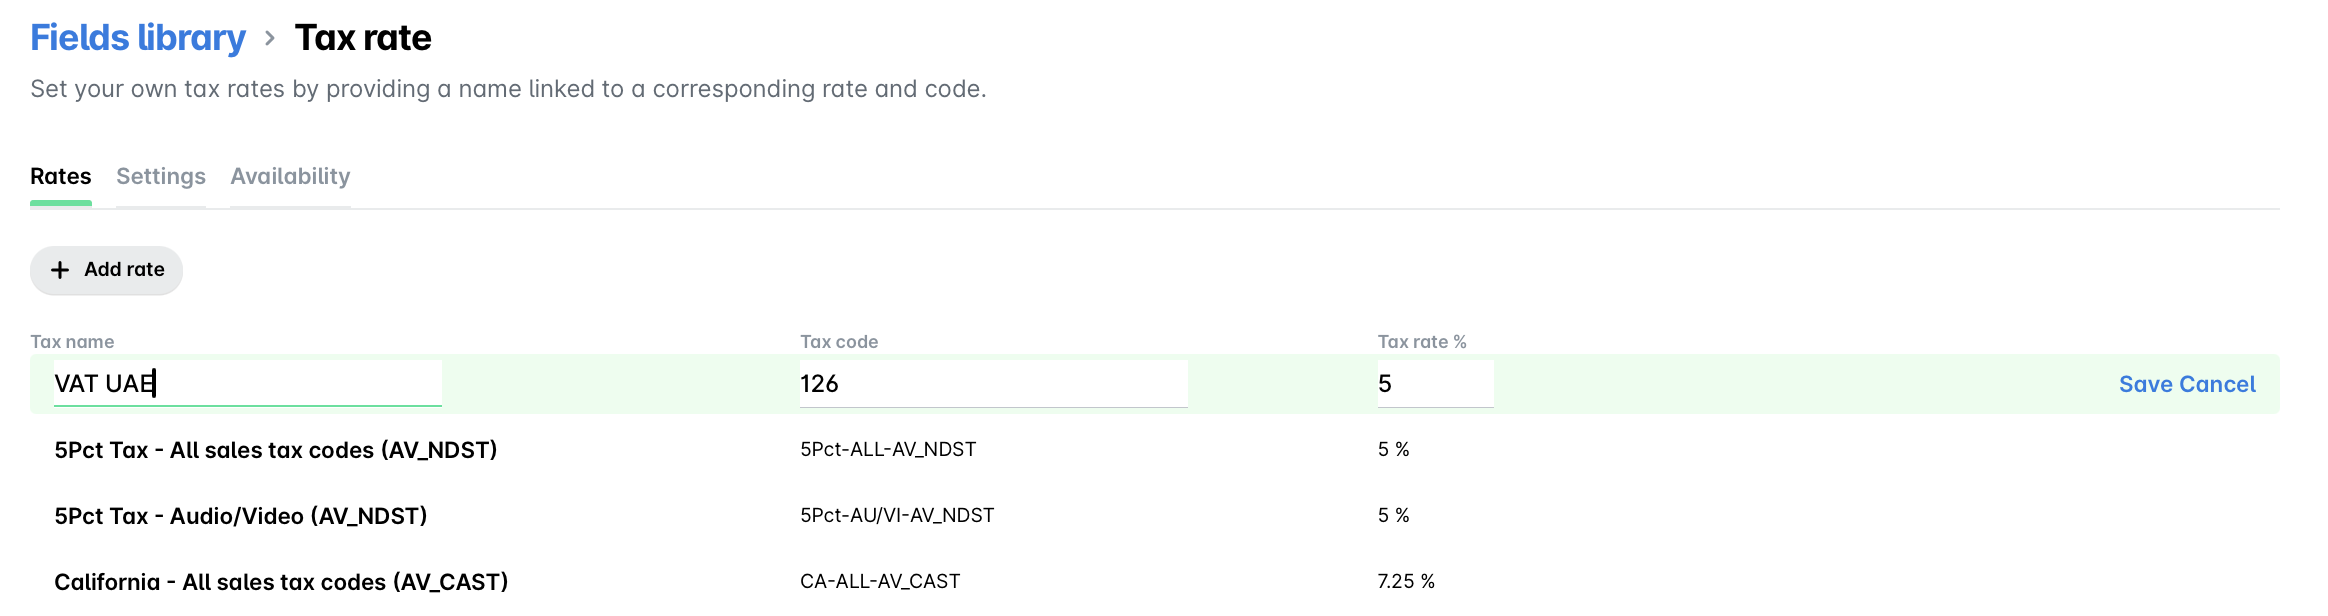
As a result, you can apply the newly created default tax rate to existing or new expense categories. For Canadian taxes, for example, you can create custom tax rates such as TPS 5% (tax on products and services) within Payhawk.
Editing and deleting tax rates
To edit or delete an existing tax rate in Payhawk:
Open the app switcher in the top-left corner and go to the Settings > Fields library.
Select Tax rate by clicking on it.
To edit the tax rate, hover over it and click on the Edit icon. Update the desired information and click on Save.

Alternatively, to delete the tax rate, hover over it and click on the Trash icon. In the dialog that opens, select the checkbox and click on Delete rate to confirm your choice.

Setting visibility for tax rates
You can control which employees can see and select a tax rate and set the tax rate visibility the same way you do for expense categories and custom fields.
To set the visibility for one or more tax rates:
In the Payhawk Web Portal, go to Settings > Fields library.
Select Tax rate by clicking on it.
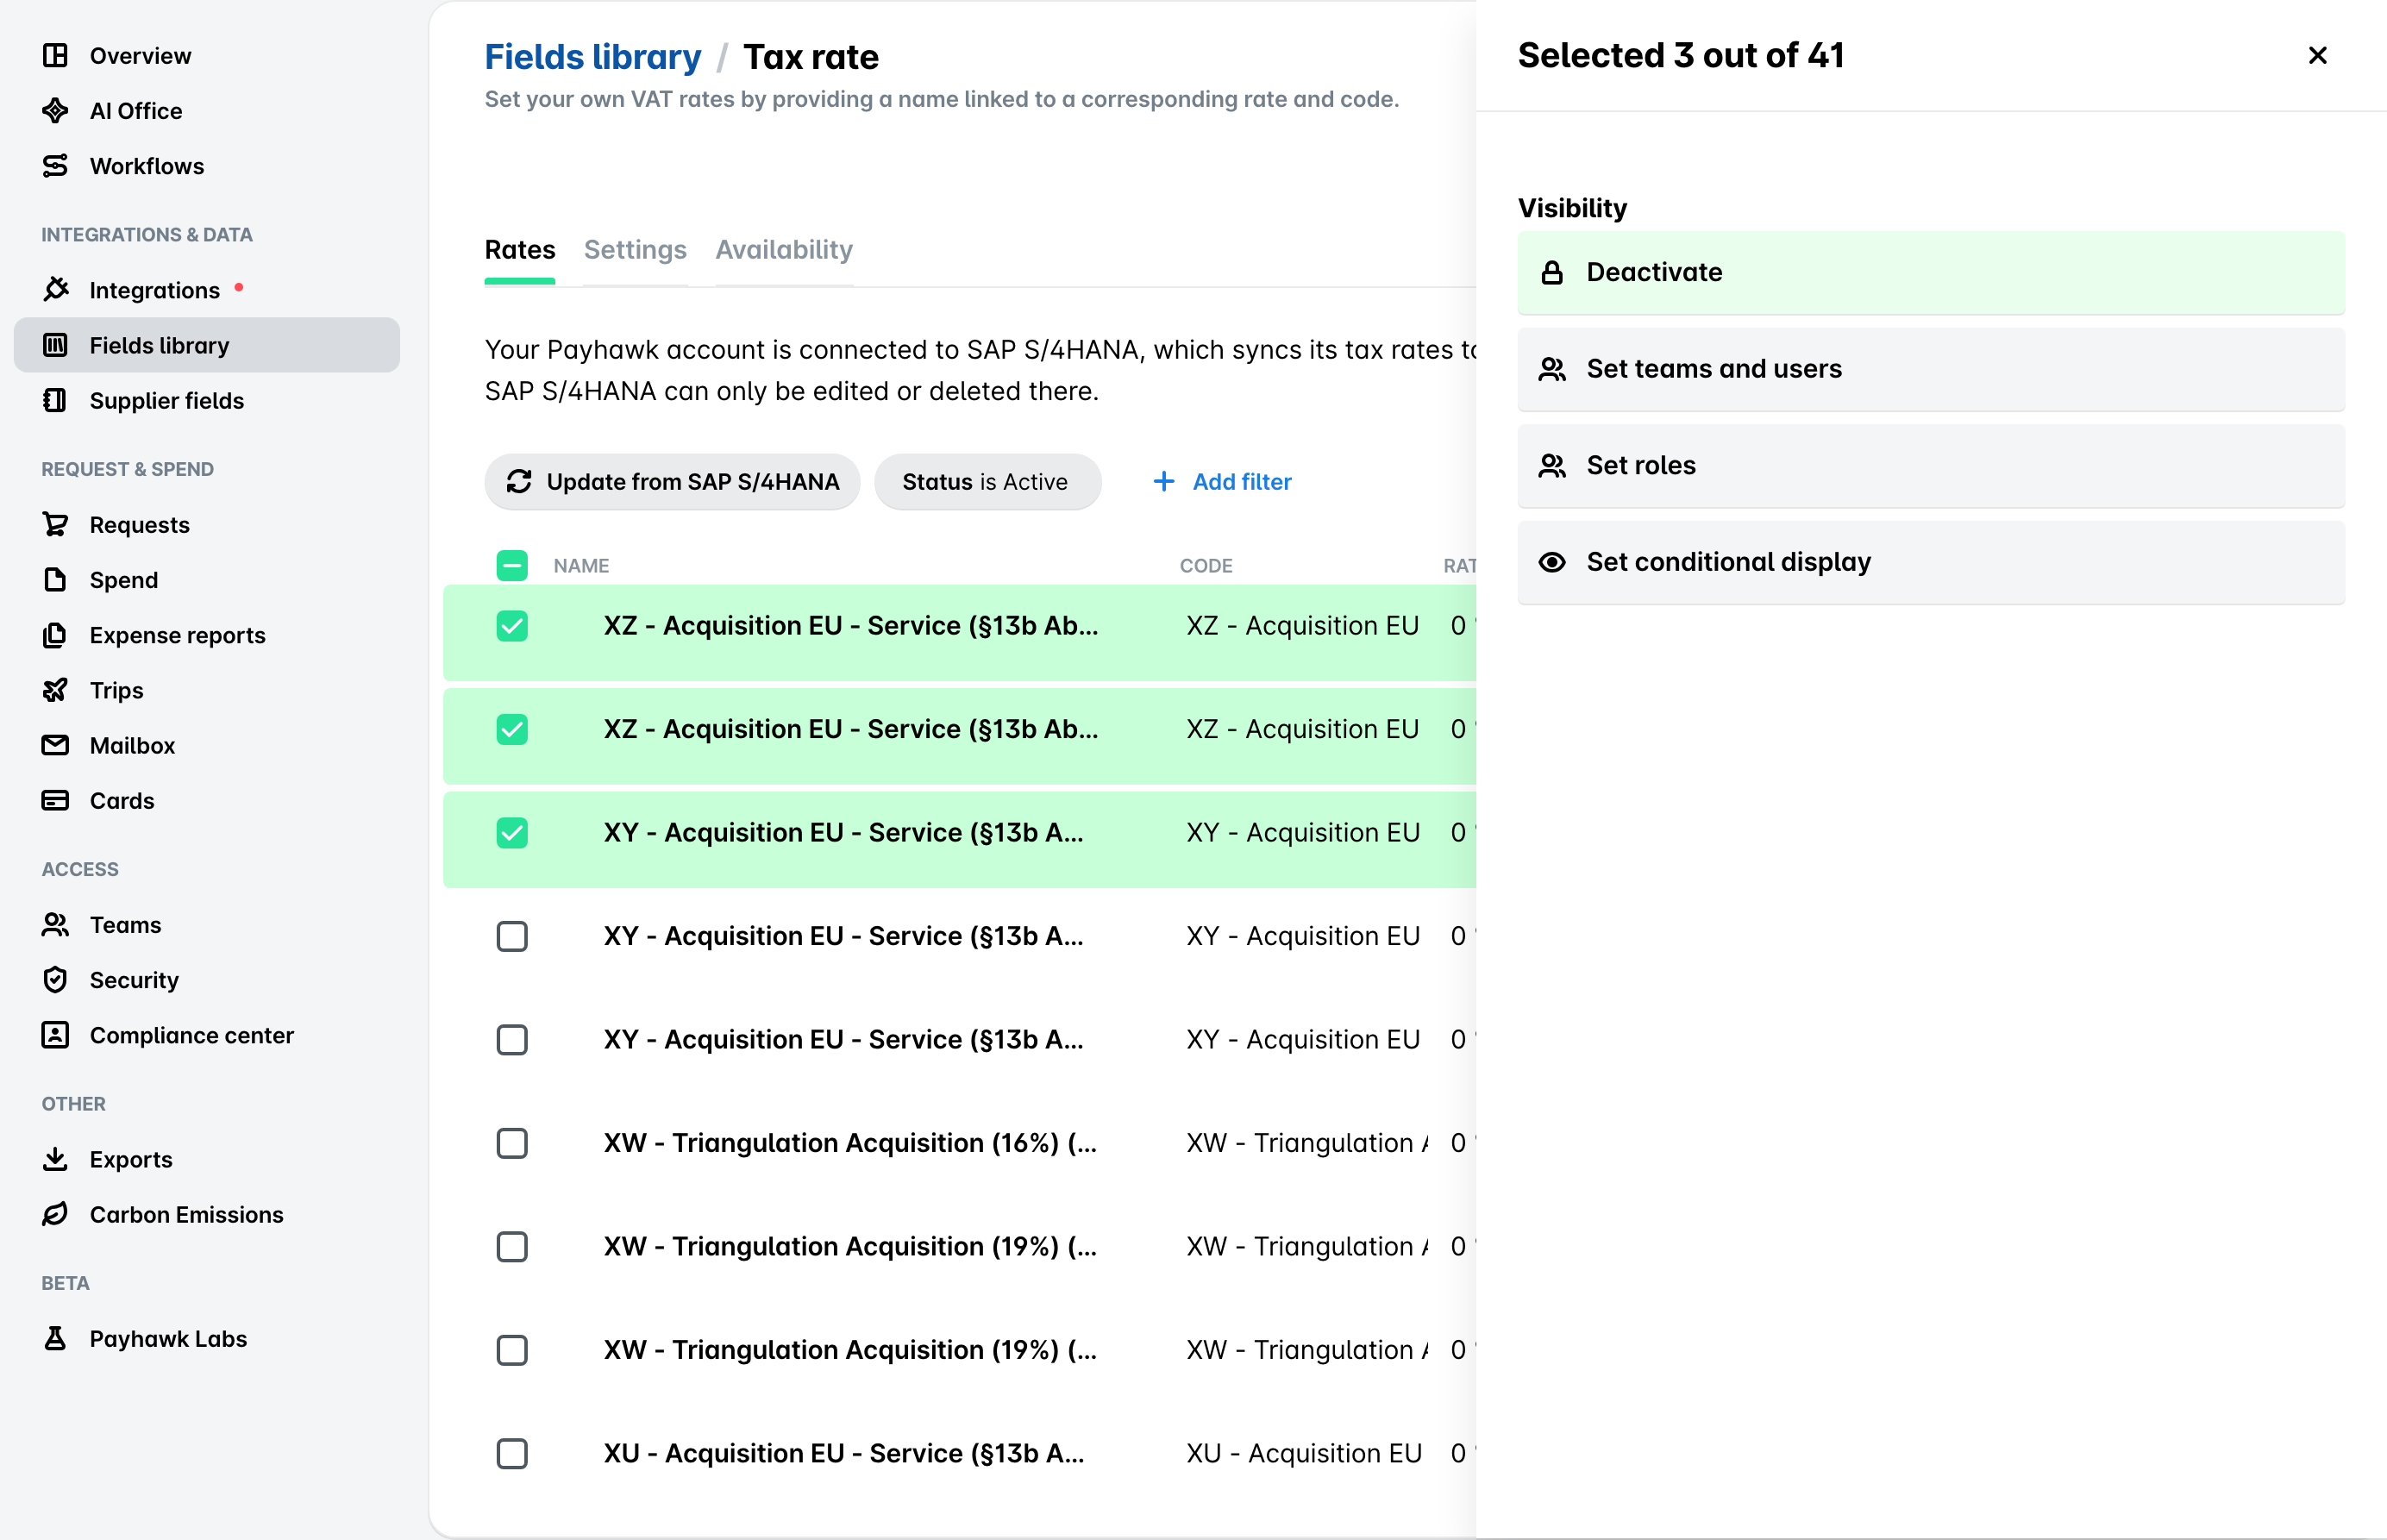
In the Rates tab, select the checkboxes next to the tax rates you want to configure.
In the panel that opens, under Visibility, select:
Deactivate to hide the selected tax rates from all employees. You can reactivate a deactivated rate at any time.
Set teams and users to define which teams or specific users can see and select the tax rate.
Set roles to define which Payhawk roles can see and select the tax rate.
Set conditional display to define when the tax rate is visible, based on the value selected in another field.
Click on Confirm.
To view and reactivate tax rates:
In the Payhawk Web Portal, go to Settings > Fields library.
Select Tax rate by clicking on it.
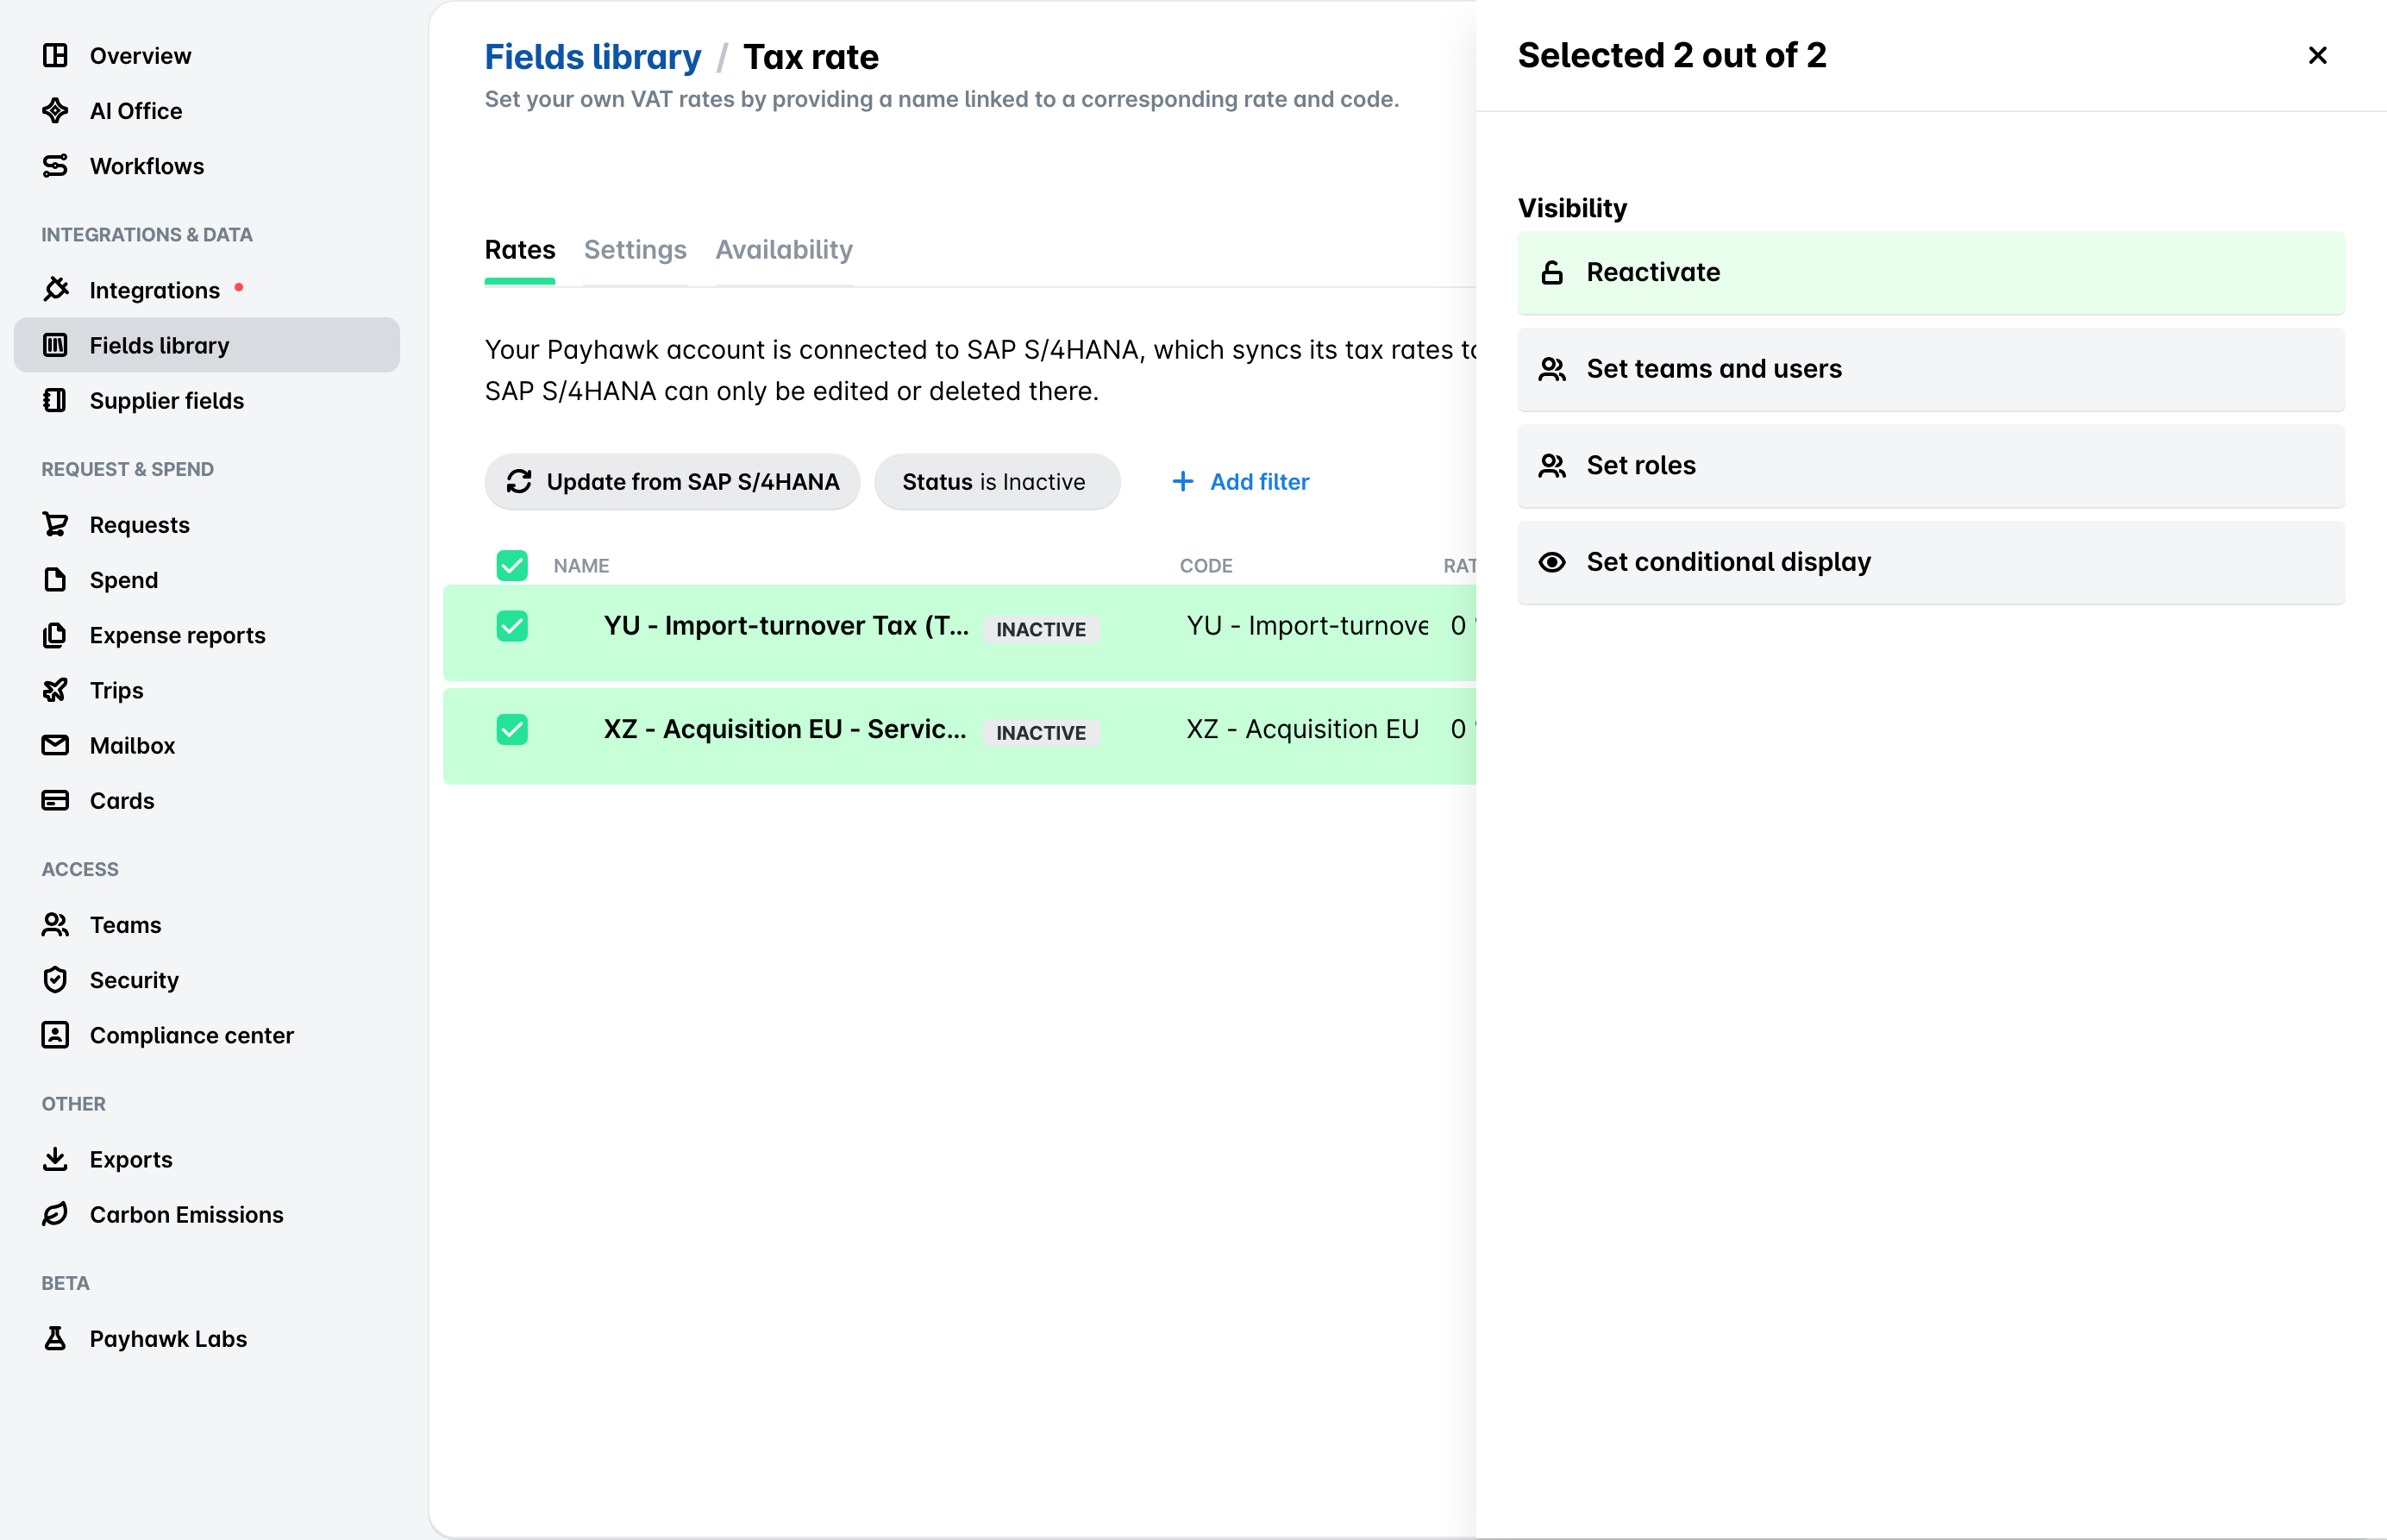
Click on + Add filter.
Select Status, choose Inactive, and click on Done.
Select the checkboxes next to the tax rates you want to reactivate.
In the panel that opens, under Visibility, select Reactivate.
Click on Confirm.
You can also hide specific tax rates from a single expense or request type (for example, Card payments), without deactivating them company-wide. For more information, see managing values in expense types.