You can view and manage the values which have been shown for each expense type from the specific expense type Fields tab.
You can show and hide values applicable for a specific field in the expense type. If you need to add new values for expense types, go to the Fields library.
Hiding values for expense types
To hide values for specific expense types:
In the Payhawk Web Portal, go to Settings > Expense types.
Select the desired expense type by clicking on it, for example, Bill.
Select the desired field by clicking on it, for example, Category.
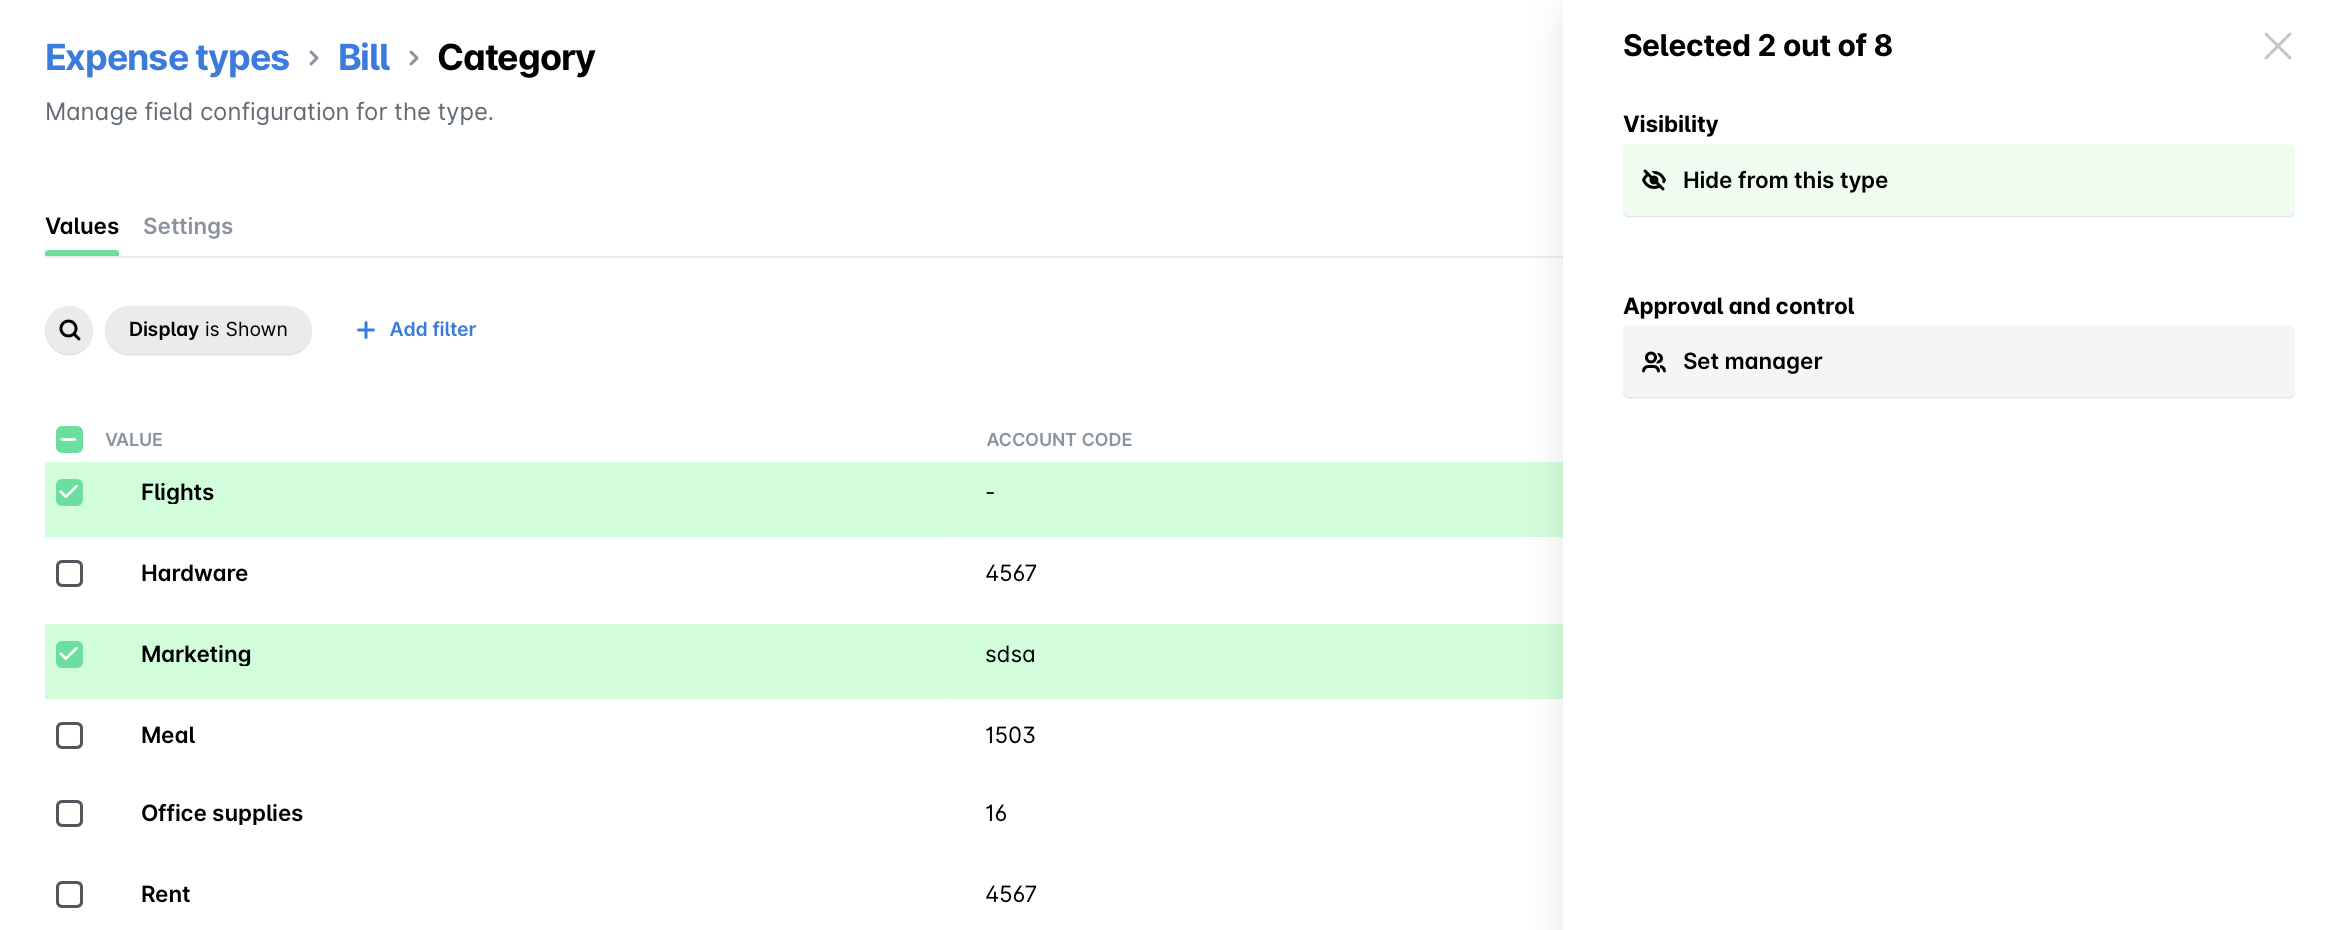
In the Values tab, select the checkboxes next to the values you want to hide, for example, Flights and Marketing.
In the dialog that opens, under Visibility, click on Hide values.
Unhiding values for expense types
To unhide values for specific expense types:
In the Payhawk Web Portal, go to Settings > Expense types.
Select the desired expense type by clicking on it, for example, Bill.
Select the desired field by clicking on it, for example, Category.
In the Values tab, click on + Add filter.
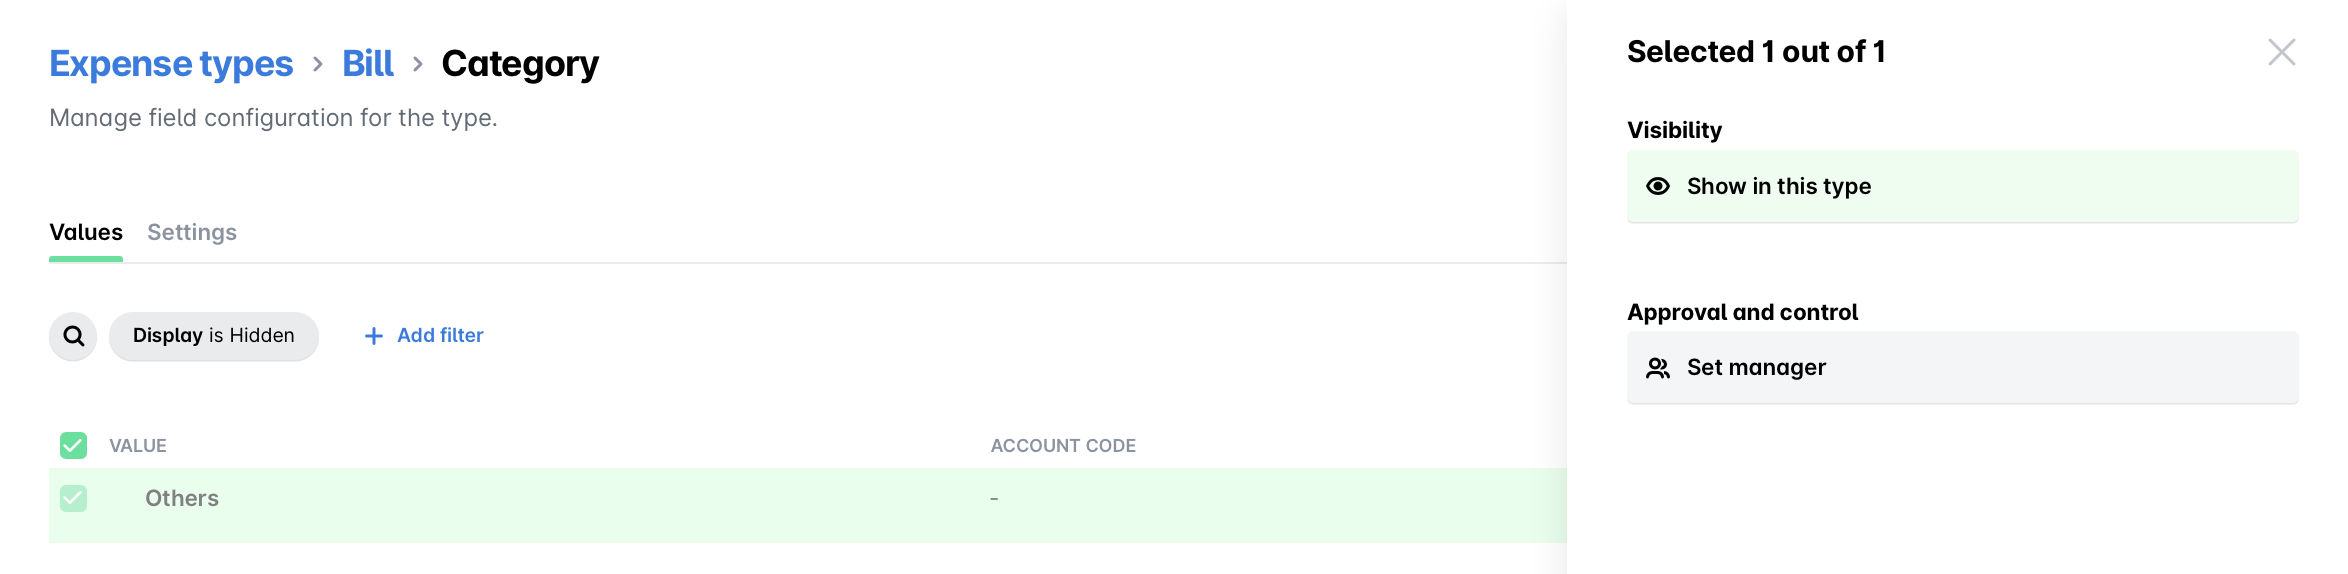
In the dialog that opens, select Hidden, to display only the hidden values.
Next, select the checkboxes next to the values you want to show, for example, Others.
In the dialog that opens, under Visibility, click on Show in this type.
Configuring managers for values for expense types
To configure managers for values for expense types:
In the Payhawk Web Portal, go to Settings > Expense types.
Select the desired expense type by clicking on it, for example, Bill.
Select the desired field by clicking on it, for example, Category.
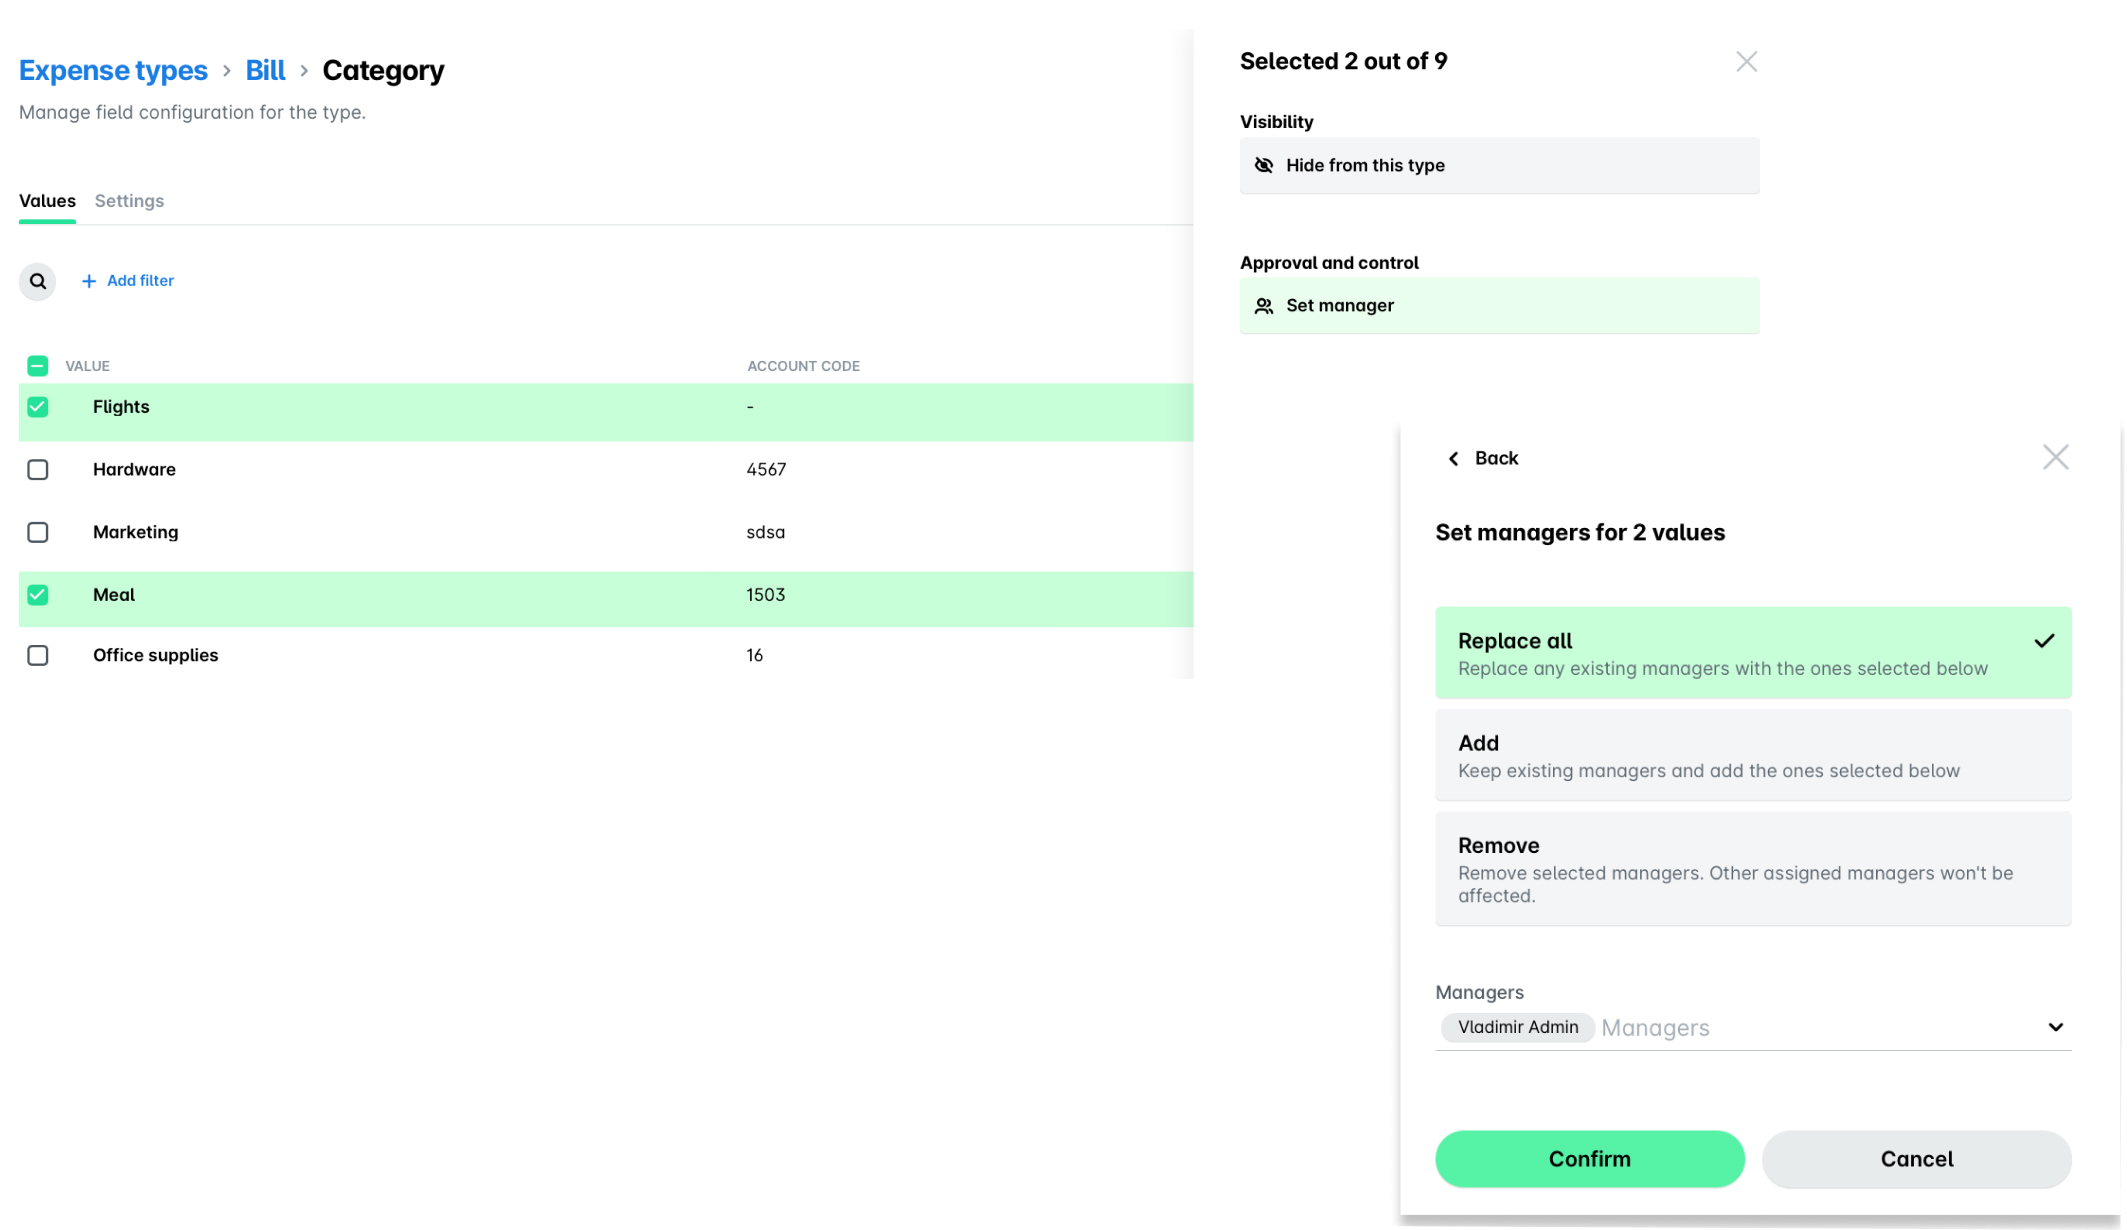
In the Values tab, select the checkboxes next to the values you want to configure managers for, for example, Flights and Meal.
In the dialog that opens, under Approval and control, click on Set manager.
(Optional) To bulk configure managers for values for expense types, select:
Replace all to overwrite previous managers.
Add to add specific managers.
Remove to remove specific managers.
From the drop-down list, select the names of the specific managers.
Click on Confirm.