Welcome to Payhawk!
We are super excited to have you on board and hope to make your life easier with our platform!
The Payhawk Customer Success Team is available to guide you through the entire process and you can also find them in the live chat every Monday-Friday from 08:00-18:00 CET for proactive support.
If you need to check some of the most common questions, search through the resources on the Payhawk help center.
Audience
This guide is intended for US-based employees with Payhawk Accountant permissions who manage and monitor company expenses within the Payhawk platform. It explains how to use Payhawk to review and monitor expenses, payments and reimbursements, manage suppliers, monitor purchase orders and spend policies, and export and edit expense data to ensure accurate financial reporting.
Summary
This quick start will lead you through the basic steps for using the system as an Accountant and will help you get up and running with the Payhawk Web Portal and Mobile App.
Let's get started with your Payhawk experience!
Step 1 - Register to Payhawk and activate your account
To be able to follow the steps in this guide, you need to first:
For more information, see the articles about configuring your personal Payhawk profile settings.
Step 2 - Manage your company expenses
You can quickly manage, monitor, and pay all your company expenses from the Expenses app in Payhawk. Just log in to your account on the Payhawk web portal and go to Dashboard > Expenses.
Expenses and expense types
Payhawk supports the card, bill, reimbursement, per diem, mileage, and company cash expense types. For more information, see the articles about expenses for Payhawk accountants and authorized and settled card payments.
Managing your company expenses can include the following actions:
Save and manage filtered views
If you frequently search for and filter by a particular kind of expense - for example, category, employee, or total amount - then, saving that filtered view will save you time.
Filter the desired expenses by the required criteria.

Select a relevant name for your view.

Manage your saved filtered views by clicking on the current view and, then, selecting the Manage views option.

The dialog that opens displays the list with all your saved filtered views. Update or delete the desired ones and, then, save your changes.
For more information:
Step 3 - Monitor card limits and spend policies
In Payhawk, corporate cards can be affected by stand-alone limits, spend policies, and team cards. While, as a Payhawk Accountant, you cannot define spend policies, issue individual corporate cards, or create team cards, you can monitor these and the cards that are affected by shared budgets or spend policies.
Stand-alone limits
In Payhawk, a stand-alone limit is a monthly recurring limit defined for a corporate card.
Spend policies
Company spend policies include predefined limits and other settings for cardholders whose cards are included in that spend policy. They help Payhawk Administrators manage multiple cards by using a company policy where they can easily configure limits and card settings for executives, managers, and employees alike. Spend policies also provide options for defining card controls on a group level - for example, recurring limits, ATM withdrawals, and approval chain for requests - and managing all cards in bulk without the need to deal with individual card controls.
Team cards
Team cards are shared budgets that apply to the cards of two or more cardholders within the company.
Step 4 - Create, edit, and export suppliers
Payhawk allows you to input the supplier information once, store it, and apply it to expenses that are due to a specific supplier.
Create suppliers
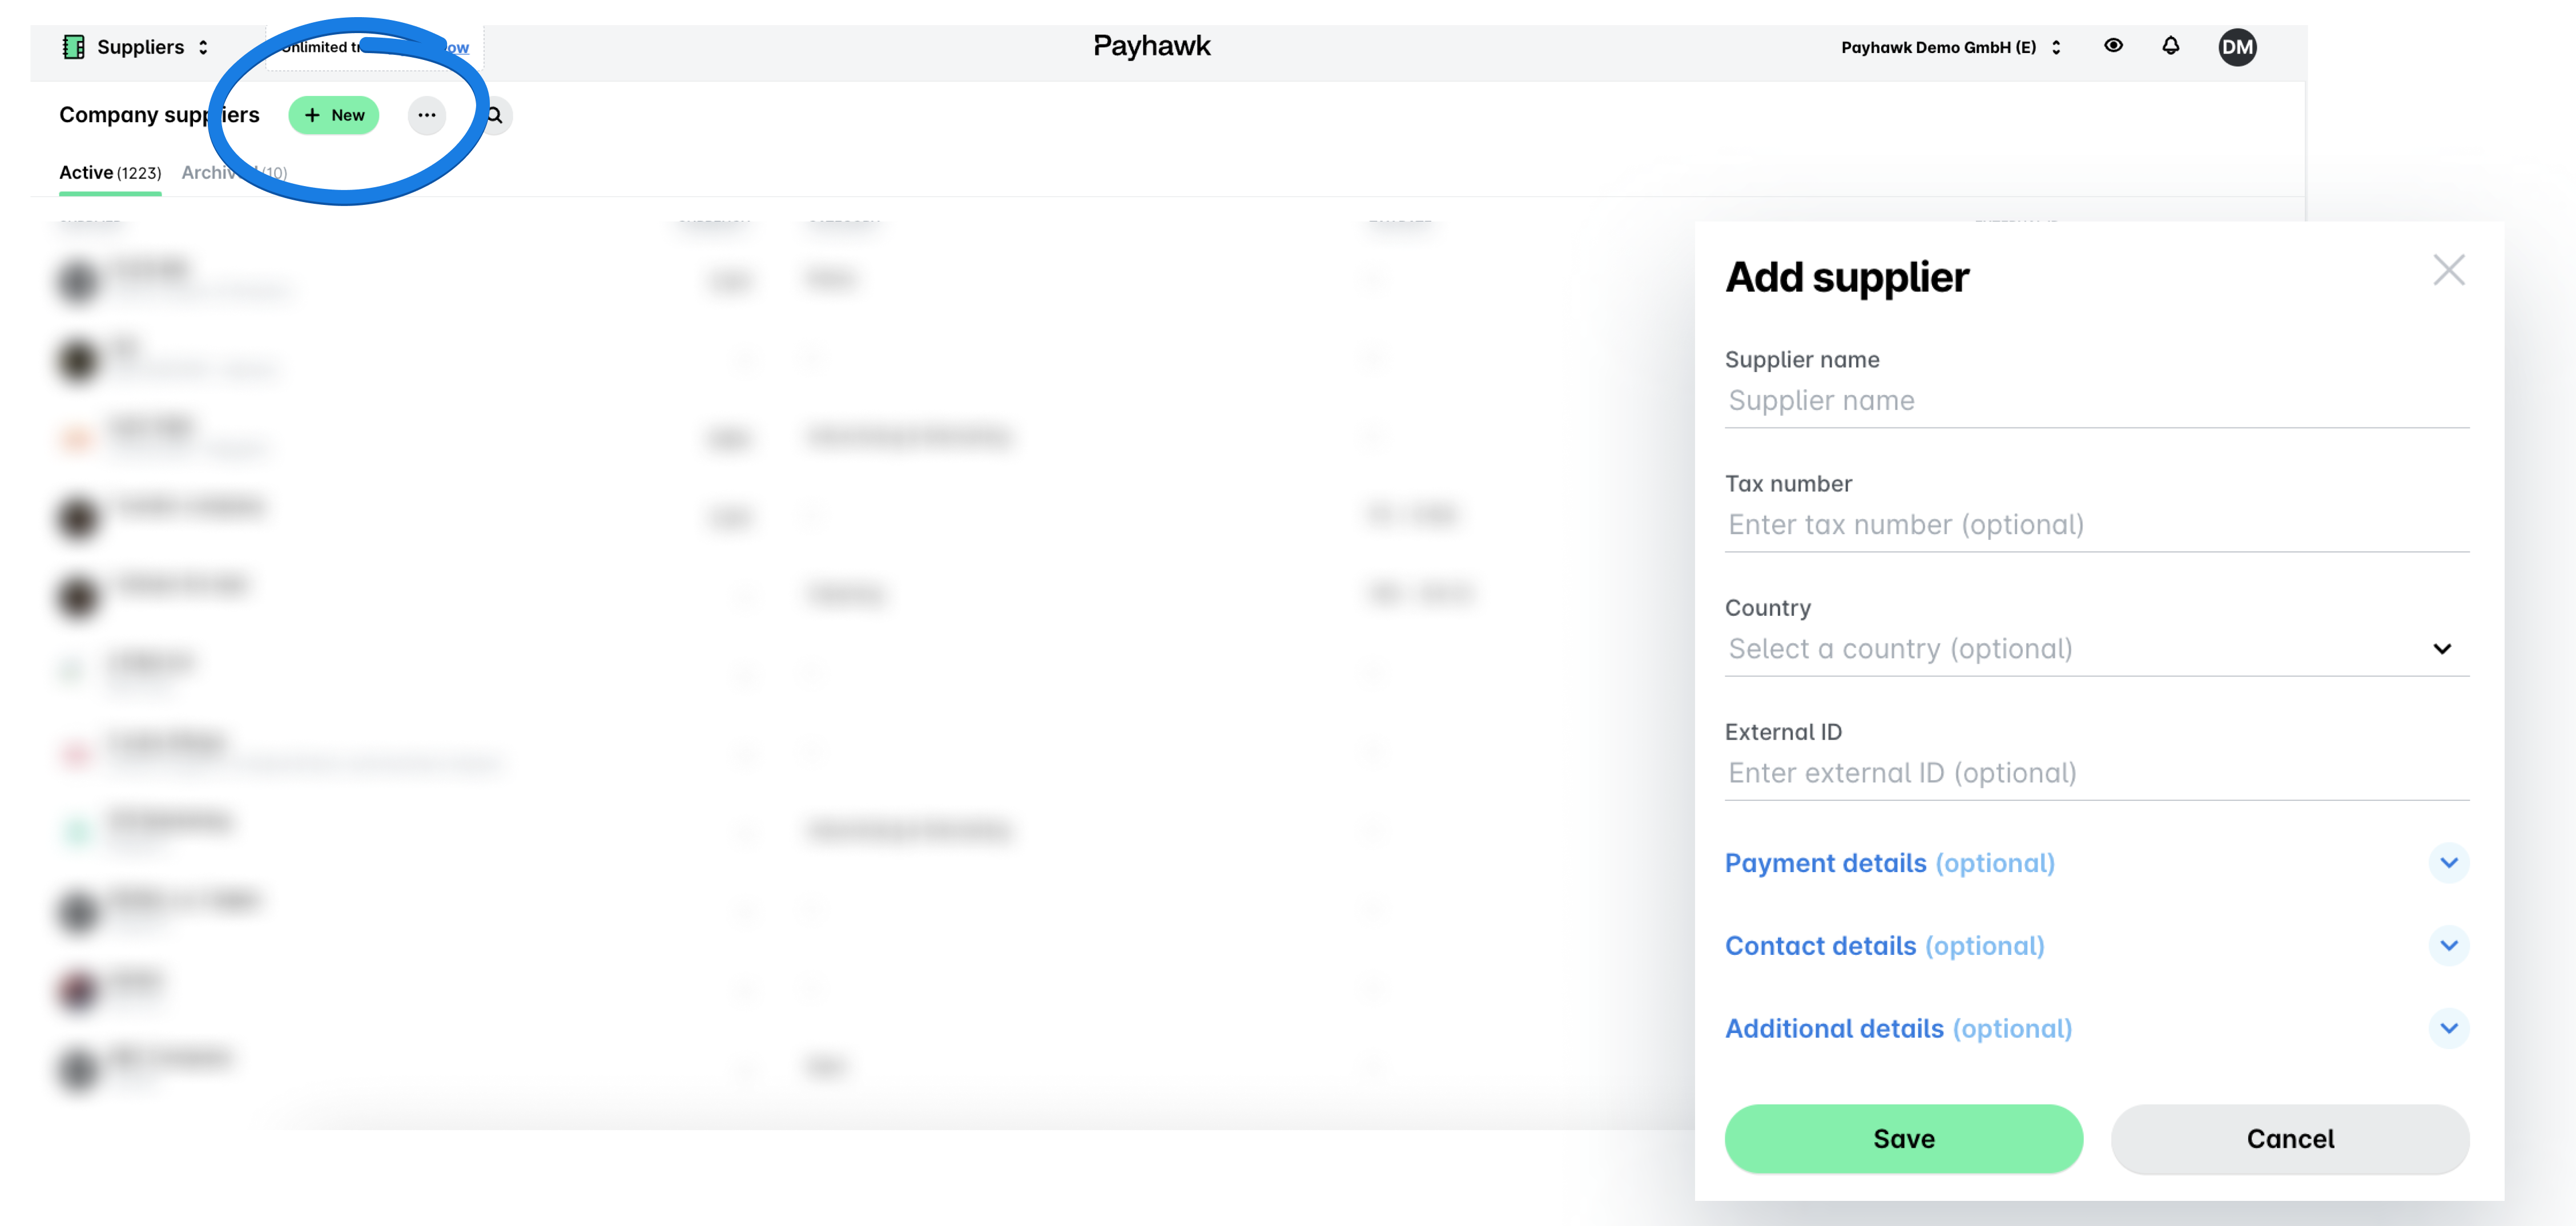
You can create a new supplier in several ways. For the purposes of this guide, let's create a supplier from the Suppliers app:
In the Payhawk Web Portal, go to Suppliers.
Click on the + New button.
Fill in the available data and click on Save. As a result, your supplier is listed under the Suppliers > Active tab.
For more information:
Archive suppliers
If a wrong supplier has been added to the list with active suppliers, an existing supplier has become outdated, or the supplier details are inaccurate and you prefer to keep them out of use instead of deleting them, you can move the company under the Suppliers > Archived tab.
Go to the Suppliers > Active tab and select the desired supplier by clicking on it.
Click on its three-dot menu and select the Archive option. As a result, the supplier will be moved under the Archived tab.

Manually import suppliers
You can manually import your existing suppliers by using the Excel template file and, similarly, allows you to export your existing supplier database from Payhawk.
You won't be able to manually import suppliers if you have an active ERP integration with Payhawk.
Go to Suppliers and click on the three-dot menu.
Select the Import suppliers option and click on the the template file link to download the template file locally.
Fill in the necessary data for the supplier import in the file and go back to Payhawk and upload the file with your supplier data. Click on Continue.
On the next screen, a summary of the uploaded data will be displayed. Confirm the import in the system and click on Import.

For more information:
Step 5 - Schedule bank payments
Employees with permissions to confirm company expense details can schedule bill payments in Payhawk to be executed on the due date, a specific date, or immediately after authorization. Payment scheduling can be done individually for each expense or in bulk for multiple expenses at once, allowing flexible management of outgoing payments based on company cash flow and authorization policies.
To schedule a single bill payment:
Go to the Expenses > Confirm details tab and select the desired expense.
From the Payment execution method drop-down menu, select the payment option:
Pay now for executing the bill payment immediately after its authorization by the respective people at your company.
Due date for executing the bill payment on the expense due date as detected by the Payhawk OCR. Note that due dates can only be set in the future.
Specific date for executing the bill payment for a date you select from the calendar. Note that past dates will be disabled.
When ready with the details confirmation of the expense, click on Confirm details. As a result, the expense will move under the Pay > Authorize tab for the authorized people at your company to proceed with the payment or confirm it for scheduling.
For more information:
Step 6 - Export expenses on demand and schedule email exports
As a Payhawk Accountant, you can export your data for accounting purposes. The Payhawk on-demand export allows you to get the exact data you need, slice and dice it as you wish, and be on top of your numbers.
For expense data reporting, Payhawk supports the following formats by default:
Excel
CSV with and without document images
PDF full account statement
CAMT.053
The on-demand expense reports in Excel and CSV include the following data:
Balance statement
Payments
Unpaid expenses
External payments
Deposits
Export accounting data in Excel
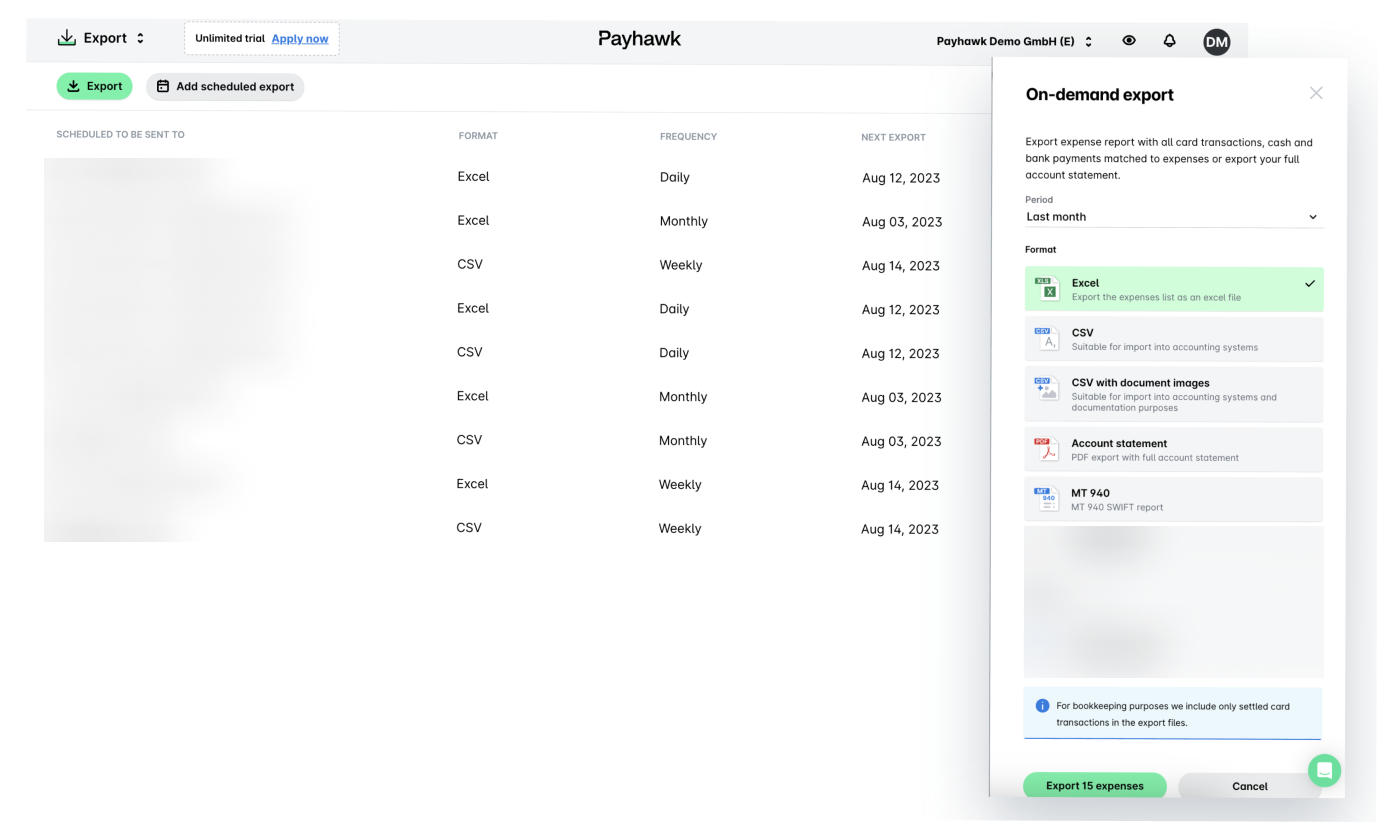
Exporting accounting data from Payhawk is a straightforward and user-friendly process. Note that all on-demand reports are downloaded directly in the browser and that at the time of file download, you will also receive an email with a download link, which for security reasons is only valid for 12 hours.
In the Payhawk Web Portal, go to Export and click on the Export button. As a result, the On-demand export dialog appears.
From the Period drop-down list, either select a predefined period or choose the Custom period option to define a specific date range.
Select the format in which you want to generate your expense report by clicking on the respective field, for example, Excel. As a result, the Export button becomes active and displays the number of expenses which will be included in the Excel report.
Click on the Export [number] expenses button to download the report to your computer.
Schedule email reports
You can schedule your expense reports in CSV, Excel, and CAMT.053 formats and define the frequency at which they will be sent to you or your team by email.
In the Payhawk Web Portal, go to Exports.
Click on Add scheduled export.
Select the team member who will receive the scheduled report, its format, and its frequency.
Click on Schedule export to confirm your choice.

For more information: