В Payhawk можете да конфигурирате полетата за типовете заявки, използвани в компанията ви.
Тази функционалност ви позволява да персонализирате каква информация се събира по време на процеса на подаване на заявка и гарантира, че получавате всички необходими данни от служителите.
Всяко поле, добавено в заявка от Библиотеката с полета, запазва настройките си от Библиотеката с полета.
Създаване на полета за типове заявки
Можете да добавяте различни типове полета за типове заявки в зависимост от целта, която искате тези полета да изпълняват за заявката.
Създаване на полета за допълнителна информация за типове заявки
Можете да добавяте полета за допълнителна информация, за да събирате повече контекст за заявката и да гарантирате, че тя следва правилния работен процес.
За да създадете полета за допълнителна информация:
В уеб портала на Payhawk отидете на Настройки > Типове заявки.
Изберете желания тип заявка, като кликнете върху него, например Хардуер.
В раздел Полета, под Допълнителна информация, кликнете върху + Добавяне на поле.
В отворилия се диалогов прозорец:
Изберете тип на полето, като кликнете върху една от наличните опции: Падащ списък, Дата или Кратък текст.
Попълнете необходимите данни в зависимост от типа на полето. Например за всички типове полета ще трябва да въведете име и кратко описание. За полето от тип падащ списък ще трябва да посочите и стойностите, от които служителите ще избират.
За да активирате полето, включете превключвателя Активиране на поле. След това ще трябва да определите:
Настройките за видимост на полето (тоест кои роли ще могат да го виждат). Можете също да зададете условия, при които полето ще се показва. Например можете да го показвате само за конкретни категории разходи.
Дали полето ще е задължително при подаване на заявка.
Кликнете върху Запазване.
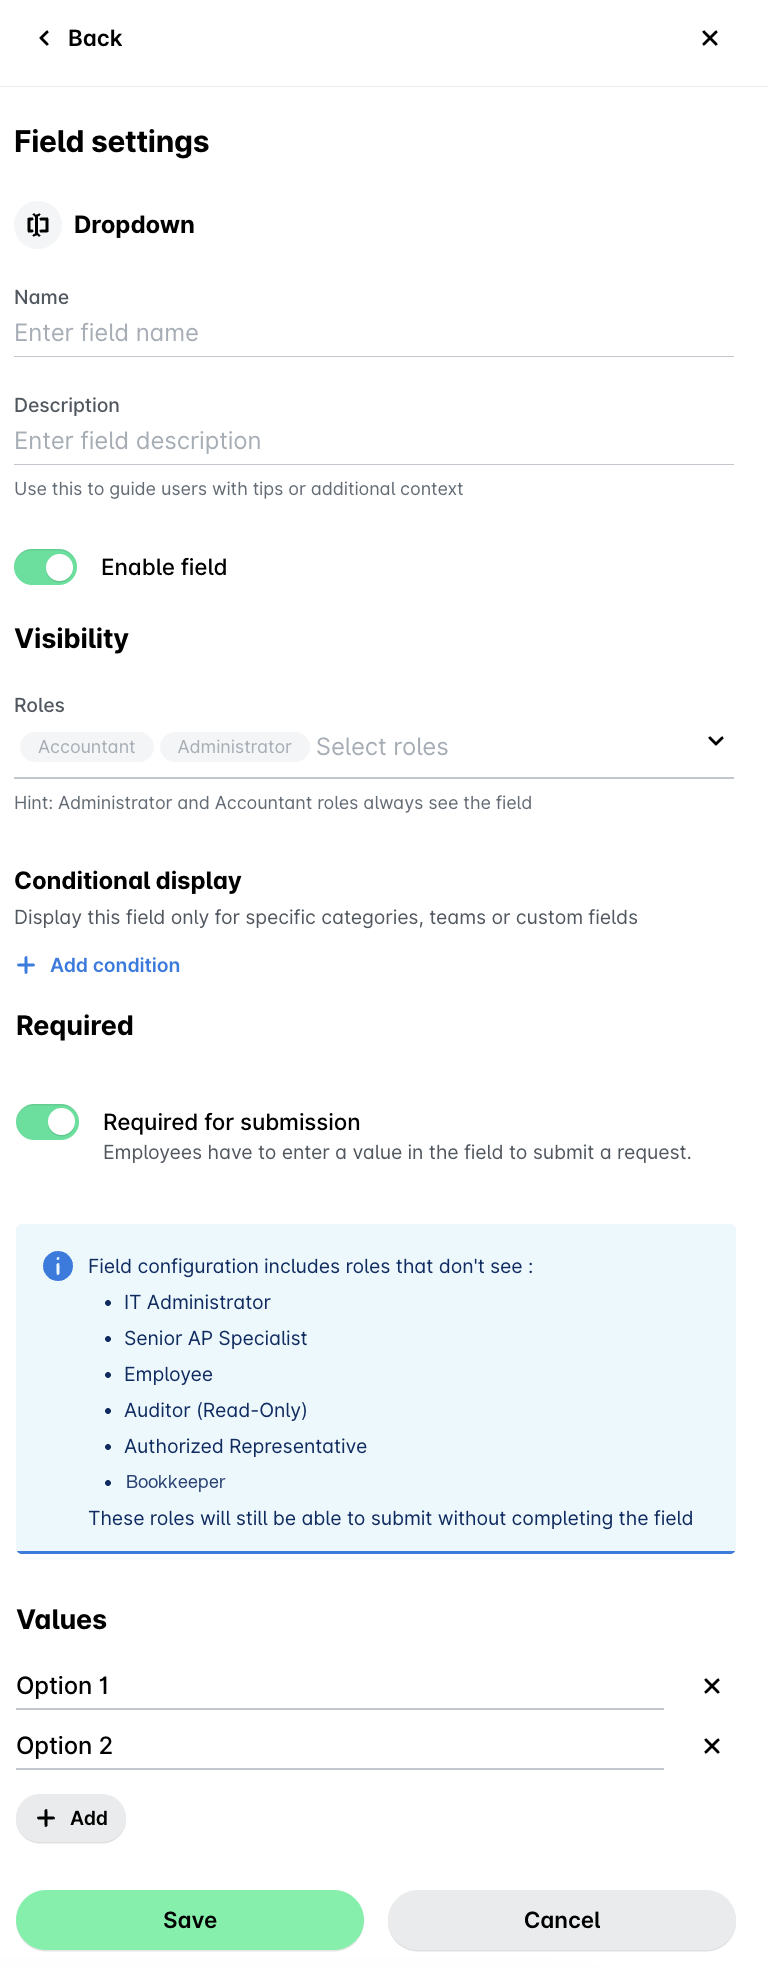
Допълнителните полета са налични в самата заявка и не се споделят с полетата в Библиотеката с полета.
Добавяне на полета за категоризация към типове заявки
Можете да добавяте полета за категоризация, които да използвате за счетоводна и отчетна категоризация, стига да са налични в Библиотеката с полета.
За да добавите полета за категоризация:
В уеб портала на Payhawk отидете на Настройки > Типове заявки.
Изберете желания тип заявка, като кликнете върху него, например Хардуер.
В раздела Полета, под Категоризация, кликнете върху + Добавяне на поле.
В отворилия се диалогов прозорец:
Изберете кое поле от библиотеката с полета да бъде добавено, например Разходен център.
Определете настройките за видимост, тоест кои роли могат да виждат това поле.
Определете дали полето ще е задължително за подателите на заявки при подаване на заявка.
Кликнете върху Запазване.
За да премахнете поле за категоризация, кликнете върху менюто с трите точки до него и изберете Премахване на поле.
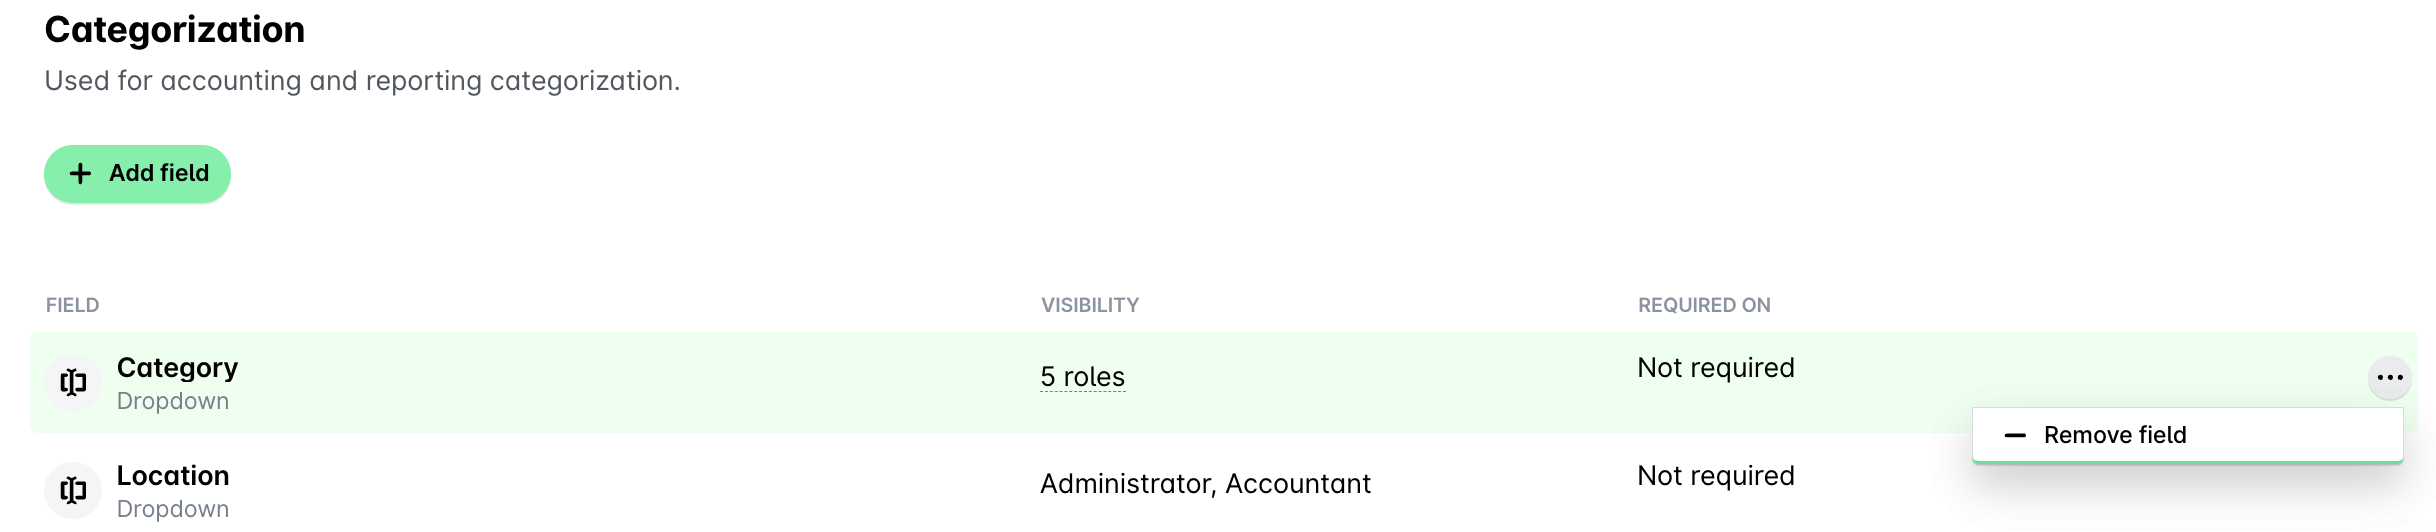
Полетата за категоризация към типове заявки са включени в библиотеката с полета и се управляват от нея. При групови акаунти в Payhawk управлението на полетата за категоризация към типове заявки е централизирано и се извършва в библиотеката с полета на ниво групов акаунт.
Задаване на работни процеси за типове заявки
Можете да зададете работни процеси за одобрение за типове заявки от раздела Работен процес на съответния тип заявка. Например за да конфигурирате работния процес за типа заявка Хардуер, навигирайте до Настройки > Типове заявки > Хардуер > Работен процес > Редактиране на работния процес.
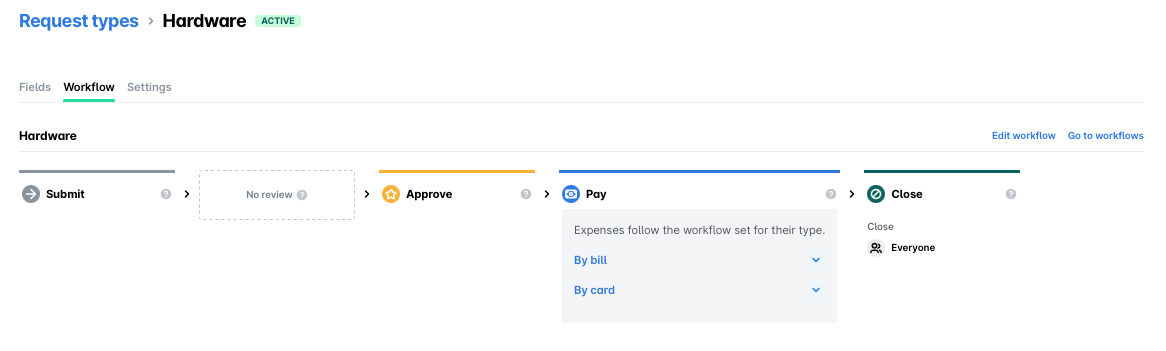
Друг вариант е да зададете работни процеси за одобрение за типове заявки от раздела Работен процес в Настройки. Например за да конфигурирате работния процес за типа заявка Хардуер, навигирайте до Настройки > Работни процеси > Заявки > Хардуер > Редактиране на работния процес.