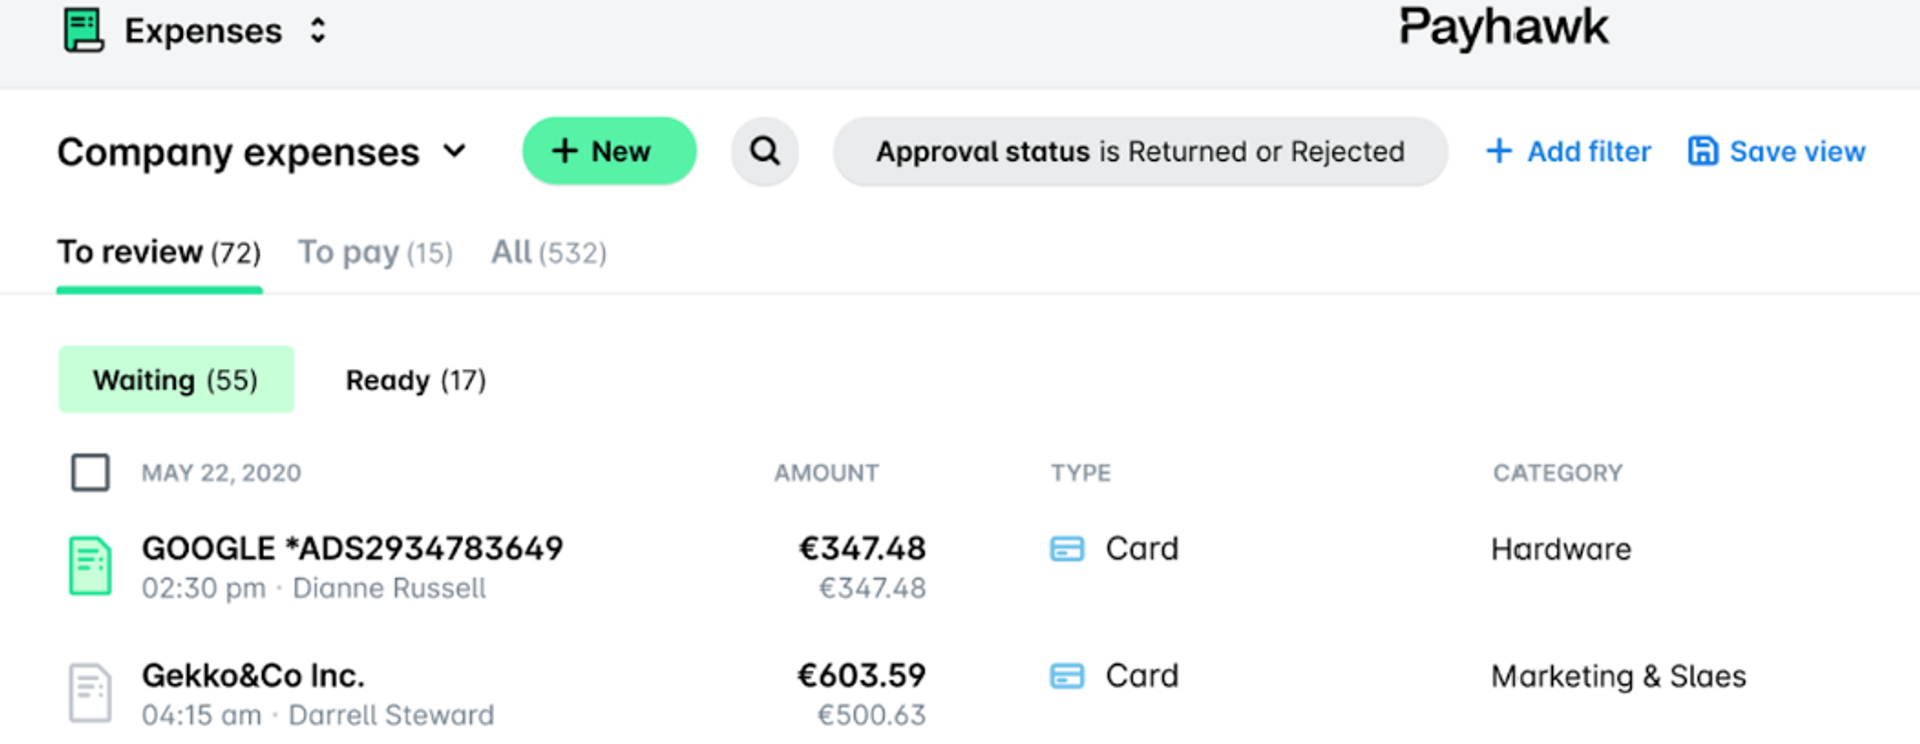
Maximize efficiency with custom expense approval filters


The administrative burden of expense management weighs heavily on finance teams. That’s why we’re continuously implementing new features that make expensing simpler than ever, easier to control, and more visible. Our brand-new approval filters are no different and give finance professionals insight into approval delays to help improve month-end planning.
By submitting this form, you agree to receive emails about our products and services per our Privacy Policy.
With our new expense filter system, you get better visibility, supercharged efficiency, and fewer jams at different approval stages (like approved or rejected expenses).
The new update empowers finance and admin team members to better strategize for month-end planning and processing, enabling accountants to take action on expenses causing delays. With just one click, you can see all expense statuses.
Expense approval systems in a nutshell
An expense approval system sits within expense management software and helps to streamline and automate your organization’s expense approval process.
Employees can submit their expense claims for your designated approver to review and approve. The approval system then checks if the expense is compliant with your company spending policy before accepting reimbursing, or paying (in the case of an invoice).
Take control of corporate spend with more time-saving features
Why are expense approval filters important?
If you can’t filter expense statuses, you must open each expense to understand what's happening. Are they waiting to be submitted? Have they been rejected? This uncertainty creates unnecessary roadblocks and causes long delays.
However, with the help of approval filters, accountants can efficiently sift through by status to determine which expenses are causing approval delays and why.
The filters mean that reviewing expenses is loads quicker, streamlining the entire expense management process.
With a filtering system in place, your organization can:
- Manage a high volume of expense approvals efficiently
- Gain essential insight into expense jams
- Troubleshoot filter errors
- Reimburse expenses quickly
The benefits of using a filtering system in expense status management
The new expense filtering system has many different benefits and lets you:
Streamline your expense approval process
A filtering system makes sense if you’re currently opening individual expenses to check their status, which is particularly helpful at volume. So, if you plan to scale your organization, you need a filtering system to streamline your approval process.
Increase efficiency and accuracy across expense management
By streamlining your processes, you automatically improve efficiency. Better efficiency leads to better spend control. Being able to drill down into expense statuses takes away any ambiguity finance teams have surrounding the cause of expense delays.
Ensure compliance with spending policies
Breaking up the expense approval system into stages ensures employees create an expense report that complies with your company expense policy. This means employees are held accountable for their spending. Costs fully controlled, ensuring accurate financial records.
Payhawk expense approval filters
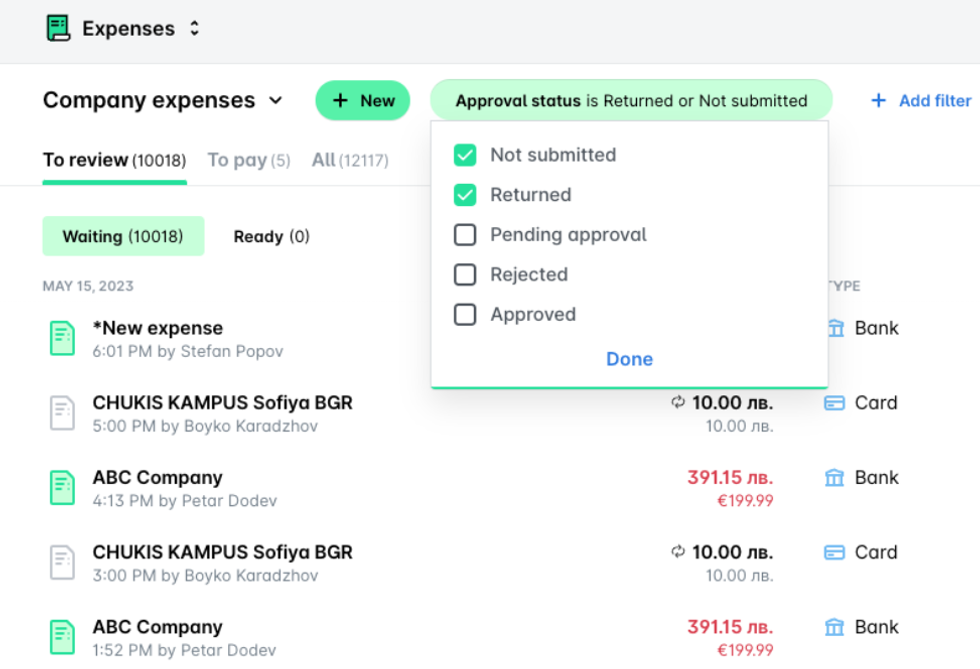
At Payhawk, our expense management software has approval filters split into five expense statuses. These are:
- Not submitted - This is when an employee still needs to submit a business expense bought on their credit card. In this instance, you can remind them to submit it to remain within your expensing window using our automated email notifications.
- Rejected - If a reviewer has rejected an expense, it’ll sit in this category. It might have been rejected because it’s outside of your expense policy.
- Returned - If an expense has been returned, your approver likely needs more information about it, or the employee has categorized it incorrectly. These expenses can be filtered by ‘returned’.
- Pending approval - If the expense is ‘pending approval’, it’s been submitted but hasn’t gone through your custom expense approval workflows. Perhaps an approver is causing delays, or the employee needs to upload additional information.
- Approved - These expenses have been submitted and are fully compliant with the company expense policy and approved. Now, you can reimburse your employees individually or in bulk or pay the invoices as required.
With these new filters, there’s no need to slow down your expense review process by trying to figure out why a specific expense isn’t ready to be reviewed. Instead, understand at a glance which expenses are at which stages and why.
Who can use the expense approval filters?
Finance department members and admins will find this feature useful for planning month-end.
Instead of getting to the end of the month and then chasing all of the missing or incorrect expenses, finance teams can proactively check which expenses still need attention at any time. Complimented with automated email reminders, this helps them alleviate a lot of pain.
Managers and employees can also find it helpful to filter expenses. This is because visibility over pending but not yet paid expenses gives them a more accurate view of cash flow and how the team performs in terms of outgoings so they can stick to their budgets.
How to use the expense approval filters
Using our expense approval filters is quick and easy. All Payhawk customers need to do is follow the next three steps:
Step 1: Access the filters via the Payhawk application
You can use the expense filters on your desktop or through the Payhawk expense approval app, making it convenient to access wherever you are.
First, navigate to your expense dashboard:
Step 2: Apply the filters
Select from the approval status dropdown in your dashboard, as shown below. Select one or multiple filters and click ‘done’ :


Step 3: Sorting and Filtering Results
The filtered results will show in the bottom panel immediately. Glance over the data to quickly check how many sit in each filter.


Now that you better understand how to use our filters let’s look at two important questions we’ve heard from finance professionals in the past.
What happens if an expense does not match the applied filters?
Your dashboard is completely customizable. If you have expenses that fall outside of the applied filters, create a new filter for that expense.
Expert tip: Keep filters generic enough to use for other expenses. Otherwise, you’ll have a long list of statuses, making the process more complicated.
Can I create custom filters for specific approval workflows?
Yes, you can create specific filters for custom workflows. Simply navigate to the right of the approval status dropdown in your expense dashboard overview, and you’ll see a button labeled ‘+ Add Filter’. Select this button and create your brand-new status filter.
Our unfiltered summary
At Payhawk, we’re always looking for new ways to optimize approval workflows for our customers. And that’s why we’ve added the filter level for approval status. The filters will help accountants and administrators better understand why expenses haven’t been approved, enabling them to take decisive action and have better control and visibility over upcoming costs.
Interested in seeing our approval workflows in action? Schedule a demo to see them in the wild and talk through with one of our experts.
Trish Toovey works across the UK and US markets to craft content at Payhawk. Covering anything from ad copy to video scripting, Trish leans on a super varied background in copy and content creation for the finance, fashion, and travel industries.
Related Articles


Payhawk transforms spending experience for businesses with four enterprise-ready AI agents

